How To Make Whipped Cream With An Immersion Blender: Quick Guide
Making whipped cream at home is a small luxury that can elevate desserts, drinks, and even breakfast. Many people use a stand mixer or hand mixer, but an immersion blender is an underrated tool that works fast and gives you silky, stable whipped cream.
If you’ve never tried this method, you’re about to discover how easy it can be—and why it’s sometimes the best choice. Here’s everything you need to know to make whipped cream with an immersion blender, including step-by-step instructions, tips, common mistakes, and surprising insights you won’t find everywhere.
Why Use An Immersion Blender For Whipped Cream?
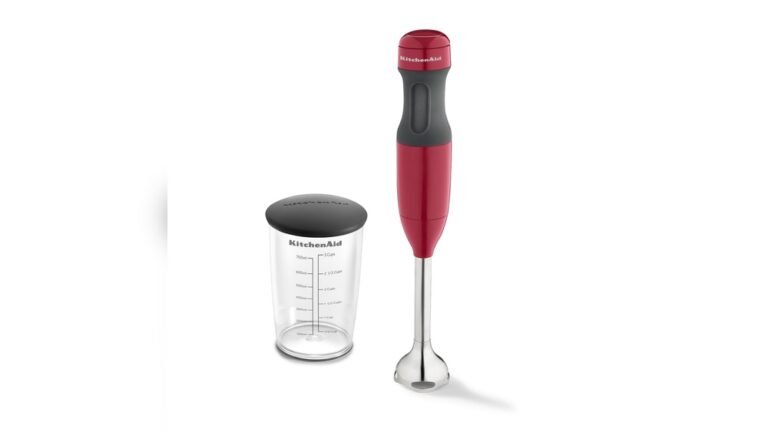
The immersion blender, also called a stick blender, is a handheld device with a spinning blade at the end. It’s usually used for soups or sauces, but it’s also great for making whipped cream. The main advantages:
- Speed: Whipped cream is ready in less than two minutes.
- Easy cleanup: Only the blade and cup need washing.
- Small batches: Works well for single servings or small groups.
- Control: You can see the texture and stop at the perfect stage.
Traditional mixers can be bulky, noisy, and messy. Immersion blenders are compact and quiet, making them ideal for quick jobs. You can whip cream directly in a tall glass, jar, or measuring cup—no need to transfer between bowls.
Ingredients And Tools Needed
Before you start, gather your ingredients and tools. The basics:
- Heavy cream (also called heavy whipping cream): This is the most important ingredient. It must have at least 36% fat to whip properly.
- Sugar: Optional, but adds sweetness. Choose granulated, powdered, or superfine sugar.
- Vanilla extract: For flavor. Other extracts like almond or peppermint can be used.
- Salt: Just a pinch can enhance the flavor.
- Immersion blender: Any standard stick blender works.
- Tall, narrow container: A glass, jar, or measuring cup works best. The container should fit the blender head snugly but leave enough room for the cream to expand.
- Measuring spoons: For precise amounts.
Let’s look at standard ingredient quantities for one cup of whipped cream:
| Ingredient | Amount (for 1 cup cream) | Notes |
|---|---|---|
| Heavy cream | 1 cup (240 ml) | Cold is best |
| Powdered sugar | 2 tbsp (16 g) | Adjust to taste |
| Vanilla extract | 1 tsp (5 ml) | Optional |
| Salt | 1 pinch | Optional |
Non-obvious tip: Powdered sugar dissolves faster and helps stabilize whipped cream, so it’s better than granulated.
Step-by-step: Making Whipped Cream With An Immersion Blender
Follow these steps for perfect whipped cream every time.
Step 1: Chill Everything
Cold is key. Whipped cream forms faster and holds its shape longer when everything is cold.
- Put the heavy cream, container, and blender blade in the fridge for at least 20 minutes.
- If you’re short on time, fill the container with ice water for a few minutes, then pour it out and dry.
Beginner insight: Many people skip chilling the container, but it makes a big difference.
Step 2: Measure Ingredients
Pour heavy cream into the container. Add the sugar, vanilla, and salt. Don’t overfill—leave space for the cream to expand.
- For small batches, use ½ cup cream.
- For larger batches, divide into portions. Don’t fill more than halfway.
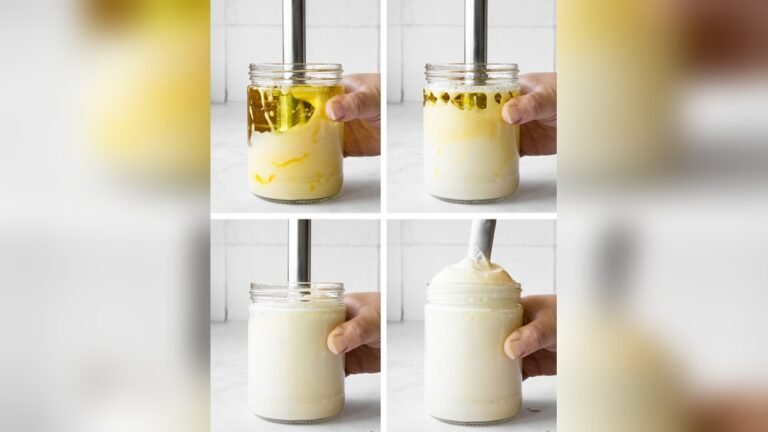
Step 3: Start Blending
Insert the immersion blender and hold it upright. Start on low speed if possible.
- Blend for 10–15 seconds, moving the blender up and down gently.
- Watch as the cream thickens and increases in volume.
Expert tip: Keep the blender head submerged to avoid splashing.
Step 4: Check Texture
After 30–45 seconds, pause and check the texture. You’re looking for soft peaks—when you lift the blender, the cream forms gentle mounds.
- For soft whipped cream, stop here.
- For firm whipped cream, blend 10–15 seconds more.
Mistake to avoid: Over-blending turns whipped cream into butter. Stop as soon as peaks form.
Step 5: Taste And Adjust
Sample the whipped cream. Add more sugar or vanilla if needed. A quick pulse blends in extras.
Step 6: Serve Or Store
Use the whipped cream right away, or refrigerate for later. It lasts up to 24 hours, but may lose volume.
- For longer storage, add a stabilizer (see below).
- Cover tightly to avoid absorbing fridge odors.
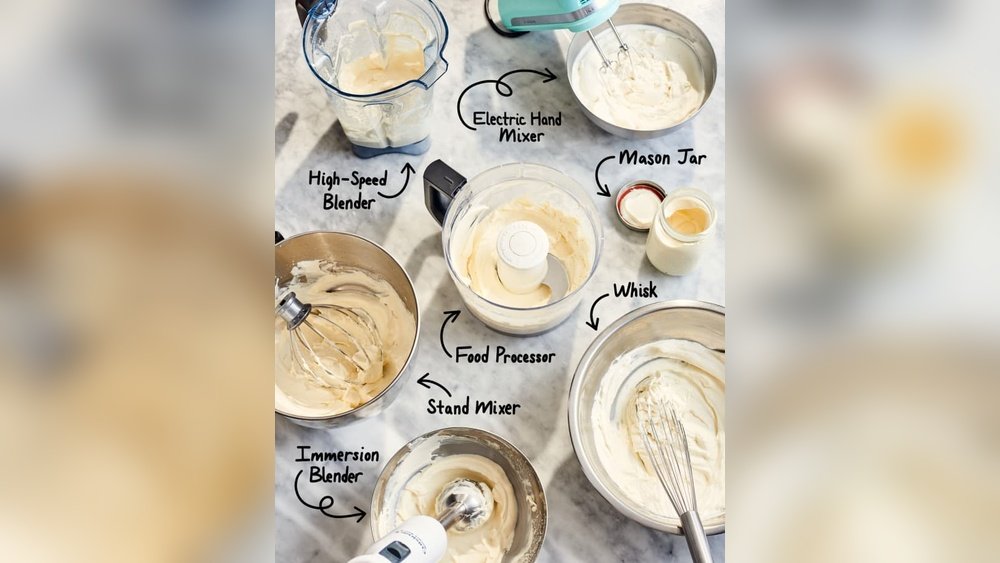
Comparison: Immersion Blender Vs Stand Mixer Vs Hand Mixer
Let’s see how the immersion blender stacks up against other methods.
| Method | Batch Size | Speed | Cleanup | Texture Control |
|---|---|---|---|---|
| Immersion Blender | Small–Medium | Very Fast | Easy | Excellent |
| Stand Mixer | Medium–Large | Fast | Moderate | Good |
| Hand Mixer | Small–Medium | Moderate | Moderate | Good |
Immersion blenders are best for quick, small batches. Stand mixers are better for big parties or baking days, but require more cleaning.
Stabilizing Whipped Cream: How And Why
Fresh whipped cream collapses after a few hours, especially in warm kitchens. If you need it to last longer (for cakes, piping, or buffet tables), use a stabilizer.
Common stabilizers:
- Powdered sugar: Contains cornstarch, which helps.
- Cream of tartar: ⅛ tsp per cup cream.
- Gelatin: Dissolve ½ tsp in 2 tsp water, then add while whipping.
- Instant pudding mix: 1 tbsp per cup cream.
- Mascarpone or cream cheese: 1–2 tbsp, adds richness.
Non-obvious insight: Gelatin gives the most stable whipped cream but can change texture. For most uses, powdered sugar or cream of tartar is enough.
How To Flavor Whipped Cream
The basic whipped cream is delicious, but you can add flavors for special occasions.
- Chocolate whipped cream: Add 2 tbsp cocoa powder and extra sugar.
- Coffee whipped cream: Mix in 1 tsp instant coffee powder.
- Citrus whipped cream: Add 1 tsp lemon or orange zest.
- Alcohol whipped cream: Splash in liqueurs like Bailey’s or rum.
Tip: Always add flavorings at the start so they mix evenly.
Troubleshooting: Common Mistakes And Fixes
Even experienced cooks make mistakes. Here’s how to avoid problems:
Mistake 1: Over-whipping
If the cream starts to look grainy or turns yellow, you’ve over-whipped and made butter.
- Fix: Add a splash of cream and blend gently to rescue it.
- If too far gone, use as butter or start over.
Mistake 2: Under-whipping
If the cream is too runny, blend a few seconds more. Don’t rush.
Mistake 3: Splattering
If cream sprays everywhere, your container is too shallow or the blender isn’t fully submerged.
- Use a taller, narrower vessel.
- Start on low speed.
Mistake 4: Not Cold Enough
Warm cream won’t whip. Chill everything before starting.
Mistake 5: Wrong Cream Type
Half-and-half or low-fat cream won’t whip. Use only heavy cream.
Tips For Perfect Results Every Time
Here are practical tips that can turn an average whipped cream into something special:
- Use fresh, high-fat cream: The fresher and fattier the cream, the better the texture.
- Chill the immersion blender blade: Not just the cream. Cold metal helps.
- Pulse rather than blend continuously: Short bursts give more control.
- Add flavorings early: They distribute better.
- Don’t overfill the container: Cream needs room to expand.
- Clean the blender right away: Dried cream is hard to remove.
Using Whipped Cream In Recipes
Whipped cream isn’t just for topping pies. Try it in:
- Layered desserts: Trifles, parfaits, tiramisu.
- Drinks: Hot chocolate, coffee, cocktails.
- Breakfast: Pancakes, waffles, fruit bowls.
- Frosting: Cakes, cupcakes, cheesecakes.
Example: For tiramisu, whipped cream makes the filling lighter and airier.
Storage And Shelf Life
Fresh whipped cream is best eaten within hours, but you can store it:
- Refrigerator: Up to 24 hours. Cover tightly.
- Freezer: Not recommended unless stabilized. Texture changes when thawed.
Data point: Whipped cream loses 25–35% volume within 24 hours if not stabilized.
Tip: For buffet or parties, use stabilized whipped cream. It keeps its shape for 8–12 hours.
Cleaning And Maintenance: Immersion Blender Care
Proper cleaning keeps your immersion blender working well:
- Unplug and remove the blender head.
- Rinse under warm water immediately after use.
- For dried cream, soak in soapy water.
- Never submerge the motor handle.
- Dry before storing.
Non-obvious insight: Most blender heads are dishwasher-safe, but always check your manual.
Best Containers For Whipping Cream
The right container makes whipping easier and cleaner. Choose:
- Tall glass jars: Mason jars, cocktail shakers.
- Measuring cups: 2-cup size with straight sides.
- Pitchers: Narrow, tall pitchers work well.
Avoid wide, shallow bowls—they cause splattering.
| Container Type | Pros | Cons |
|---|---|---|
| Tall glass jar | Easy to see texture, minimal mess | Small batches only |
| Measuring cup | Precise measuring, easy pouring | Can overflow if too full |
| Pitcher | Good for medium batches | Harder to clean |
:max_bytes(150000):strip_icc()/The-Best-Way-to-Make-Whipped-Cream-FT-DGTL1125-Hero-e9d74edd74cf4995bafbacbffbefb64b.jpg)
Credit: www.foodandwine.com
How To Make Whipped Cream For Different Diets
Whipped cream can be adapted for dietary needs:
- Sugar-free: Use stevia, monk fruit, or erythritol instead of sugar.
- Vegan: Use coconut cream or soy-based cream. Chill well and whip as usual.
- Low-carb/Keto: Heavy cream is naturally low-carb. Use low-carb sweeteners.
Beginner insight: Coconut cream whips best when chilled overnight and the liquid is drained.
Whipped Cream For Decorating And Piping
If you want to pipe whipped cream onto cakes or cupcakes, it must be firm and stable.
- Use a stabilizer (gelatin or cream of tartar).
- Whip to stiff peaks—when the cream holds its shape and doesn’t droop.
- Fill a piping bag and use immediately.
Tip: For perfect swirls, chill the piping bag and tip before filling.
Whipped Cream As A Dairy Ingredient
Whipped cream adds richness to recipes. Use it:
- To lighten mousse or custard.
- As a base for ice cream.
- In savory dishes (soups, sauces).
Non-obvious insight: Whipped cream can balance spicy foods—try it with chili or curry.
Nutritional Information
Whipped cream is rich in fat and calories, but small amounts can fit into most diets.
- 1 tablespoon whipped cream: About 50 calories, 5g fat, 1g carbs.
- Heavy cream: Contains vitamins A, D, and some calcium.
Data point: Using powdered sugar adds about 10 calories per tablespoon.
History And Science Of Whipped Cream
Whipped cream has a long history. The first written recipes date to the 16th century, called “milk snow” in Europe. The science is simple:
- Whipping traps air in the fat molecules, creating a foam.
- Too much whipping breaks the fat, separating butter and liquid.
Source: For more on the science, visit Wikipedia.
Using Whipped Cream For Special Occasions
Homemade whipped cream impresses guests and adds elegance to events:
- Birthdays: Swirl onto cakes and cupcakes.
- Holidays: Serve with pie, hot cocoa, or fruit salad.
- Weddings: Layer in trifles or parfaits.
Tip: Add food coloring for themed parties.

Credit: bagelsandlasagna.com
Immersion Blender Models: What To Look For
Not all immersion blenders are equal. When choosing one:
- Power: At least 200 watts for whipping.
- Speed settings: Low and high for control.
- Removable blade: Easier cleaning.
- Stainless steel shaft: Durable and safe for hot liquids.
Beginner mistake: Cheap plastic models can crack or stain. Invest in stainless steel if possible.
Safety Tips
Immersion blenders have sharp blades. Always:
- Unplug before cleaning.
- Keep fingers away from blade.
- Don’t run dry—always blend with liquid.

Credit: www.youtube.com
Environmental Impact: Homemade Vs Store-bought
Making whipped cream at home cuts down on packaging waste and preservatives.
- Store-bought whipped cream often contains stabilizers, artificial flavors, and gases.
- Homemade uses simple ingredients.
Data point: Aerosol whipped cream canisters are difficult to recycle.
Saving Money: Cost Comparison
Making whipped cream at home saves money, especially for frequent bakers.
- Store-bought whipped cream: $3–$5 per can (about 2 cups).
- Homemade: $1–$2 per cup, depending on cream price.
Tip: Buy cream in bulk for best savings.
Real-life Example: Quick Whipped Cream For Coffee
Imagine you want a treat for your morning coffee. Pour ¼ cup heavy cream into a tall glass, add 1 tsp powdered sugar and a drop of vanilla. Chill, then blend for 30 seconds. Spoon onto coffee for a café-style drink—no extra appliances needed.
Frequently Asked Questions
Can I Whip Cream With An Immersion Blender If It’s Not Cold?
It’s possible, but the results are poor. Warm cream won’t trap air well and stays liquid. Always chill cream and tools before whipping.
What Can I Do If My Whipped Cream Turns Into Butter?
If the cream looks grainy or yellow, it has separated. You can add a splash of cold cream and blend gently to rescue it. If it’s too far gone, use as butter or start over.
How Long Does Whipped Cream Made With An Immersion Blender Last?
Fresh whipped cream lasts about 24 hours in the refrigerator. If stabilized with powdered sugar or cream of tartar, it stays fluffy for up to 48 hours. Always store in an airtight container.
Can I Make Whipped Cream With Plant-based Cream Using An Immersion Blender?
Yes, but results vary. Coconut cream works best—chill overnight, drain liquid, then whip. Soy or almond creams can be used, but may need added stabilizers for firm peaks.
Is It Safe To Clean The Immersion Blender In The Dishwasher?
Most blender heads are dishwasher-safe, but always check your manual. Never place the motor handle in water. Clean immediately after use for easiest maintenance.
Making whipped cream with an immersion blender is simple, fast, and produces creamy, airy results. Whether you need a quick topping or a stable frosting, this method is efficient and easy to master. With the right tips and tools, you can customize whipped cream for any occasion or diet.
Enjoy experimenting—and impress your guests with homemade whipped cream that tastes far better than anything from a can.