How To Make Ice Cream With Immersion Blender: Easy Recipe Guide
Making ice cream at home is a delightful experience, but many people think they need an expensive machine to do it. That’s not true. With an immersion blender and some simple ingredients, you can create creamy, delicious ice cream in your own kitchen. This guide will show you how to make ice cream with an immersion blender, explain why it works, and give you tips for success. You’ll also learn different flavor ideas, how to avoid common problems, and which techniques make a big difference in texture. Let’s unlock the secret to homemade ice cream—no fancy tools required.
Why Use An Immersion Blender For Ice Cream?
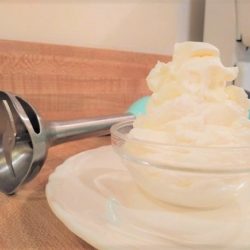
Most people picture an ice cream maker when they think about homemade ice cream. But the immersion blender—a handheld stick with spinning blades—can also do the job. The main reason is that ice cream needs to be churned as it freezes. Churning breaks up ice crystals and mixes in air, creating a soft, smooth texture. An immersion blender can do both.
This method is perfect for small kitchens or for those who want to try making ice cream without buying a bulky appliance. It’s also fast to clean and easy to use for kids or beginners. With an immersion blender, you’re not limited to traditional recipes, so you can experiment with flavors and ingredients.
One insight many people miss: Immersion blenders make it easier to add mix-ins, like chocolate chips or fruit, at the right moment. You’re in full control of the process.
What You Need: Tools And Ingredients
You don’t need a lot of equipment. Here’s what you’ll use:
- Immersion blender (stick blender)
- Large mixing bowl (stainless steel or glass works best)
- Freezer-safe container with lid
- Spatula
- Measuring cups and spoons
For a classic vanilla ice cream base, gather these ingredients:
- 2 cups heavy cream
- 1 cup whole milk
- ¾ cup granulated sugar
- 1 tablespoon pure vanilla extract
- Pinch of salt
This amount makes about one quart (4 cups) of ice cream, which serves 4 to 6 people.
Ingredient Insights
- Heavy cream is key for richness and smoothness.
- Whole milk keeps the ice cream from being too dense.
- Using pure vanilla extract (not imitation) gives a cleaner flavor.
- A small amount of salt boosts sweetness and flavor.
Many people try to use low-fat milk or skip the cream. This makes the ice cream icy, not creamy. Stick to the right fat content for best results.
How The Process Works
Traditional ice cream machines freeze the mix while stirring it. With an immersion blender, you will freeze the mix in a bowl, then blend it every 30–45 minutes to break up ice crystals. This manual churning is what gives you that classic texture.
Here’s a simple overview:
- Mix the ingredients until smooth.
- Chill the mix (optional for better results).
- Freeze the mix in a shallow bowl.
- Blend the mix every 30–45 minutes as it freezes.
- Repeat until creamy.
- Add mix-ins near the end, if you want.
- Freeze solid, then serve.
Step-by-step: Making Ice Cream With An Immersion Blender
Let’s look at each step in detail so you get perfect results every time.
1. Combine And Dissolve
Pour the cream, milk, sugar, vanilla, and salt into your mixing bowl. Use your immersion blender to blend everything together until the sugar dissolves completely. This takes 1–2 minutes. The liquid should look smooth and a bit frothy.
Tip: Blending now helps dissolve sugar and adds air, making the ice cream lighter.
2. Chill The Base (optional But Helpful)
Cover the bowl and put it in the fridge for at least 1 hour, or overnight if you have time. Chilling the base before freezing helps the flavors develop and gives a smoother texture. This step is not required, but you’ll notice the difference.
3. Start Freezing
Pour the chilled mix into your freezer-safe bowl. Choose a wide, shallow bowl if possible—this helps the mix freeze faster and more evenly. Place the bowl in the coldest part of your freezer.
4. First Blend
After 30–45 minutes, the edges will start to freeze. Take the bowl out and use your immersion blender to blend the mixture. Move the blender around to break up any frozen parts and mix everything well. Scrape the sides with a spatula if needed.
Non-obvious insight: Don’t wait too long for the first blend. If the mix freezes hard, it’s much harder to blend smooth again.
5. Repeat And Refine
Return the bowl to the freezer. Continue to freeze and blend every 30–45 minutes, for a total of 3–4 times. Each time, the mix will get thicker and more like ice cream. The goal is to blend in air and keep ice crystals small.
If you forget a blending session and the mix gets too hard, let it soften at room temperature for 10 minutes before blending again.
6. Add Mix-ins
On the last blending round (when the ice cream is thick and almost done), gently fold in any mix-ins you like: chocolate chips, fruit pieces, nuts, or cookie bits. Use the immersion blender on low, or fold with a spatula to keep the pieces chunky.
7. Final Freeze
Smooth the top, cover the bowl, and freeze for at least 2–3 hours (or overnight) until solid. When ready to serve, let the ice cream sit at room temperature for 5–10 minutes to soften before scooping.
Vanilla Ice Cream Recipe (immersion Blender)
Here’s the whole process in recipe form, with exact quantities and timing:
Ingredients:
- 2 cups heavy cream
- 1 cup whole milk
- ¾ cup granulated sugar
- 1 tablespoon pure vanilla extract
- Pinch of salt
Instructions:
- Combine all ingredients in a large mixing bowl.
- Blend with the immersion blender for 1–2 minutes, until smooth and sugar is dissolved.
- (Optional) Chill in the fridge for 1 hour to overnight.
- Pour into a freezer-safe, shallow container.
- Freeze for 30–45 minutes.
- Blend with the immersion blender, breaking up any frozen parts.
- Return to the freezer. Repeat blending every 30–45 minutes, 3–4 times.
- On the last round, add mix-ins if desired.
- Cover and freeze until firm (2–3 hours).
- Let soften briefly at room temperature before scooping.
Yields: About 1 quart (4 cups), serves 4–6
Prep time: 10 minutes
Chill time: 1–8 hours (optional)
Freeze time: 4–6 hours total
Popular Flavors And Variations
With this method, you can make more than just vanilla. Here are some easy flavor ideas, with the changes you need to make:
Chocolate Ice Cream
- Replace ¼ cup sugar with ¼ cup cocoa powder.
- Blend cocoa with sugar and liquids until smooth.
- Add chocolate chips for more texture.
Strawberry Ice Cream
- Puree 1 cup fresh strawberries with the sugar before mixing.
- Add a squeeze of lemon juice to boost freshness.
Coffee Ice Cream
- Dissolve 2 tablespoons instant coffee in the milk before mixing.
- Add chocolate chunks for mocha flavor.
Vegan And Dairy-free Options
- Use 2 cups full-fat coconut milk instead of cream and milk.
- Add 1 teaspoon vanilla and ½ cup sugar.
- Blend as usual; texture will be slightly softer.
Mix-in Ideas
- Crushed cookies or brownies
- Toasted nuts
- Swirls of caramel or fudge
- Fresh or dried fruit
- Chopped candies
Expert tip: For best results, add mix-ins when the ice cream is thick but not hard—this keeps them from sinking to the bottom.
Credit: parnellthechef.com
Comparing Immersion Blender Vs. Ice Cream Maker
Many people wonder how immersion blender ice cream compares to ice cream made with a dedicated machine. Here’s a simple comparison:
| Feature | Immersion Blender | Ice Cream Maker |
|---|---|---|
| Texture | Creamy, slightly less airy | Very creamy, more air (overrun) |
| Cost | Low (uses common tools) | High (special machine needed) |
| Time | 4–6 hours (with hands-on blending) | 2–4 hours (set-and-forget) |
| Batch size | Flexible, any size | Limited by machine size |
| Clean-up | Easy, fewer parts | More parts to clean |
Immersion blender ice cream is perfect for home cooks who want flexibility, while ice cream makers are best for frequent, large-batch ice cream fans.
Choosing The Right Immersion Blender
Not all immersion blenders are equal. Here’s what matters most:
- Power: Look for at least 200 watts. Low-power models may struggle with thick ice cream.
- Blade Design: A wider, sturdy blade blends better and handles frozen parts easily.
- Comfort: A soft grip and balanced weight make repeated blending easier.
- Easy Cleaning: Removable parts are best for fast washing.
Immersion Blender Features At A Glance
| Feature | Why It Matters |
|---|---|
| Power (Watts) | Handles frozen mix without overheating |
| Blade Shape | Breaks up ice crystals, mixes smoothly |
| Grip | Comfort for multiple blending sessions |
| Removable Shaft | Makes cleaning much easier |
A common mistake: Using a battery-powered or travel-sized stick blender. These often lack power and can overheat. Stick with a full-size model for best results.

Credit: www.youtube.com
Advanced Tips For Creamier Ice Cream
Getting the right texture is part science, part art. Here are some expert tips:
- Chill everything: Even the bowl and blender. Cold tools help the mix freeze faster, making smaller ice crystals.
- Use alcohol: Adding 1 tablespoon of vodka or liqueur (like Kahlua or Grand Marnier) lowers the freezing point, making ice cream softer and easier to scoop.
- Corn syrup or glucose: Replace 2 tablespoons of sugar with corn syrup or glucose. This makes the ice cream smoother and less icy.
- Don’t rush the blending: Take time to blend well after each freeze period. Rushing leaves large ice crystals.
- Cover tightly: Air exposure causes freezer burn. Press plastic wrap directly on the surface before sealing the lid.
Non-obvious insight: Many people think more sugar always means softer ice cream. But too much sugar can make it syrupy and prevent proper freezing. Find the right balance.
Troubleshooting: Common Problems And Solutions
It’s normal to have issues your first time. Here’s how to fix the most common problems:
Ice Cream Is Too Hard
- Use more cream or add a little alcohol.
- Let it sit at room temperature for 10 minutes before scooping.
Ice Cream Is Icy
- Make sure to blend often while freezing.
- Use a shallow container so it freezes evenly.
- Add corn syrup or glucose for smoother texture.
Ice Cream Is Grainy
- Fully dissolve sugar before freezing.
- Chill the base before freezing for smoother results.
Mix-ins Sink Or Get Soggy
- Add mix-ins when the ice cream is thick but still soft.
- Pat wet fruits dry before adding.
Flavor Is Weak
- Use pure extracts and ripe fruits.
- Let the base rest overnight for deeper flavor.
If you run into a problem not listed here, try searching for the specific issue—many ice cream experts share advice online, like on Serious Eats.

Credit: www.youtube.com
Storing Homemade Ice Cream
Homemade ice cream doesn’t last as long as store-bought kinds because it has fewer stabilizers. Here’s how to keep it fresh and tasty:
- Store in a tightly sealed, freezer-safe container.
- Press plastic wrap onto the surface before sealing to reduce ice crystals.
- Eat within 1–2 weeks for best quality.
- Don’t store in the freezer door—it’s warmer there, causing more melting and refreezing.
If ice forms on top, just scrape it off before serving.
Fun Flavor Combos To Try
Ready to get creative? Here are some fun ideas:
- Peanut Butter Banana: Blend 2 bananas with the base and swirl in peanut butter on the last blend.
- Cookies and Cream: Add crushed chocolate sandwich cookies after the last blending.
- Salted Caramel Swirl: Drizzle caramel sauce and a sprinkle of sea salt, gently swirl with a spatula.
- Mint Chip: Add ½ teaspoon mint extract and mini chocolate chips.
- Lemon Blueberry: Mix lemon zest and juice into the base, fold in fresh blueberries near the end.
Experiment with spices, extracts, or even swirls of jam. With an immersion blender, you’re not limited to traditional recipes.
Is Immersion Blender Ice Cream Healthier?
Homemade ice cream is not exactly a health food, but you do have more control over what goes in:
- Less processed: No stabilizers, gums, or artificial flavors.
- Lower sugar: You can cut sugar by 10–20% if you prefer less sweetness.
- Dairy-free/vegan: Easily swap in coconut, almond, or oat milk.
- Allergy-friendly: Skip nuts, gluten, or eggs as needed.
A ½-cup serving of this basic vanilla ice cream has about 210 calories, 16g fat, and 17g sugar. These numbers change based on mix-ins and base choices.
Cleaning And Caring For Your Immersion Blender
Good cleaning keeps your blender working well and your ice cream safe.
- Unplug before cleaning.
- Remove the blending shaft if possible.
- Wash the blade and shaft in warm, soapy water right after use.
- For stuck-on bits, soak the shaft in soapy water for 10 minutes, then use a brush.
- Never submerge the motor unit.
- Dry all parts fully before storing.
With proper care, a good immersion blender can last many years.
Creative Uses: Beyond Classic Ice Cream
The immersion blender ice cream method works for more than just dairy-based treats. Try these ideas:
- Frozen yogurt: Swap half the cream for Greek yogurt. Add honey and fruit for a tangy treat.
- Gelato-style: Use less cream and more milk for a denser, Italian-style ice cream.
- Sorbet: Puree fruit, sugar, and lemon juice. Freeze and blend as with dairy ice cream.
- “Nice” cream: Blend frozen bananas with a splash of milk for a healthy, dairy-free dessert.
You can even use the same method for frozen cocktails, smoothie bowls, or iced coffee treats.
Ice Cream Texture: What Actually Makes The Difference?
Many beginners focus on the recipe, but texture is what makes ice cream special. Texture comes from tiny ice crystals and the right amount of air (overrun). Here’s what affects it most:
- Fat content: More cream = smoother, richer ice cream.
- Sugar content: Keeps ice cream soft, but too much makes it sticky.
- Blending frequency: Blending every 30–45 minutes prevents big ice crystals.
- Mix-in timing: Add when almost frozen for best texture.
Mistake to avoid: Adding too much liquid mix-in (like fruit puree) can make ice cream icy. Balance is key.
Cost And Convenience: Is It Worth It?
Buying ice cream is easy, but making it at home has unique advantages. Here’s a look at the cost:
| Item | Homemade (per quart) | Store-bought (per quart) |
|---|---|---|
| Basic Ingredients | $3–$5 | $4–$7 |
| Special Flavors/Mix-ins | $4–$7 | $6–$10 |
| Time Needed | 4–6 hours | 0 hours |
| Control Over Ingredients | Full | None |
While homemade ice cream takes time and effort, you get fresh flavor, ingredient control, and a fun kitchen project. For many, the hands-on process is part of the enjoyment.
Serving Suggestions And Presentation
Homemade ice cream deserves a special touch. Here are some ways to serve it:
- Scoop into chilled bowls or cones for best texture.
- Top with fresh fruit, chocolate sauce, or nuts.
- Serve with a warm dessert like brownies or pie.
- Make ice cream sandwiches with cookies.
- Add a scoop to cold brew coffee for an affogato.
For parties, let guests build their own sundaes with a selection of toppings.
Frequently Asked Questions
How Often Do I Need To Blend The Ice Cream Base While It Freezes?
You should blend the ice cream base every 30–45 minutes during freezing. This keeps ice crystals small and makes the texture creamy. Usually, 3–4 blending sessions are enough.
Can I Use Low-fat Milk Instead Of Cream?
You can, but the ice cream will be less creamy and may turn out icy. For the best results, use at least half cream. If you want a lighter version, try using coconut milk or Greek yogurt.
How Do I Make Dairy-free Or Vegan Ice Cream With This Method?
Use full-fat coconut milk (or a blend of coconut and almond/oat milk) in place of cream and milk. Increase sugar by 1–2 tablespoons for softer texture. Follow the same freezing and blending steps.
My Ice Cream Is Too Hard To Scoop. What Should I Do?
Let the ice cream sit at room temperature for 5–10 minutes before scooping. Adding a tablespoon of alcohol or extra sugar to the base also helps keep it softer.
Are There Any Safety Tips For Using An Immersion Blender?
Always unplug the blender before cleaning, and never touch the blades while running. Don’t use the blender on very hard, frozen mixtures—let them soften slightly first to avoid damaging the motor.
Making ice cream with an immersion blender is simple, fun, and rewarding. With the right technique and a bit of patience, you can enjoy homemade ice cream in any flavor you like—no fancy equipment needed. Give it a try and discover a new way to enjoy this classic treat.