How To Blend Soup Without An Immersion Blender: Easy Solutions
Blending soup is a simple task when you have the right tools. But what if you don’t own an immersion blender? Many home cooks find themselves stuck, wondering how to achieve that creamy texture without this common kitchen gadget. The good news is you can blend soup perfectly, even without an immersion blender.
With the right techniques and a bit of care, you can create smooth, delicious soups using tools you already have. Whether you’re making classic tomato soup, spicy chili, or a hearty vegetable blend, this guide will show you practical, safe, and effective ways to blend soup—no immersion blender needed.
Why Blending Matters For Soup
Texture plays a huge role in how soup tastes and feels. Most blended soups—like butternut squash or potato leek soup—rely on smoothness for their appeal. When you blend soup, you break down fibers and mix flavors, making the dish richer and more satisfying. A well-blended soup also looks more appetizing, which makes a difference when serving guests or picky eaters.
Many recipes call for an immersion blender because it’s easy: you put it in the pot and blend. But traditional blenders, food processors, and even some hand tools can do the job just as well if used carefully. For cooks without an immersion blender, learning alternative methods is not just convenient—it’s essential.
Tools You Can Use Instead Of An Immersion Blender
If you don’t have an immersion blender, you probably have at least one other tool that can help you blend soup. Here’s a comparison of the most common options:
| Tool | Pros | Cons |
|---|---|---|
| Countertop Blender | Creates very smooth texture; good for large batches | Can be dangerous if used with hot liquids; needs cleaning |
| Food Processor | Handles thick soups; easy to use | Sometimes less smooth; may leak with liquids |
| Hand Mixer | Quick to use; good for partial blending | Not ideal for full smoothness; can splash |
| Potato Masher | Cheap; good for chunky soups | Not smooth; slow for large batches |
| Whisk | Easy to clean; good for light blending | Minimal smoothness; not for thick soups |
Each tool has its strengths and weaknesses. Choosing the right one depends on the soup you’re making and the texture you want. For example, if you love creamy soups, a countertop blender is best. If you prefer chunky soup, a potato masher or whisk can work well.
Step-by-step: How To Blend Soup With A Countertop Blender
A countertop blender is the most common alternative to an immersion blender. It’s powerful and can turn chunky soup into silk. However, using it with hot liquids needs special care.
Prepare Your Soup
Before blending, make sure your soup is cooked and seasoned. Remove any bones, bay leaves, or tough stems—they can damage the blender or ruin the texture. Let your soup cool for a few minutes. Hot soup can cause pressure to build up inside the blender, leading to dangerous splashes.
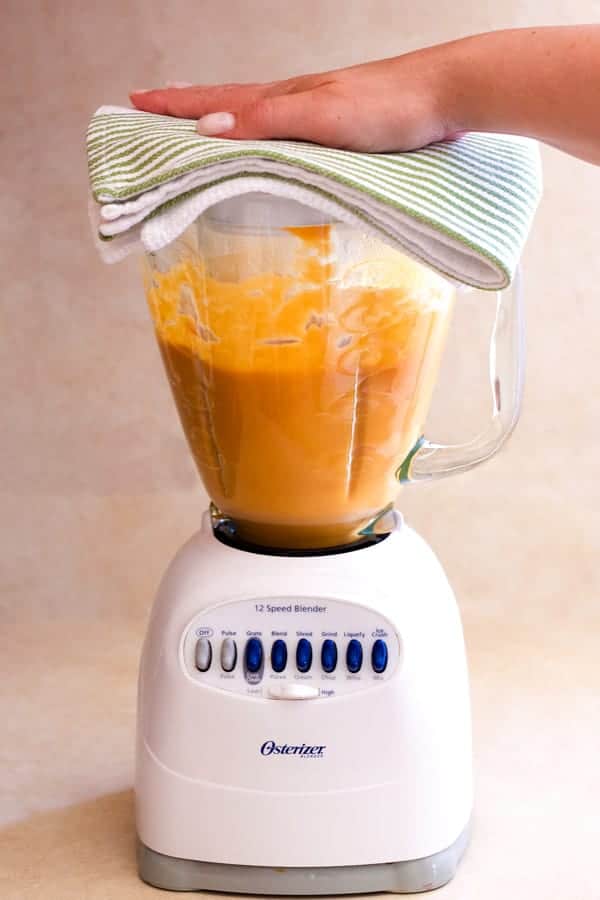
Portion And Fill The Blender
Never fill a blender more than halfway with hot soup. This prevents spills and allows space for steam. If your soup is very hot, allow it to cool slightly or add a few ice cubes to the batch. Place a folded kitchen towel over the lid and hold it down firmly.
Blend In Batches
Blend the soup in small batches. Start at a low speed and then increase to high. This avoids sudden splashing. Blend until smooth, then pour each batch into a clean pot or bowl. Repeat until all soup is blended.
Combine And Reheat
Once all batches are blended, return the soup to the pot. Stir well to combine. Warm gently if needed, but don’t boil after blending—it can change the texture.
Safety Tips
- Always vent the blender lid slightly to let steam escape.
- Hold the lid with a towel for extra safety.
- Never rush—hot liquids can cause burns.
These careful steps make blending soup with a countertop blender easy and safe. Many cooks have burned themselves by skipping these steps, so always take your time.
Using A Food Processor For Soup
Food processors are designed for chopping, but they can handle liquid soups if used properly. Here’s how:
Prepare And Portion
Just like with a blender, let your soup cool a bit. Fill the bowl only halfway. Thick soups are better for food processors; thin or watery soups might leak.
Blend In Pulses
Use the “pulse” function to start. This breaks down chunks slowly. After the soup becomes smoother, let it run for 30–60 seconds. Check the texture and repeat if needed.
Pour And Combine
After blending, pour the soup into a pot or bowl. Food processors often leave a few chunks, so you may need to blend twice or strain the soup.
Cleaning Tips
Food processors can be tricky to clean after blending soup. Rinse parts immediately so food doesn’t stick. Many parts are dishwasher-safe, but check your manual.
Blending Soup With A Hand Mixer
Hand mixers aren’t ideal for blending soup, but they work in a pinch—especially for soups that are already soft and cooked.
How To Use A Hand Mixer
- Place the hand mixer directly in the pot.
- Start at low speed to avoid splashing.
- Move the mixer around the pot, breaking down chunks.
- Stop and check texture every minute.
This method creates a rustic, chunky soup. It’s not as smooth as a blender, but it works for potato, bean, or lentil soups.
Common Mistakes
- Using high speed right away—this splashes soup everywhere.
- Trying to blend uncooked or hard ingredients.
When To Use This Method
Hand mixers are best for soups where some texture is desired. For example, a chunky vegetable soup or thick chili.
Potato Masher And Whisk: Manual Methods
If you have no electric tools, manual methods are still possible. These are old-fashioned but effective for certain soups.
Potato Masher
A potato masher is great for breaking down cooked vegetables and beans. Simply press down repeatedly in the pot. This method leaves some chunks, so it’s perfect for rustic soups.
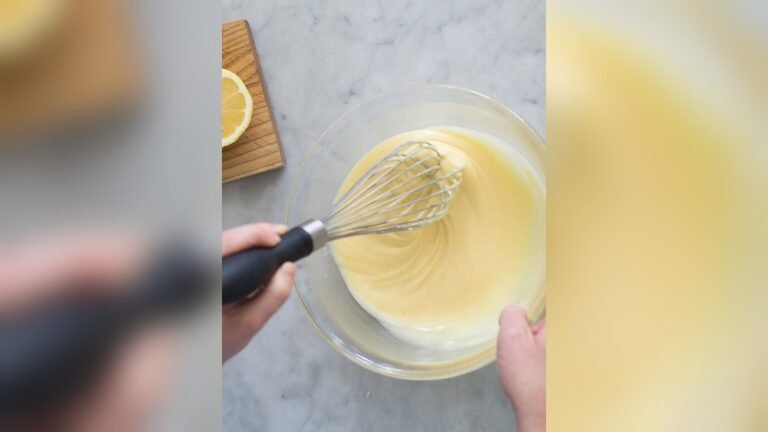
Whisk
A whisk helps mix ingredients and break down soft foods. It’s good for lighter soups, like tomato or carrot, where you don’t need a fully smooth texture.
Practical Tips
- For best results, cook vegetables until they are very soft.
- Use a large pot to avoid splashing.
- Mash or whisk for several minutes for the smoothest result.
How To Decide Which Method Is Best
Choosing the right blending method depends on your soup’s ingredients, your desired texture, and the tools you have. Here’s a quick comparison:
| Soup Type | Recommended Tool | Texture Outcome |
|---|---|---|
| Creamy Vegetable | Countertop Blender | Very smooth |
| Chunky Bean | Potato Masher | Chunky, rustic |
| Tomato Soup | Food Processor | Semi-smooth |
| Lentil Soup | Hand Mixer | Chunky, partially blended |
| Broth-based | Whisk | Lightly blended |
If you want a restaurant-quality creamy soup, use a countertop blender. For home-style chunky soups, manual tools are perfect. Food processors are a middle ground.
Practical Example: Blending Butternut Squash Soup Without An Immersion Blender
Let’s walk through a real example. Butternut squash soup is a classic, usually blended to a silky texture. Here’s how to do it without an immersion blender.
Ingredients
- 1 large butternut squash, peeled and cubed (about 4 cups)
- 1 medium onion, chopped
- 2 cloves garlic, minced
- 4 cups vegetable broth
- 2 tablespoons olive oil
- Salt and pepper to taste
- Optional: 1/2 cup heavy cream
Cooking Steps
- Heat olive oil in a large pot over medium heat.
- Add onion and garlic; cook for 5 minutes.
- Add squash; cook for 10 minutes, stirring often.
- Pour in broth; bring to a boil.
- Reduce heat; simmer for 20–25 minutes until squash is very soft.
- Season with salt and pepper.
Blending Steps (countertop Blender)
- Let soup cool for 5–10 minutes.
- Pour half the soup into the blender.
- Secure lid, vent slightly, hold with towel.
- Blend on low, then high, for 30–60 seconds.
- Pour blended soup into a clean pot.
- Repeat with remaining soup.
- Stir in heavy cream if desired.
- Warm gently before serving.
Tips
- Don’t rush the cooling step.
- Blend in batches to avoid spills.
- Taste after blending—adjust seasoning as needed.
This example shows that creamy soup is possible without fancy tools. The key is patience and safety.
Common Mistakes When Blending Soup Without An Immersion Blender
Many cooks make simple mistakes when blending soup without an immersion blender. Here are some to avoid:
- Blending hot soup without cooling—can cause burns.
- Overfilling the blender or processor—leads to spills and uneven blending.
- Not removing tough parts like bones or stems—can damage blades.
- Ignoring texture checks—blend slowly and check often.
- Failing to combine batches—always mix all blended portions together.
- Skipping cleaning steps—blenders and processors need quick rinsing.
Learning from these mistakes can save you time and prevent accidents.
How To Blend Soup Safely
Safety should always come first when blending hot soup. Here are some key points:
- Cool soup slightly before blending.
- Use small batches.
- Hold the blender lid firmly, venting for steam.
- Clean tools right away to prevent stains and smells.
- Never force hard ingredients into the blender.
Experts recommend blending soup at temperatures below 180°F (82°C). This reduces the risk of pressure buildup and burns.
Making Soup Smooth Without Blenders: Extra Tips
Sometimes, you don’t have any electric tools. Here’s how to make soup smoother with simple tricks:
- Cook vegetables longer until very soft.
- Add a bit more liquid (broth or water) to loosen texture.
- Use a fine-mesh strainer to remove lumps after mashing or whisking.
- Stir in cream or milk to add silkiness.
- Use a fork to mash small batches directly in the bowl.
These tips help you get a better texture even with basic tools.
How To Blend Soup When Traveling Or Camping
If you’re away from your kitchen—at a campsite, cabin, or hotel—blending soup can feel impossible. Here are practical solutions:
- Bring a portable food processor or mini blender if possible.
- Use a fork or spoon to mash soft ingredients.
- Cook soup longer, so vegetables fall apart naturally.
- Strain soup through a clean cloth or sieve for smoother texture.
- Add instant mashed potatoes to thicken and smooth soup.
Many travelers use these tricks to make tasty soup with minimal equipment.
Improving Soup Texture With Extra Ingredients
Sometimes, blending alone isn’t enough for perfect soup. Adding certain ingredients can help smooth or thicken soup without extra blending.
Popular Add-ins
- Potatoes: Make soup thicker and creamier.
- Rice: Blends smoothly and adds body.
- Bread: Classic in Mediterranean soups for a silky finish.
- Cream or Milk: Adds richness and smoothness.
- Coconut milk: Good for dairy-free options.
How To Use
Cook these ingredients in the soup until very soft. Then blend with your chosen method. The result is a smoother, richer soup.
Cleaning And Maintaining Your Tools
Proper cleaning makes your tools last longer and keeps soup tasting fresh. Here are practical tips:
- Rinse blenders and processors immediately after use.
- Use warm, soapy water for deep cleaning.
- Check for stuck food under blades and in crevices.
- Dry tools fully before storing to prevent mold.
For manual tools like mashers and whisks, scrubbing with a sponge is usually enough.
:max_bytes(150000):strip_icc()/sea-primary-immersion-blenders-sep-24-rkilgore-0658-89167e1e4bd44afb93d9c847674b09e4.jpeg)
Credit: www.seriouseats.com
Comparing Blended And Chunky Soups
Some people prefer smooth soups, while others like chunky texture. Here’s a comparison to help decide which style suits you:
| Texture | Popular Soup Types | Advantages | Disadvantages |
|---|---|---|---|
| Smooth | Tomato, squash, carrot, lentil | Elegant; easy to eat; good for kids | Less filling; can lose individual flavors |
| Chunky | Vegetable, bean, minestrone, chili | Hearty; variety of textures; more filling | Can be harder to digest; not always elegant |
Smooth soups are perfect for special occasions. Chunky soups are great for everyday meals.
Real-life Data: Soup Blending And Kitchen Safety
Kitchen accidents involving hot liquids are common. According to the National Electronic Injury Surveillance System (NEISS), burns from kitchen appliances increased by 14% in the past decade. Most injuries happened when people blended hot soup without cooling or used faulty blenders.
Here are a few stats:
- Over 40,000 kitchen-related burns reported yearly in the US.
- Most common cause: Blending hot liquids without proper safety steps.
- Proper cooling and batch blending reduce risk by over 80%.
Taking a few minutes to follow safety steps can prevent serious injuries.
Advanced Tips For Experienced Cooks
If you cook soup often, you might want to refine your blending skills. Here are some expert-level tips:
- Add soup ingredients in stages—blend part, then add more for texture.
- Use a fine-mesh sieve after blending for ultra-smooth soup.
- Blend with ice cubes for cold soups (like gazpacho).
- Mix spices and cream after blending for stronger flavor.
- Try blending with roasted vegetables for deeper taste.
Experienced cooks often blend only part of the soup, then mix in chunks for a layered texture.
When To Avoid Blending Soup
Some soups should not be blended. Blending can ruin their texture or flavor. Examples include:
- Clear broths—blending turns them cloudy.
- Noodle soups—blending breaks noodles.
- Soups with meat or seafood—blending changes flavor and texture.
Always check the recipe. If the soup is meant to be chunky or clear, skip blending.
How To Fix Over-blended Soup
Sometimes, you blend soup too much, making it thin or watery. Here’s how to fix it:
- Add cooked rice, potatoes, or bread to thicken.
- Stir in a small amount of cream or cheese.
- Simmer the soup to reduce and thicken.
- Add fresh vegetables and cook briefly for more texture.
These fixes restore balance to your soup.
Soup Blending For Large Groups
If you’re cooking for many people, blending soup in batches is necessary. Here’s how to handle big pots:
- Divide soup into small batches for blending.
- Keep blended soup warm in a slow cooker or oven-safe dish.
- Stir all batches together before serving for consistent texture.
For large groups, countertop blenders and food processors are best. Manual tools are not practical for big volumes.
Alternatives To Blending: Using A Food Mill
A food mill is another tool for blending soup. It works by pressing soup through a metal screen, removing skins and lumps. Food mills are common in professional kitchens.
How To Use A Food Mill
- Place the mill over a pot or bowl.
- Pour cooked soup into the mill.
- Turn the handle to press soup through.
- Collect smooth soup below; discard skins or seeds.
Food mills create very smooth soup without electricity. They are ideal for tomato, squash, and carrot soups.
Blending Soup Without Electricity
During power outages or in off-grid kitchens, blending soup can seem impossible. Here’s how to manage:
- Use a potato masher or fork for manual blending.
- Strain soup through a sieve for smoothness.
- Cook soup longer for softer ingredients.
- Use a hand-cranked food mill.
Many traditional kitchens rely on these methods every day.
:max_bytes(150000):strip_icc()/__opt__aboutcom__coeus__resources__content_migration__serious_eats__seriouseats.com__recipes__images__2015__12__20151209-blender-tomato-soup-recipe-2-412b480b080d4c828e59c6dff97a80c9.jpg)
Credit: www.seriouseats.com
Why Some Soups Are Better Chunky
While blending is popular, some soups shine when left chunky. Examples include:
- Minestrone
- Chicken vegetable
- Italian wedding soup
- Chili
Chunky soups offer a variety of flavors and textures. They are often healthier, as they keep fiber and nutrients intact.
Soup Blending: Nutrition And Flavor
Blending soup can change its nutritional profile. When you blend vegetables, you break down fibers, making nutrients easier to absorb. Smooth soups are often easier to digest, which is helpful for children and older adults.
However, blending can sometimes dull flavors. To keep taste strong, add fresh herbs or spices after blending. This brings back aroma and depth.
Credit: cookfasteatwell.com
Top Recipes That Work Without An Immersion Blender
Some classic soups are easy to blend with simple tools. Here are a few:
- Split pea soup—blends well with a potato masher.
- Carrot ginger soup—countertop blender makes it silky.
- Black bean soup—food processor creates thick, hearty texture.
- Tomato basil soup—hand mixer gives rustic style.
- Potato leek soup—mash for home-style texture.
These recipes don’t need fancy gadgets. With patience and care, you can make them anytime.
Expert Advice On Soup Blending
Professional chefs recommend these tips for blending soup without an immersion blender:
- Always cool soup before blending.
- Blend in small batches for best texture.
- Taste and adjust seasoning after blending.
- Clean tools immediately for long life.
- Use a sieve for extra smoothness.
You can find more expert tips at Serious Eats, a trusted cooking resource.
Frequently Asked Questions
Can I Blend Soup When It’s Hot?
It’s possible, but not recommended. Hot soup causes steam and pressure, which can lead to spills or burns when using blenders or processors. Always let soup cool for 5–10 minutes before blending. If you must blend hot soup, fill your blender only halfway, vent the lid, and hold it firmly with a towel.
What’s The Best Tool For Blending Soup Without An Immersion Blender?
A countertop blender is best for smooth, creamy soups. It’s powerful and makes the texture silky. For chunky soups, a potato masher or whisk is easier and safer. Food processors are a good middle option for semi-smooth soups.
How Do I Clean Up After Blending Soup?
Rinse tools (blender, processor, masher) right after use with warm, soapy water. Use a brush to clean around blades and crevices. If food sticks, soak for 15 minutes. Dry fully before storing to avoid mold or rust.
Can I Blend Soup Without Any Electric Tools?
Yes. Use a potato masher, whisk, or fork. Cook ingredients until very soft, then mash or whisk well. For extra smoothness, strain soup through a fine-mesh sieve. This takes more time but works well for rustic soups.
How Do I Avoid Accidents When Blending Soup?
Always cool soup before blending. Don’t overfill blenders or processors. Hold lids firmly, vent for steam, and blend in small batches. Clean up spills right away. Use caution when handling hot tools and liquids.
Blending soup without an immersion blender is simple when you use the right tools and take proper safety steps. With patience and care, you can create delicious, smooth soups at home—no matter what equipment you have. Whether you use a countertop blender, food processor, hand mixer, or manual tools, the result can be just as tasty as any restaurant soup.
Try different methods, experiment with recipes, and enjoy the process. Your kitchen creativity will shine, and your soup will always be delicious.