Cuisinart Smart Stick Immersion Blender How To Use Like a Pro
Most kitchens today need tools that save time and make cooking easy. The Cuisinart Smart Stick Immersion Blender is one of those smart tools. It’s simple, powerful, and can change how you blend, mix, and puree foods at home. Whether you are making smoothies, soups, sauces, or even whipped cream, this stick blender can do the job quickly. But many new users don’t know how to get the best results or how to use all its features. If you have just bought a Cuisinart Smart Stick or are thinking about getting one, this guide will show you everything you need to know.
The following sections will teach you about the different parts, how to set it up, safety tips, step-by-step usage, cleaning, and maintenance. You will also find comparison tables, common mistakes to avoid, and practical examples so you can blend with confidence. Let’s dive in and discover how you can get the most from your Cuisinart Smart Stick Immersion Blender.
What Is The Cuisinart Smart Stick Immersion Blender?
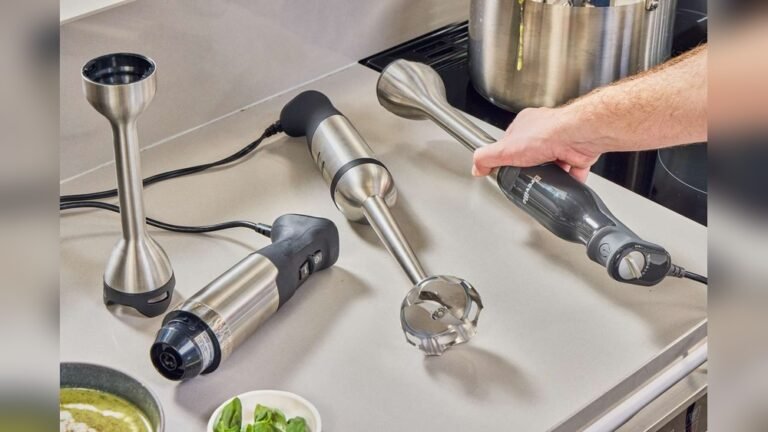
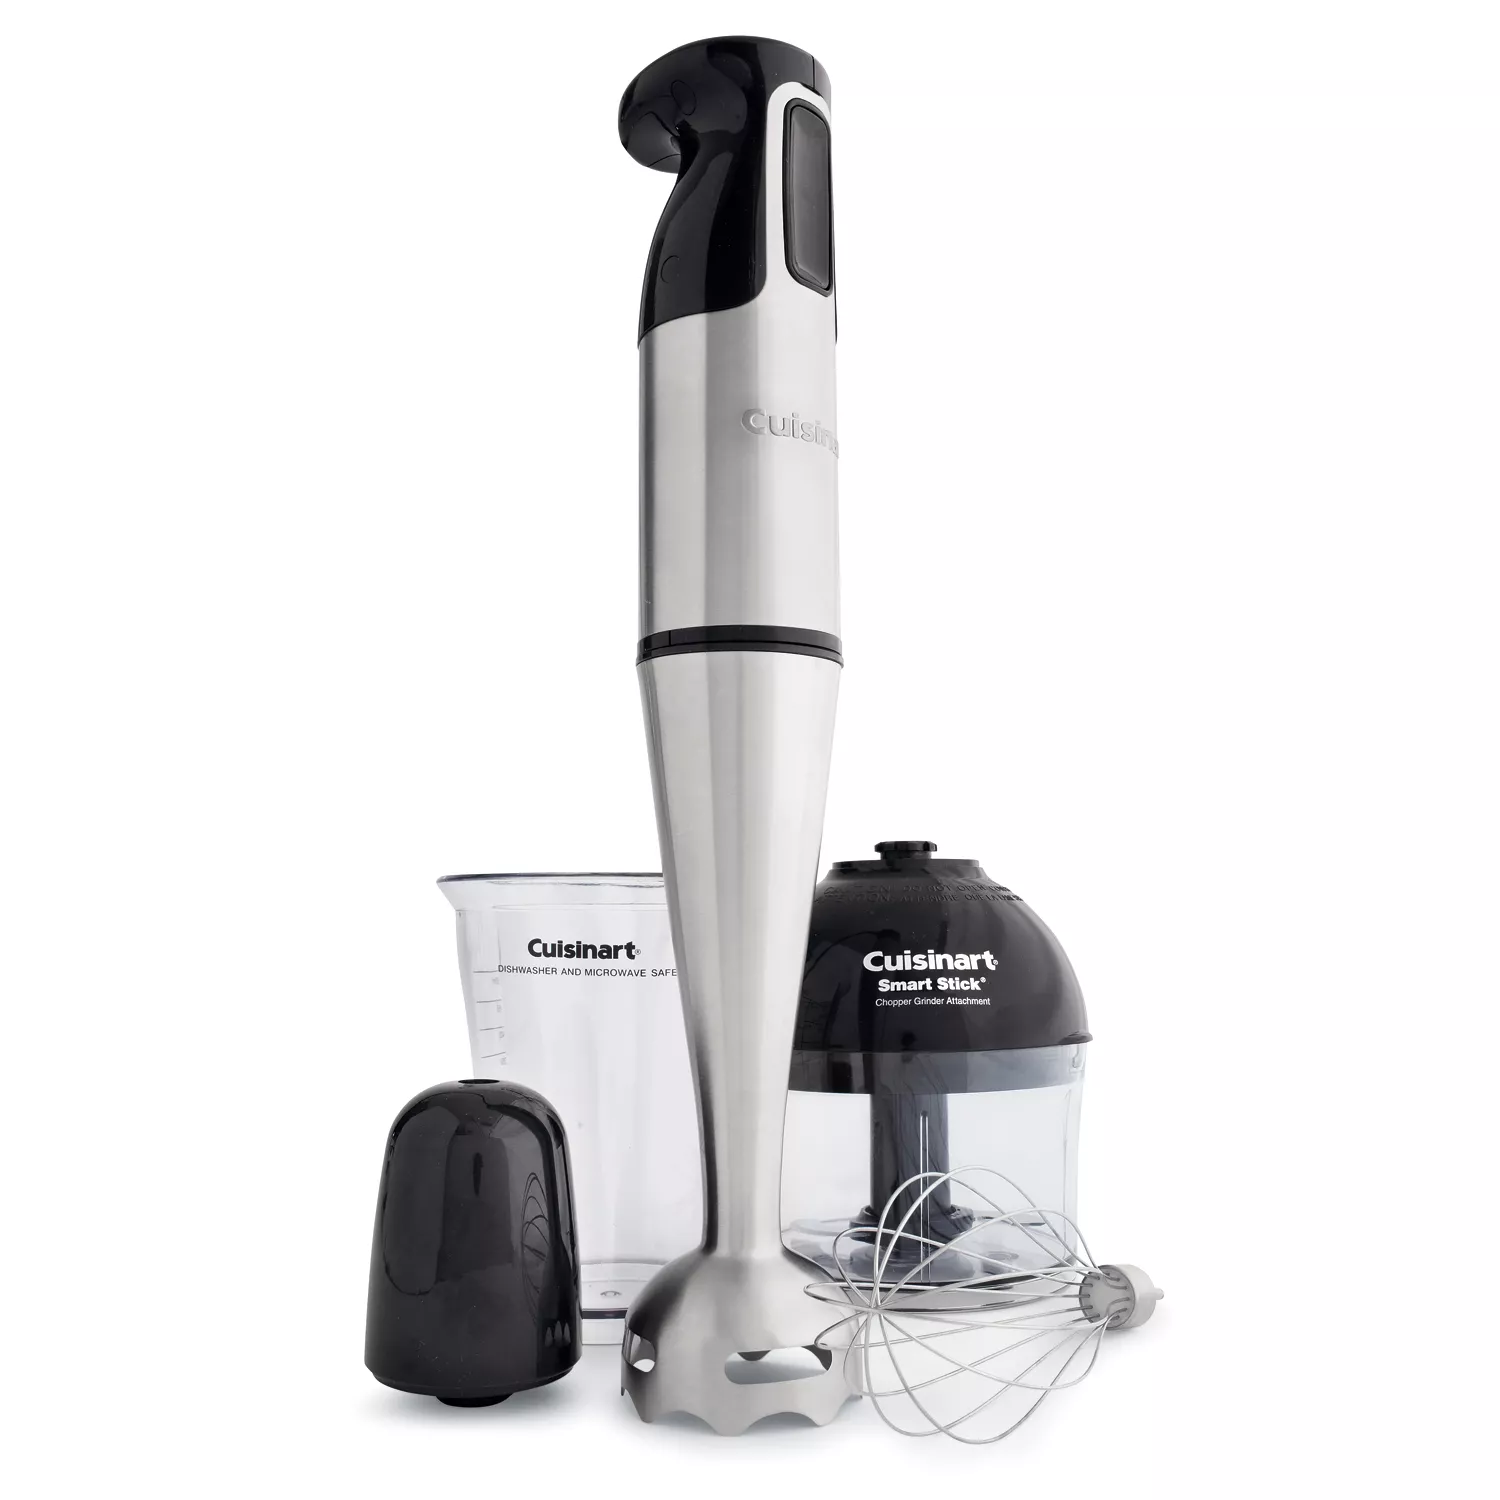
The Cuisinart Smart Stick is a handheld blender that lets you blend foods directly in pots, bowls, or pitchers. Unlike a traditional countertop blender, you don’t have to move your hot soup from the pot to another device. You just put the stick blender into the pot and start blending. This makes it safer, faster, and less messy.
Cuisinart offers several models of the Smart Stick. They can have different speeds, attachments, and power levels. Most are lightweight, have a comfortable grip, and can be used with just one hand. The stick design means it’s easy to store and clean compared to big blenders.
Main Features
- Powerful motor: Usually between 200 and 300 watts, enough for most home uses.
- Variable speed settings: Some models have low and high speeds; newer ones may have more options.
- Detachable blending shaft: For easy cleaning and switching attachments.
- Stainless steel blade: Durable and easy to clean.
- Multiple attachments: Some models come with a whisk, chopper, or mixing cup.
Why Choose An Immersion Blender?
- Blend hot foods safely
- Less cleanup (blend in the same pot you cook in)
- Great for small kitchens
- Versatile (smoothies, sauces, baby food, whipped cream, and more)
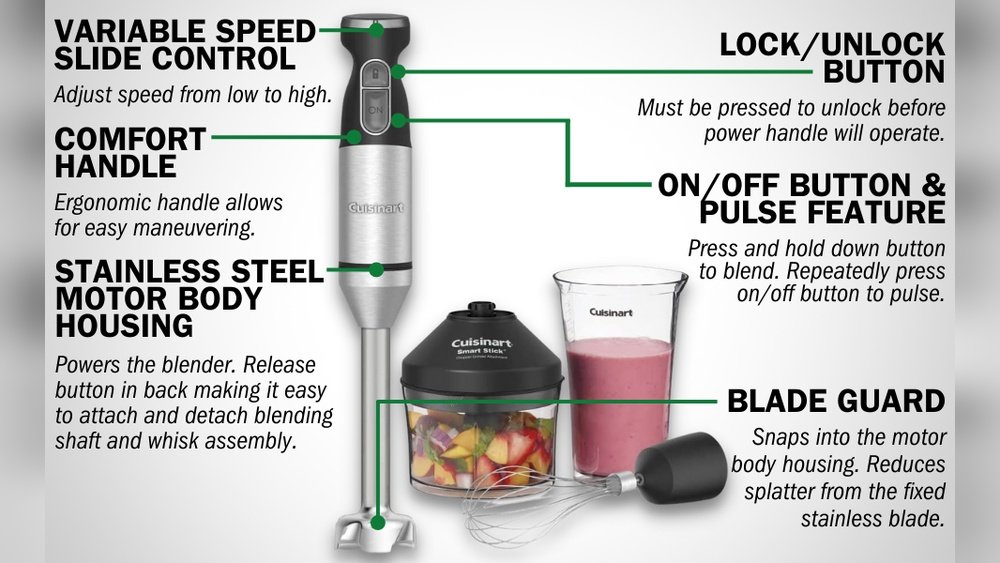
Parts And Accessories Of The Cuisinart Smart Stick
Understanding the parts of your immersion blender will help you assemble, use, and clean it correctly.
| Part | Function |
|---|---|
| Motor Body | Contains the motor and controls |
| Blending Shaft | Holds the blade for blending and pureeing |
| Blade Guard | Protects the blade and prevents splashing |
| Power Button(s) | Turns the blender on/off and controls speed |
| Attachments (Optional) | Whisk, chopper, or frother for extra tasks |
| Mixing Cup | Perfect size and shape for blending drinks or dressings |
Key Accessories
Not all models come with the same accessories. Here are the most common:
- Whisk attachment: Great for whipping cream or beating eggs.
- Chopper/grinder: Helps chop nuts, herbs, or even make salsa.
- Measuring/mixing cup: Usually a tall, narrow cup for best blending results.
If your model does not include these, you can often buy them separately.
Setting Up Your Cuisinart Smart Stick
Before you use your blender, you need to assemble it and check a few things.
- Unpack all parts. Make sure you have everything: Motor body, blending shaft, attachments, and cup.
- Wash removable parts. Clean the blending shaft and attachments with warm, soapy water (see cleaning tips later).
- Attach the blending shaft. Line up the shaft with the motor body and twist or click into place (follow your model’s instructions).
- Check power supply. Plug the blender into a standard US outlet. Do not use with extension cords unless necessary.
- Test the controls. Press the power button briefly to see if the blender turns on (never run the blender empty for long).
Safety Tips Before First Use
- Never attach or detach parts when plugged in.
- Keep fingers and utensils away from the blade.
- Do not blend hot liquids above the “max fill” line in the cup.
- If you have children, store the blender and parts out of reach.
How To Use The Cuisinart Smart Stick Immersion Blender
Using the Smart Stick is simple, but following the right steps gives you better results and keeps you safe.
Step 1: Choose The Right Attachment
- For soups, smoothies, and sauces: Use the blending shaft.
- For whipped cream or eggs: Attach the whisk.
- For chopping nuts or herbs: Use the chopper/grinder.
Make sure the attachment is securely in place before you begin.
Step 2: Prepare Your Ingredients
- Cut large fruits, vegetables, or meats into smaller pieces (about 1-inch cubes) for smoother blending.
- For hot soups, let the food cool slightly before blending to avoid splashes or burns.
- Remove any bones or hard seeds, as these can damage the blade.
Step 3: Fill Your Container
- Use a deep, narrow container for best results. This reduces splashing and helps food blend evenly.
- Do not fill past the max fill line.
- If blending in a pot or bowl, make sure the blade is fully covered by the food.
Step 4: Start Blending
- Plug in the blender.
- Insert the blade end into the food before turning it on. This avoids splashing.
- Hold the motor body firmly with one hand and the container with the other (if using a cup).
- Press and hold the power button. Some models require you to press two buttons for safety.
- Blend with an up-and-down motion. Move the stick gently around to blend all ingredients.
- For chunky foods, pulse the blender instead of running it continuously.
Step 5: Adjust Speed And Power
- Some models have two speeds (low and high), while others have a variable speed dial.
- Use low speed for thin liquids or delicate foods like whipped cream.
- Use high speed for thick soups, smoothies, or raw vegetables.
Step 6: Stop And Check Consistency
- Release the button to stop blending. Check if your food is smooth enough.
- If not, blend a little more.
- Scrape down the sides with a spatula if needed, but always unplug before using utensils near the blade.
Step 7: Detach And Clean
- Unplug the blender before removing the shaft or attachments.
- Clean all food parts right after use to avoid stuck-on messes.
Practical Examples: What Can You Make?
The Smart Stick is more than just for soups. Here are popular uses and tips for each:
1. Smoothies And Milkshakes
- Add fruit, yogurt, milk, and ice to the mixing cup.
- Blend on high until smooth.
- Tip: Frozen fruits work better than ice for a creamier texture.
2. Soups And Purees
- Cook vegetables in a pot until soft.
- Insert the blender and puree directly in the pot.
- Tip: For extra silky soups, add a little cream or butter at the end and blend again.
3. Sauces And Salsas
- Combine tomatoes, onions, cilantro, and spices in the cup.
- Use the chopper or blending shaft for chunky or smooth texture.
- Tip: Pulse for chunky salsa; blend longer for smooth sauces.
4. Whipped Cream Or Meringue
- Use the whisk attachment.
- Start on low, then increase speed as cream thickens.
- Tip: Chill the bowl and cream for faster whipping.
5. Baby Food
- Steam fruits or vegetables until soft.
- Puree with a little water or milk.
- Tip: Make small batches and freeze extra portions.
6. Salad Dressings And Mayonnaise
- Add oil, vinegar, and seasonings to the cup.
- Blend on low, then high.
- Tip: Pour oil slowly to help emulsify the dressing.
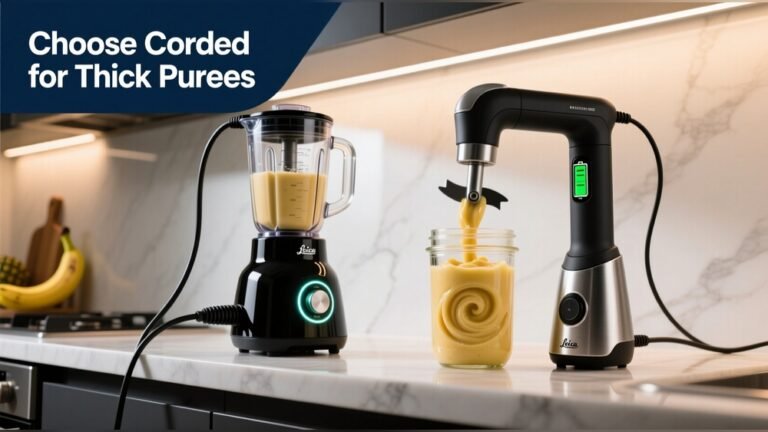
Comparison: Cuisinart Smart Stick Vs. Traditional Blender
Which is better for your kitchen? Here’s a side-by-side comparison:
| Feature | Smart Stick | Traditional Blender |
|---|---|---|
| Size | Small, handheld | Large, countertop |
| Cleanup | Easy, less mess | More parts to wash |
| Blending Hot Foods | Yes, directly in pot | No, must transfer |
| Versatility | Soups, sauces, small batches | Large smoothies, ice crushing |
| Storage | Fits in drawer | Needs cabinet space |
| Price | Usually lower | Higher |

Credit: www.youtube.com
Advanced Tips For Best Results
Even with a simple tool, there are tricks to get more from your Cuisinart Smart Stick Immersion Blender.
Move The Blender, Not The Food
Instead of stirring your food, move the blender around the container. This helps break up chunks and ensures even blending.
Use Pulses For Chunky Textures
If you want salsa or chunky soup, don’t blend continuously. Use short pulses to control the texture.
Avoid Overheating
The motor can overheat if you run it for too long. For thick mixtures, blend in 15- to 30-second bursts and let the motor rest between batches.
Watch For Suction
Sometimes the blender can “stick” to the bottom of your pot. If this happens, tilt the stick slightly to break the suction.
Keep The Blade Submerged
To prevent splashing, make sure the blade is always below the surface of the food before starting.
Use The Right Container
Tall, narrow containers are best for blending. Wide bowls can cause splashing and less effective blending.
Secure The Cord
Keep the power cord away from water and hot surfaces. Loop it behind your counter if needed to prevent accidents.
Cleaning And Maintenance
Keeping your immersion blender clean is easy, but there are important safety steps.
Cleaning Steps
- Unplug the blender.
- Remove the blending shaft or other attachments.
- Wash attachments in warm, soapy water. Most are also dishwasher safe (top rack only).
- Wipe the motor body with a damp cloth. Never submerge it in water.
- Dry all parts before reassembling or storing.
Deep Cleaning Tips
- For sticky or oily foods, soak the shaft in warm water for 5–10 minutes before washing.
- Use a small brush to remove food stuck near the blade.
Maintenance Advice
- Check the blade for dullness or damage. Replace if necessary.
- Store the blender and parts in a dry place.
- Do not wrap the cord tightly around the motor body, as this can cause damage over time.
Credit: www.hgv-finthen.de
Common Mistakes And How To Avoid Them
Many first-time users make simple mistakes that can damage their blender or cause poor results. Here’s how to avoid them:
- Running the blender when not submerged: This can cause splashing and motor strain.
- Filling the container too full: Food spills over and makes a mess.
- Forcing the blade through hard foods: Always pre-cut tough items.
- Not securing attachments properly: Parts can fall off or fail to work.
- Using in non-stick cookware: The blade guard can scratch coatings. Use in stainless or glass containers instead.
- Neglecting to clean immediately: Dried-on food is much harder to remove.
- Overheating the motor: Give the blender breaks during heavy use.
Troubleshooting: Fixing Common Problems
If your Cuisinart Smart Stick isn’t working as expected, here are some quick fixes:
Blender Won’t Turn On
- Check that it is plugged in.
- Make sure safety lock (if present) is released.
- Try a different outlet.
Blade Is Not Spinning
- Attachment may not be locked in place.
- Food may be stuck around the blade—unplug and clean.
- Motor may be overheated—let it cool for 15 minutes.
Uneven Blending
- Move the blender around the container.
- Cut food into smaller pieces.
- Add a little more liquid to help blending.
Too Much Splashing
- Use a deeper container.
- Keep the blade submerged before starting.
- Start on low speed and increase slowly.
Choosing The Right Model For Your Needs
Cuisinart offers several Smart Stick models. Picking the right one depends on your cooking style.
| Model | Speeds | Attachments | Best For |
|---|---|---|---|
| CSB-75 | 2 (Low/High) | Blending shaft, cup | Basic blending |
| CSB-179 | Variable | Whisk, chopper, cup | Versatile, multi-use |
| CSB-400CD | Variable | Multiple, cordless | Heavy use, cordless |
Tips for Choosing:
- If you mostly make smoothies or purees, the basic model is enough.
- For baking or chopping, get a model with a whisk and chopper.
- If you dislike cords, try a cordless model.
Check the latest models and features on the official Cuisinart website.
Safety Reminders
- Always unplug before changing attachments or cleaning.
- Never immerse the motor body in water.
- Keep hair, loose clothing, and jewelry away from the blade.
- Do not let children use the blender unsupervised.
- Inspect the cord regularly for damage.

Credit: www.amazon.com
Storage And Longevity
Proper storage extends the life of your blender.
- Dry all parts before storing.
- Store blades and attachments in a safe place, away from children.
- Keep the motor body upright and away from moisture.
- If not used often, run the blender empty for a few seconds every month to keep the motor active.
Real-world Examples And User Insights
Many users find that their Cuisinart Smart Stick quickly becomes their favorite kitchen tool. Here are some less obvious ways people use it:
- Making homemade nut butters: Blend roasted nuts with a little oil in the chopper attachment.
- Quick pancake batter: Whisk together eggs, milk, and flour in the mixing cup for lump-free batter.
- Fresh pesto: Chop basil, pine nuts, and cheese for a quick pasta sauce.
- Frothing milk: Use the blending shaft or a frother attachment for homemade lattes.
Two Insights Beginners Often Miss
- The mixing cup isn’t just for drinks. Its narrow shape is perfect for mayonnaise, dressings, and even small pancake batches. Using wide bowls leads to splattering and poor blending.
- Attachments change how you cook. Most people forget about the whisk or chopper after the first use. But using them regularly means fewer tools to wash and faster meal prep.
When Not To Use Your Immersion Blender
Not every kitchen task is right for the Smart Stick. Here are a few cases where you should use a different tool:
- Crushing ice: Most models cannot handle hard ice cubes—use a countertop blender.
- Very thick doughs: The motor is not strong enough for bread or cookie doughs.
- Large quantities: For big batches, a full-size blender or food processor may be better.
The Environmental Impact
Immersion blenders are energy efficient. They use less power than big blenders, which means lower electricity bills. Because you blend in the same pot, you also use less water and soap for cleaning. And by making sauces, baby food, or smoothies at home, you reduce packaging waste from store-bought versions.
Cost And Value
Most Cuisinart Smart Stick models cost between $30 and $100. While basic models are affordable, higher-end versions with more attachments cost more. The value comes from daily use—if you blend often, even the premium models pay for themselves in time saved and fewer dirty dishes.
Frequently Asked Questions
How Do I Avoid Splashing When Using The Cuisinart Smart Stick Immersion Blender?
Always make sure the blade is fully submerged in the food before you start blending. Start on the lowest speed and increase slowly if needed. Use a deep, narrow container to keep splashes inside.
Can I Blend Hot Soup Directly In The Pot With The Smart Stick?
Yes, you can. Let the soup cool for a few minutes after boiling to prevent splashes and burns. Always keep the blade under the surface of the soup and move the blender gently.
What Should I Do If Food Gets Stuck Around The Blade?
Unplug the blender first. Remove the blending shaft and clean it under running water. Use a brush for tough bits. Never use your fingers to remove food from the blade.
Is The Cuisinart Smart Stick Dishwasher Safe?
Most attachments, like the blending shaft, whisk, and chopper bowl, are top-rack dishwasher safe. The motor body should only be wiped with a damp cloth and never submerged in water.
Can I Use The Immersion Blender To Crush Ice Or Frozen Fruit?
You should not crush large ice cubes with the Smart Stick. However, small frozen fruits (like berries or banana slices) are fine if you add enough liquid. For crushing ice, use a countertop blender.
Final Thoughts
The Cuisinart Smart Stick Immersion Blender is a reliable, flexible tool that can change the way you cook at home. With a little practice, you’ll find it saves time, reduces mess, and opens up new ways to prepare everyday meals. Remember to use the right attachments, blend in suitable containers, and clean the parts after each use. Avoid common mistakes, and your blender should last for years. If you want more details or troubleshooting help, the official Cuisinart support page is a great resource. Happy blending!