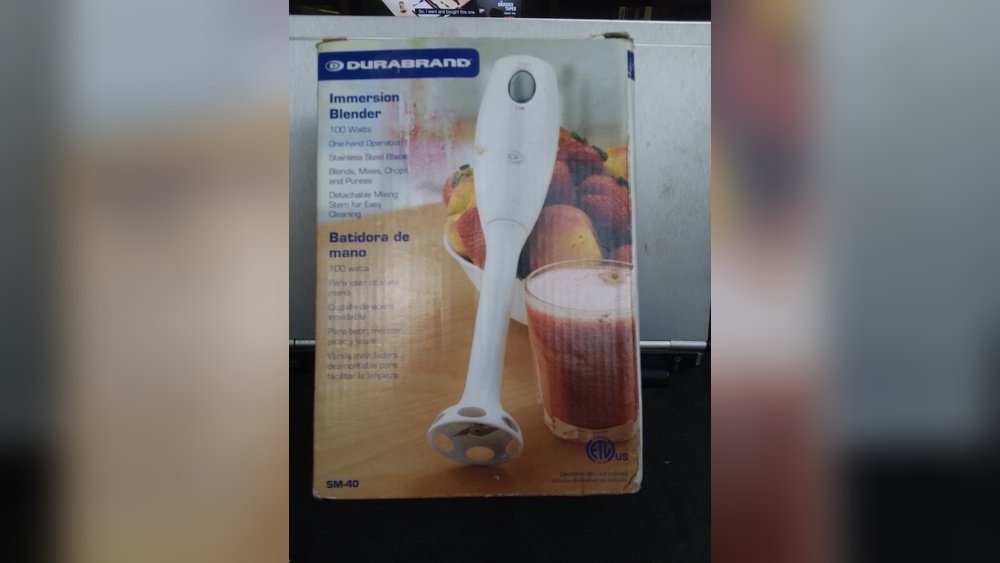
Durabrand Immersion Blender How To Remove Blade Safely
Durabrand Immersion Blender: How To Remove Parts Safely And Easily
An immersion blender is a handy kitchen tool for making soups, sauces, smoothies, and more. The Durabrand immersion blender is popular because it’s affordable and easy to use. But many people find it tricky when it’s time to clean or remove parts—especially if they’re worried about breaking the device or hurting themselves. This guide will help you understand exactly how to remove the parts of your Durabrand immersion blender, why it matters, and what to watch out for. You’ll find step-by-step instructions, useful tips, and answers to common questions, all designed for clear understanding, even if English isn’t your first language.
Understanding Your Durabrand Immersion Blender
Before you remove any parts, it helps to know what you’re working with. The Durabrand immersion blender has a simple design, but each piece has a purpose.
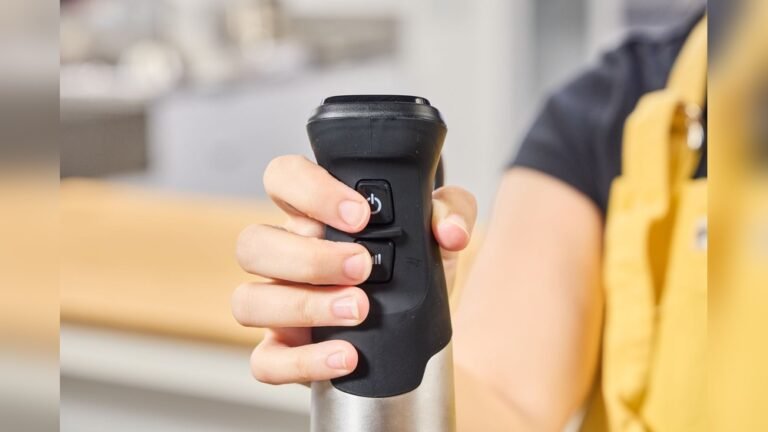
- Motor unit: This is the main body, where you hold the blender. It has the power button and electrical connection.
- Blending shaft: The long metal or plastic part that goes into your food. This has the blades at the bottom.
- Blade assembly: The sharp blades that do the blending.
- Attachment release button: Usually found near where the shaft connects to the motor unit.
- Cord: For plug-in models, this is attached to the motor unit.
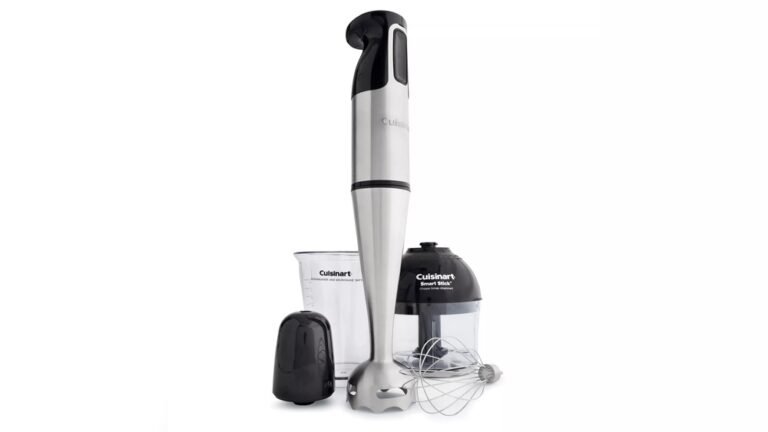
Some Durabrand models have extra attachments, like a whisk or chopper. But for most, the main focus is the blending shaft and blade.
The blending shaft is usually made from stainless steel or tough plastic, making it strong enough for thick soups but light enough to handle easily. The motor unit is shaped for easy grip. If your model has a whisk or a chopper, these attachments connect in a similar way to the blending shaft, but their removal steps might differ.
Always check your manual for attachment-specific instructions.
Why Removal Is Important
Removing parts lets you clean the blender well, avoid food buildup, and keep it working longer. If you don’t remove the shaft or blade, old food can cause bad smells, bacteria, or even damage. Also, removing parts helps you check for wear and tear, so you know when to replace something.
If you leave food inside, it can dry and harden, making removal more difficult later. Mold and bacteria can grow, especially in small spaces near the blade. Over time, buildup can cause rust or damage to the shaft and blade, reducing the blender’s power and making it unsafe for food.
By removing parts regularly, you make sure your blender stays clean and safe.
Another key reason for removal is checking the condition of your parts. Sometimes cracks or loose blades are hidden under old food. By removing and cleaning, you spot problems early, saving money and avoiding accidents.
Safety First: Preparing To Remove Parts
Safety is the most important thing when working with any kitchen appliance. The Durabrand immersion blender has sharp blades and electrical parts, so you must be careful.
- Unplug the blender: Always unplug before removing parts. Electricity and water don’t mix.
- Let it cool down: If you just used the blender, let it cool for 5–10 minutes. Metal parts can be hot.
- Read the manual: If you have the Durabrand manual, check for removal instructions. Not all models are the same.
- Clear your workspace: Make sure your hands are dry, and you have a clean area to work. Slippery hands can cause accidents.
Non-obvious insight: Many beginners forget to check if the blades are still spinning after unplugging. Wait a few seconds to ensure all movement has stopped.
It’s also wise to keep a towel or paper towel nearby. If you spill something during removal, you can clean up quickly and avoid slips or mess. If your blender has a detachable cord, remove it to reduce the risk of pulling the unit off the counter by accident.
Always use caution with the blade assembly. Even if you think the blades are dull, they can still cause cuts. If you have children or pets around, keep parts out of reach until you finish cleaning and reassembly.

Credit: www.americanmusicabroad.com
Step-by-step: How To Remove The Blending Shaft
The blending shaft is the part you need to remove most often. Follow these steps for safe removal:
- Hold the motor unit firmly: Use one hand to grip the main body.
- Locate the release button: On most Durabrand models, there’s a button or switch near where the shaft meets the motor unit.
- Press the release button: While pressing, gently twist or pull the blending shaft away from the motor unit.
- Pull the shaft out: The shaft should slide out smoothly. Do not force it—forcing can damage the connection.
- Check the shaft: Look for food buildup or damage. If it’s dirty, soak it in warm, soapy water.
If your model doesn’t have a release button, try twisting the shaft counterclockwise. Some models use a simple twist-lock system.
Be gentle during removal. If the shaft doesn’t move easily, double-check that you’re pressing the correct button or switch. Sometimes, food or residue can make the shaft stick. In those cases, a little patience and gentle movement help.
Example: Removing Shaft On A Classic Durabrand Model
Let’s say you have a basic Durabrand immersion blender. Here’s how removal works:
- Unplug the device.
- Find the button near the top of the shaft.
- Press and hold the button.
- Gently pull the shaft straight down.
- If it feels stuck, wiggle it slightly (but don’t force).
Common mistake: People sometimes forget to press the release button, causing the shaft to get stuck. If this happens, stop and check the manual.
Another mistake is pulling at an angle. Always pull straight down or twist gently. Pulling sideways can bend the connector, making future assembly harder.
If you have a model with a twist-lock, turning the shaft too far can damage the threads. A quarter-turn is usually enough. If your shaft has grooves, line them up before pulling.
Removing The Blade Assembly
The blade is the sharpest part. Removing it helps you clean around and under the blades, where food often gets trapped.
- Remove the blending shaft: Follow the steps above first.
- Inspect the shaft bottom: Look for screws or clips holding the blade.
- Use a screwdriver if needed: Some models have a small screw. Use a Phillips screwdriver to loosen it.
- Lift the blade assembly out: Carefully pull the blades out. Wear gloves if you’re worried about cuts.
- Clean the blade: Rinse under running water. Use a brush for stubborn food.
Non-obvious insight: Many people try to clean the blades while attached, but this is risky. Removing the blade gives you better access and reduces injury risk.
If your blade assembly has clips, push them gently—forcing can break the plastic. For models with screws, keep the screws in a safe place so you don’t lose them. Sometimes, the blade may be tight due to dried food. If so, soak the shaft bottom in warm water for a few minutes before trying again.
If you notice rust or discoloration on the blade, clean it thoroughly. If the rust doesn’t come off, consider replacing the blade. A rusty blade can affect both safety and blending quality.
Blade Removal Differences: Durabrand Vs. Other Brands
Some immersion blenders have fixed blades you can’t remove. Durabrand usually allows removal, but always check your model.
| Brand | Blade Removal | Tools Needed |
|---|---|---|
| Durabrand | Removable | Screwdriver (some models) |
| KitchenAid | Fixed | None |
| Hamilton Beach | Removable | None |
| Oster | Removable | Screwdriver |
If you switch brands in the future, check if the blades are removable before buying. Removable blades make cleaning easier, especially if you blend thick or sticky foods.

Credit: www.consumerreports.org
Cleaning After Removal
Once you remove the shaft and blade, cleaning is easy but important. Proper cleaning prevents rust, smells, and bacteria.
- Soak in warm water: Fill a bowl with warm, soapy water. Place the shaft and blade inside for 10–15 minutes.
- Use a soft brush: Scrub around the blade and shaft. Avoid harsh scrubbers that could scratch the metal.
- Rinse and dry: Rinse with clean water. Dry with a towel or let air dry.
- Clean motor unit separately: Wipe the motor unit with a damp cloth. Never submerge it in water.
Practical tip: If food is stuck, use vinegar or baking soda for extra cleaning power.
If you blended sticky foods like peanut butter or thick soups, soak parts longer. For tough stains, sprinkle baking soda on a damp brush and scrub gently. Vinegar helps remove odors and disinfects.
For plastic shafts, avoid hot water, which can warp the material. For stainless steel, dry immediately to prevent water spots. If you air dry, place parts on a rack with space between them.
Never use bleach or harsh chemicals. These can damage parts and may leave unsafe residues. If you have a dishwasher-safe shaft, check the manual first. Most Durabrand shafts are safe for the top rack, but blades are best washed by hand.
Reassembling Your Durabrand Blender
After cleaning, you need to put everything back together. Here’s how:
- Align shaft with motor unit: Match the shapes or markings. Most shafts have grooves that fit only one way.
- Push shaft in gently: Slide the shaft back until you hear a click or feel it lock.
- Secure the blade: If you removed the blade, place it back and tighten any screws.
- Plug in and test: Run the blender for a few seconds with water to check if everything works.
Common mistake: Not aligning the shaft correctly. If it doesn’t click, remove and try again.
If your shaft has a twist-lock, turn it until you feel resistance, but don’t over-tighten. For blade screws, make sure they’re tight but not forced. Loose screws can cause rattling or unsafe operation.
Testing with water is a safe way to check reassembly. If the blender sounds strange or vibrates, stop and check alignment. If you notice leaks, disassemble and dry again.
If your blender doesn’t turn on, check that all connections are tight and the cord is fully plugged in. Sometimes, the safety lock won’t engage if the shaft isn’t seated properly.
Troubleshooting Removal Problems
Sometimes, parts don’t come off easily. Here’s what to do:
Shaft Stuck
- Check for dried food: Food can harden around the connection. Soak the shaft in warm water to loosen.
- Use gentle force: Wiggle gently, but never force. Forcing can break the connection.
- Check the release button: Make sure you’re pressing the right button or switch.
Blade Won’t Come Out
- Inspect for screws: Sometimes a hidden screw keeps the blade in place.
- Try rotating: Twist gently. Some blades unlock with a turn.
- Contact Durabrand support: If stuck, reach out for help. Replacement parts may be needed.
Motor Unit Issues
- Don’t submerge: If water gets inside, dry it thoroughly before use.
- Check for cracks: If the motor unit is damaged, stop using and consider replacement.
Sometimes, a stuck shaft or blade is caused by old lubricant drying out. If you see sticky residue, clean thoroughly and consider applying a drop of food-safe oil at the connection.
If parts are rusted, they may be harder to remove. Try soaking in vinegar for 10–15 minutes, then scrub gently. If rust remains, replacement may be safest.
| Problem | Possible Cause | Recommended Action |
|---|---|---|
| Shaft won’t detach | Dried food, wrong button | Soak, check manual |
| Blade stuck | Hidden screw, rust | Look for screw, use lubricant |
| Motor unit wet | Improper cleaning | Dry completely, avoid use |
| Device doesn’t work after reassembly | Misaligned shaft, loose blade | Align, tighten blade |
Maintenance Tips After Removal
Keeping your blender in good shape helps it last longer and work better.
- Clean after every use: Remove shaft and blade for cleaning, even if you only blended soft foods.
- Dry thoroughly: Moisture causes rust. Dry all parts before reassembly.
- Inspect for damage: Check blades for dullness or cracks.
- Lubricate moving parts: If your model allows, use a food-safe lubricant on the shaft connection.
- Store safely: Keep in a dry place. Avoid storing with shaft attached if possible.
Non-obvious insight: Even if your shaft seems clean, small food particles can hide in the connection. Regular removal prevents buildup.
If you notice your blender is harder to assemble over time, check for dirt or damage at the connection points. Wipe these areas with a dry cloth before reassembling. For models with plastic parts, avoid exposure to direct sunlight, which can cause fading or warping.
Store your blender upright if possible, especially after cleaning. This prevents water from pooling in the shaft or blade area. If you use your blender often, keep it in a spot that’s easy to access but safe from spills.

Credit: www.ebay.com
Comparing Durabrand With Other Immersion Blenders
Durabrand immersion blenders are known for their value, but how do they compare with other brands for removal and cleaning?
| Feature | Durabrand | KitchenAid | Hamilton Beach | Oster |
|---|---|---|---|---|
| Ease of shaft removal | Easy | Moderate | Easy | Easy |
| Blade removal | Possible | Fixed | Possible | Possible |
| Cleaning access | Good | Average | Good | Good |
| Extra attachments | Few | Many | Some | Some |
| Average price | $20–$30 | $40–$60 | $25–$35 | $30–$40 |
Durabrand is simple and easy to maintain, making it a good choice for beginners or anyone who prefers less hassle.
If you value simplicity, Durabrand offers straightforward removal and reassembly. Other brands, like KitchenAid, may have more features but often require more care during cleaning. If you often use extra attachments, compare how they attach and detach—Durabrand’s few attachments are quick to change, while others may need more steps.
When To Replace Parts
Sometimes, removing parts reveals damage or wear. Here’s when you should replace:
- Blades are dull or chipped: Blunt blades don’t blend well and can break.
- Shaft is cracked: Cracks can let food or water inside, causing mold or electrical issues.
- Release button doesn’t work: If the shaft won’t detach, the mechanism may be broken.
- Motor unit overheats: If the motor gets hot or smells, it may need professional repair or replacement.
Durabrand parts are affordable. Check online or at stores for replacements. Always use official parts for safety.
If you notice your blender making strange noises, inspect the shaft and blade for damage. A loose or bent blade can cause vibration and reduce blending power. If the shaft is leaking, stop using it and check for cracks or worn seals.
For release buttons, if they stick or feel loose, clean the area and check for visible damage. Sometimes, a small spring or clip inside breaks. If you’re unsure, ask a professional or contact Durabrand support.
Common Mistakes Beginners Make
Many first-time users make mistakes during removal. Here’s what to avoid:
- Forcing parts: If the shaft or blade won’t come off, forcing can cause permanent damage.
- Not unplugging: Removing parts while plugged in is dangerous.
- Skipping cleaning: Not cleaning after removal allows bacteria and odors.
- Reassembling while wet: Moisture can damage the motor.
- Losing screws: If your blade has screws, keep them safe during cleaning.
Practical tip: Keep a small dish for screws and parts during cleaning. This avoids losing tiny pieces.
Another common mistake is storing the blender with parts still wet. Even a little moisture can cause rust or mold. Always dry parts completely.
If you lose screws or clips, check online for replacements. Using the wrong size can cause the blade to wobble, making blending dangerous.
Expert Advice For Durabrand Owners
As someone who’s worked with many immersion blenders, here are some practical suggestions:
- Check compatibility: Not all Durabrand shafts fit all motor units. If you buy a replacement, match the model number.
- Use gloves for blade removal: Even dull blades can cut. Kitchen gloves help protect your hands.
- Avoid harsh chemicals: Only use mild dish soap or baking soda. Strong cleaners can damage plastic or metal.
- Dry overnight if unsure: If you’re not sure all water is gone, let parts dry overnight before reassembling.
If you have trouble, search for online videos—visual guides can help, especially for complex models. For official info, visit the manufacturer’s site or check this Durabrand support page.
If your blender has a lingering smell after cleaning, try soaking the shaft and blade in a mixture of water and lemon juice. This removes odors without harsh chemicals. If you blend often, consider a regular maintenance routine—monthly deep cleaning and checking for wear.
Frequently Asked Questions
How Often Should I Remove And Clean The Blending Shaft?
It’s best to remove and clean the shaft after every use. Even if you only blended liquid foods, small particles can stick. Regular cleaning keeps your blender working well and prevents bacteria.
If you blend sticky or thick foods, clean immediately to prevent buildup. For simple smoothies, a quick rinse may be enough, but deep cleaning every few uses helps.
Can I Remove The Blade Without Tools?
Some Durabrand models let you remove the blade by hand, but others need a screwdriver. Check your manual or look for screws at the bottom of the shaft. If you need a tool, use a Phillips screwdriver.
If the blade is tight, don’t force it. Soak and try again later. For clip-on blades, press gently and avoid bending the clips.
What Should I Do If The Shaft Is Stuck?
If the shaft won’t come off, first soak the area in warm, soapy water. This loosens dried food. Wiggle gently while pressing the release button. If it still doesn’t work, check for blockages or contact Durabrand support.
If you see visible damage, stop and consult an expert. For stubborn cases, a drop of cooking oil at the connection can help loosen.
Is It Safe To Wash The Motor Unit?
No, never wash the motor unit with water or put it in the sink. Only wipe with a damp cloth. Water inside the motor can cause electric shock or damage.
If you spill something on the motor unit, unplug and dry immediately. For sticky spills, use a slightly damp cloth and dry again.
Where Can I Find Replacement Parts For My Durabrand Immersion Blender?
You can find replacement parts online at major retailers or on the Durabrand website. Always check your model number before buying. Using official parts keeps your blender safe and reliable.
If you’re not sure which part fits, ask customer service or check user reviews. Avoid generic parts unless they’re recommended for your model.
Removing parts from your Durabrand immersion blender is simple when you know the steps and follow safety tips. With regular cleaning and careful handling, your blender will stay powerful and safe for years. Whether you’re new to kitchen gadgets or an experienced cook, these tips help you get the most from your Durabrand immersion blender.