How To Take Apart A Waring Immersion Blender: Step-by-Step Guide
Taking apart a Waring immersion blender can seem confusing if you have never tried it before. These powerful kitchen tools help you blend, puree, and mix with ease, but sometimes you need to clean them deeply, fix a jam, or replace a part.
If you want to know how to safely disassemble your Waring immersion blender, you’re in the right place. This guide covers every step, with practical tips and real examples. Even if you’re not a technician, you’ll find clear instructions and smart advice that will help you avoid mistakes and handle your blender confidently.
Many people try to fix their immersion blender but end up damaging the machine or hurting themselves. Why? They often miss small details or rush through the process. By following this article, you’ll learn not only the steps but also the reasons behind them.
You’ll understand which tools to use, where to find hidden screws, and how to reassemble everything correctly. Whether you’re cleaning, troubleshooting, or replacing parts, this guide will help you do it safely and effectively.
Understanding Your Waring Immersion Blender
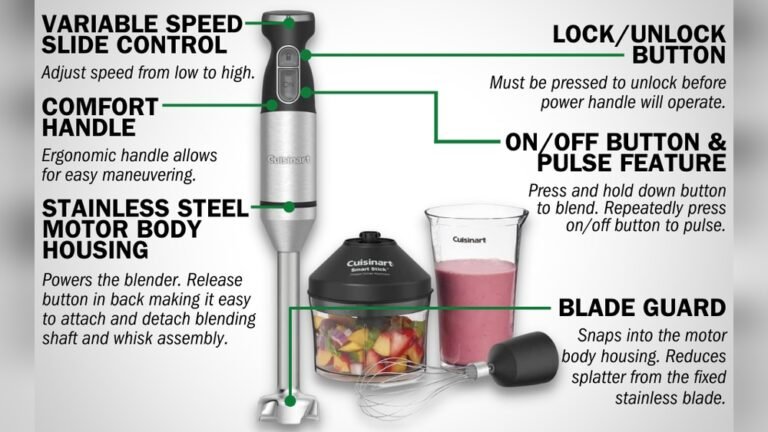
Before you start, it’s important to know the basic parts of a Waring immersion blender. Most models share the same main components, but there can be slight differences. Familiarizing yourself with these parts will make the disassembly process easier and safer.
Key Parts Of The Blender
- Motor housing: The top part where you hold the blender. It contains the motor.
- Blending shaft: The long metal piece that connects the motor to the blades.
- Blade assembly: Located at the end of the shaft, responsible for blending.
- Coupling: Connects the shaft to the motor housing.
- Speed controls: Buttons or switches on the motor housing.
- Power cord: Provides electricity; must be unplugged before disassembly.
Some Waring immersion blenders have detachable shafts, while others use fixed ones. The difference affects how you take the blender apart. Always check your user manual for specific model details.
Common Models And Their Differences
Let’s look at a comparison of three popular Waring immersion blender models:
| Model | Shaft Type | Blade Assembly | Max Power (Watts) |
|---|---|---|---|
| Waring WSB40 | Detachable | Fixed | 500 |
| Waring WSB50 | Detachable | Replaceable | 750 |
| Waring WSB60 | Fixed | Fixed | 750 |
If your blender has a detachable shaft, you can remove it easily. Fixed shafts require more careful steps. Always identify your model before starting.
Safety Precautions Before Disassembly
Taking apart an immersion blender involves handling sharp blades and electrical parts. Safety is crucial. Here are the main steps to stay safe:
- Unplug the blender: Never start disassembling while it’s connected to power.
- Wear gloves: Blades are sharp and can cause injuries.
- Work on a clean surface: Clear your workspace to avoid losing small parts.
- Have tools ready: Use screwdrivers, pliers, and sometimes a Torx bit, depending on your model.
- Handle blades carefully: Always treat the blade area as dangerous, even when the blender is off.
- Avoid water exposure: Never let water touch the motor housing. Clean only detachable parts with water.
It’s important to keep children and pets away while working. If you feel unsure, read your user manual or visit the manufacturer’s website for extra guidance.

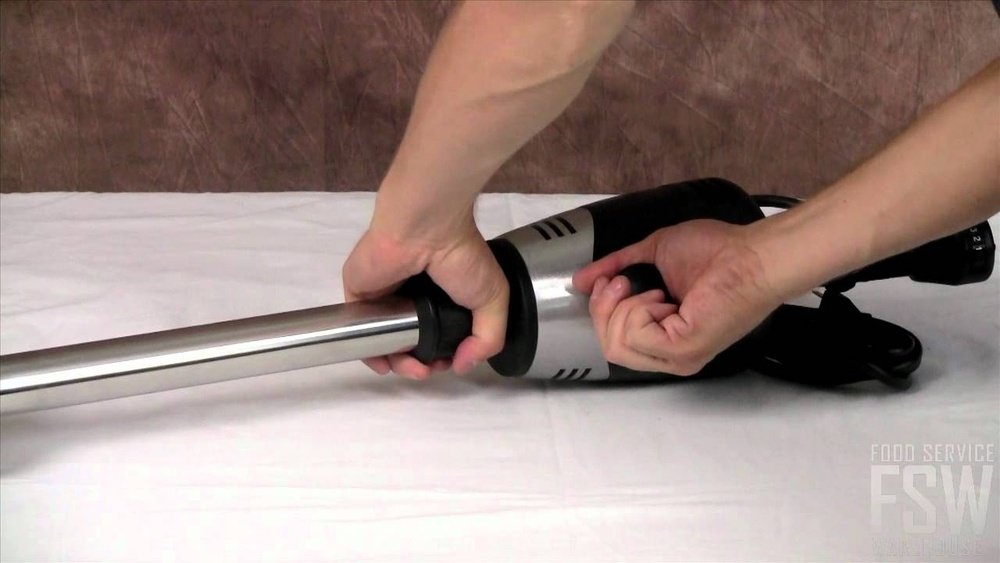
Credit: www.youtube.com
Tools You’ll Need
Disassembling a Waring immersion blender doesn’t require many tools, but having the right ones makes the job easier and safer.
- Phillips screwdriver: For most screws in the housing.
- Flathead screwdriver: Useful for prying open parts.
- Torx screwdriver: Some models use Torx screws.
- Needle-nose pliers: For gripping small parts.
- Soft cloth: To protect surfaces and clean parts.
- Small container: To store screws and prevent losing them.
Some models may require a specialty tool to remove the blade assembly. Check your manual or look for a tool set at appliance stores. Using the correct tool prevents damage to screws and plastic parts.
Step-by-step Guide: Taking Apart Your Waring Immersion Blender
Let’s break down the process into clear steps. Follow each one carefully, and don’t rush.
Step 1: Preparation
- Unplug the blender.
- Remove any attachments (whisks, blending cups).
- Wipe the exterior with a dry cloth to remove grease or food residue.
Step 2: Detaching The Shaft
For blenders with a detachable shaft:
- Press the release buttons or twist the shaft as indicated in your user manual.
- Pull the shaft gently away from the motor housing.
For fixed shaft models:
- Look for screws near the base where the shaft meets the motor housing.
- Use a Phillips or Torx screwdriver to remove these screws.
- Gently wiggle the shaft until it loosens.
Step 3: Removing The Blade Assembly
The blade is the most dangerous part. Handle with care.
- For detachable shafts, the blade assembly usually unscrews or pops out.
- Use pliers to grip the blade assembly and twist it counterclockwise.
- For fixed shafts, use a flathead screwdriver to pry open the blade cover, then unscrew the blade assembly.
Some blade assemblies have a locking ring. Check for this before removing the blade. If stuck, don’t force it—apply gentle pressure.
Step 4: Opening The Motor Housing
This step can be tricky, as manufacturers often hide screws for safety.
- Inspect the housing for visible screws. Look under stickers or rubber feet.
- Use a screwdriver to remove all screws.
- If the housing won’t open, gently pry along the seam with a flathead screwdriver.
- Be careful not to crack the plastic.
Inside, you’ll see the motor, speed controls, and wiring. Only touch these parts if you’re comfortable with electronics.
Step 5: Removing Internal Components
If you need to clean or repair inside:
- Take photos as you go to remember where parts belong.
- Disconnect wiring connectors gently.
- Remove the motor by unscrewing its mounts.
- Take out speed control switches if needed.
Avoid touching circuit boards unless necessary. If you see burnt wires or damaged parts, note them for replacement.
Step 6: Cleaning And Maintenance
Once apart, clean the shaft and blade with warm soapy water. Never submerge the motor housing. Use a dry cloth to wipe the inside.
Lubricate moving parts with a small amount of food-safe oil. This keeps the shaft and blade running smoothly.
Step 7: Reassembling The Blender
Reverse the steps:
- Reinstall motor and switches.
- Close the housing and tighten all screws.
- Attach the blade assembly.
- Reconnect the shaft to the motor housing.
Test the blender before use. Plug it in and run at low speed to check for unusual noise or vibration.
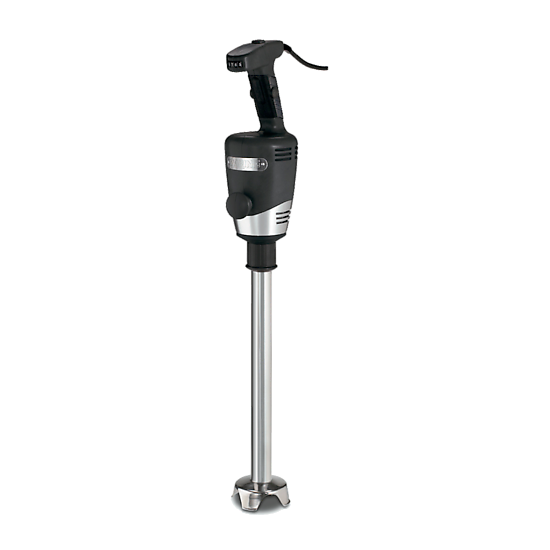
Credit: www.americanchefsupply.com
Common Issues And Troubleshooting
Sometimes you take the blender apart because something isn’t working. Here’s how to identify and solve common problems.
Blender Won’t Turn On
- Check the power cord for damage.
- Inspect internal wiring for loose connections.
- Test the speed controls with a multimeter.
Blade Won’t Spin
- Look for food jams in the blade assembly.
- Check for bent or broken blades.
- Inspect the coupling for wear.
Strange Noise Or Vibration
- Make sure the shaft is aligned properly.
- Tighten screws in the motor housing.
- Lubricate moving parts.
Burning Smell
- Look for burnt wires or motor damage.
- Replace damaged parts immediately.
Most of these issues can be fixed by careful cleaning and replacing worn parts. If you find a major problem, consider contacting a professional.
Comparing Waring Immersion Blender Models
Different Waring immersion blender models have slightly different designs and disassembly steps. Here’s a table comparing some important features:
| Feature | WSB40 | WSB50 | WSB60 |
|---|---|---|---|
| Detachable Shaft | Yes | Yes | No |
| Blade Assembly Removal | Twist Off | Twist Off | Unscrew |
| Motor Housing Screws | Phillips | Torx | Phillips |
| Cleaning Ease | High | High | Medium |
If you have a WSB60, you’ll spend more time getting the shaft off, but the motor is more powerful. If you use a WSB40 or WSB50, cleaning and blade replacement are easier.
Smart Tips For Safe Disassembly
- Take photos: As you remove parts, take pictures. It helps during reassembly.
- Organize screws: Use a small container for screws, washers, and clips.
- Don’t force parts: If something is stuck, check for hidden screws or locking rings.
- Work slowly: Rushing can cause cracks or lost parts.
- Read the manual: Even experienced users miss important steps by skipping the manual.
- Check warranty: If your blender is under warranty, opening it may void the coverage. Contact the manufacturer first.
Many beginners forget the importance of organizing screws and taking photos. These small steps prevent big mistakes later.
Cleaning And Maintenance After Disassembly
Once you’ve taken apart your blender, proper cleaning is important. Clean the shaft, blade, and coupling with warm soapy water. Rinse well and dry completely before reassembling.
Never use water or liquid cleaners on the motor housing. Instead, use a soft dry cloth or compressed air to remove dust inside.
Lubricate the shaft and blade assembly with food-safe lubricant. Don’t use regular machine oil—it can contaminate food.
If you see rust or corrosion, scrub gently with a soft brush. Replace any parts that are too damaged.
Replacing Parts And Upgrades
If you need to replace parts, choose only official Waring parts. Generic blades or couplings can damage your blender or void the warranty.
When upgrading, check compatibility. Not all shafts or blades fit every model. For example, a WSB50 shaft will not fit a WSB60 blender.
For difficult repairs, visit the Waring website or a trusted appliance store. Here’s a helpful link for buying official parts: Waring Official Parts.
Mistakes To Avoid
- Don’t forget to unplug: The most common mistake is working with the blender plugged in.
- Avoid water in the motor housing: This can cause electrical failure.
- Don’t use force: Forcing parts can crack plastic or bend blades.
- Ignore the manual: Missing small instructions leads to mistakes.
- Lose screws: Many people misplace screws, making reassembly difficult.
Another mistake is skipping lubrication after cleaning. A dry shaft can cause noise and wear. Always lubricate moving parts with food-safe oil.

Credit: www.ebay.com
Real-life Example: Fixing A Jammed Blade
Let’s look at a real example. Maria, a home cook, noticed her Waring immersion blender’s blade stopped spinning. She followed these steps:
- Unplugged the blender.
- Removed the shaft and blade assembly.
- Found a small piece of carrot jammed inside.
- Used pliers to pull out the jam.
- Cleaned and lubricated the shaft.
- Reassembled and tested the blender.
Maria avoided forcing the blade, which prevented damage. She also took photos to help reassemble. This simple approach saved her time and money.
When To Ask For Professional Help
If you find damaged motor parts, burnt wires, or electrical faults, don’t try to fix them yourself unless you have experience. Professional repair may cost $50–$100, but prevents bigger problems.
Some repairs, like replacing the motor or speed controls, require special tools and skills. Always check the warranty before opening the blender.
Data: Average Lifespan And Repair Costs
Waring immersion blenders last 3–5 years with regular use. Blade and shaft replacements cost $20–$40. Motor repairs can cost $70–$100.
Here’s a quick comparison:
| Part | Average Lifespan (years) | Replacement Cost (USD) |
|---|---|---|
| Blade Assembly | 2 | 25 |
| Shaft | 3 | 30 |
| Motor | 5 | 90 |
Replacing small parts is usually cheaper than buying a new blender. Regular cleaning and careful use extend the life.
Frequently Asked Questions
How Often Should I Take Apart My Waring Immersion Blender For Cleaning?
For deep cleaning, disassemble the blender every 1–2 months if you use it often. For light use, cleaning once every 3–4 months is enough. Always clean after blending sticky or thick foods.
Can I Wash The Motor Housing With Water?
No, never wash the motor housing with water. Use a dry cloth or compressed air. Water can damage electrical parts and cause failure.
What Should I Do If I Can’t Remove A Stuck Blade Assembly?
If the blade assembly is stuck, check for a locking ring or hidden screw. Apply gentle pressure with pliers. Never force it, as this can damage the shaft. Sometimes soaking the shaft in warm water helps loosen stuck food.
Are Generic Replacement Parts Safe For My Blender?
It’s best to use official Waring parts. Generic blades or shafts may not fit correctly and can cause damage or void the warranty.
Does Taking Apart My Blender Void The Warranty?
Yes, opening the motor housing usually voids the warranty. Check your warranty terms before disassembly. If under warranty, contact Waring for repair options.
Taking apart a Waring immersion blender is easier when you follow clear steps and use the right tools. You can fix jams, clean deeply, and replace parts without risking safety or damaging the machine. By understanding your model, organizing parts, and avoiding common mistakes, you’ll keep your blender running smoothly for years.
If you ever feel unsure, seek professional help or refer to official resources. With practice, you’ll become confident in handling your kitchen appliances, saving time and money while enjoying better results in the kitchen.