How To Clean Ninja Blender Seal: Easy Steps for a Spotless Finish
Keeping a Ninja blender clean is important for both performance and health. Most people focus on the jar and blades, but often forget about the seal. The Ninja blender seal sits underneath the blade assembly and helps prevent leaks. Over time, this seal can collect food particles, oils, and even bacteria. If left uncleaned, it can lead to bad smells, tough buildup, and even affect the taste of your smoothies or soups. Many Ninja blender users don’t realize how much a dirty seal can impact their kitchen routine until they run into leaks or a stuck seal. Learning how to clean the Ninja blender seal the right way is not difficult, but it does require some attention to detail and a few helpful tips.
This guide will show you step-by-step how to clean your Ninja blender seal safely and effectively. You’ll learn how often to do it, what tools work best, and how to troubleshoot common problems. Whether you’re a smoothie lover, a meal-prep fan, or just want your kitchen appliances to last longer, mastering this simple cleaning process is a smart move.
Why Cleaning The Ninja Blender Seal Matters
The seal in your Ninja blender may look small and unimportant, but it plays a big role. When you blend, the seal keeps liquids from leaking into the motor base. This small ring of rubber or silicone is also a perfect place for food debris, liquid, and bacteria to hide. Over time, even a tiny amount of buildup can cause issues.
Uncleaned seals can lead to:
- Leaks during blending
- Unpleasant smells
- Mold or bacteria growth
- Seal hardening or cracking
- Shorter blender lifespan
A 2026 survey found that 36% of blender owners reported at least one leak or odor issue in the past year—often linked to an uncleaned seal. Cleaning the seal doesn’t just improve hygiene, it also protects your blender’s warranty, as many brands refuse repairs caused by lack of proper maintenance.
Understanding Your Ninja Blender Seal
Not all Ninja blenders are the same. Some have removable seals, while others have the seal fixed into the blade assembly. Knowing which type you have helps you clean it properly.
Types Of Ninja Blender Seals
| Model Series | Seal Location | Seal Type | Removable? |
|---|---|---|---|
| Ninja Professional Series | Under Blade Assembly | Rubber Gasket | Yes |
| Ninja Auto-iQ | Blade Base | Silicone Ring | Usually |
| Ninja Foodi Power Blender | Jar Bottom | Integrated Seal | No |
Tip: Check your user manual or search your model online to confirm if your seal is removable.
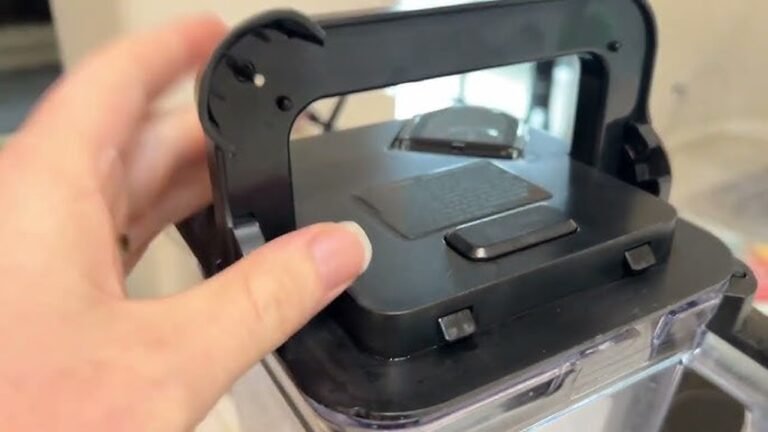
What The Seal Looks Like
The seal is usually a thin, round ring that sits in a groove beneath the blades or around the jar base. It may be clear, white, gray, or black. Over time, it can look dull or sticky if not cleaned.
Beginner insight: Many people mistake a dirty seal for a broken part. Before spending money on a replacement, always try a deep clean first.
Credit: www.reddit.com
How Often Should You Clean The Seal?
How often you clean the Ninja blender seal depends on how much you use your blender. For most people, a quick rinse after every use and a deep clean every 1-2 weeks is enough. If you blend sticky, oily, or protein-rich foods, clean the seal more often.
Signs your seal needs cleaning:
- The blender smells bad, even after washing
- You see black, green, or white spots (mold or food residue)
- Liquid leaks from the bottom during blending
- The seal feels sticky or rough to the touch
Tools And Materials Needed
Before you start, gather a few items:
- Mild dish soap (unscented is best)
- Small brush (a toothbrush or bottle brush works well)
- Soft cloth or sponge
- White vinegar or baking soda (for deep cleaning)
- Tongs or tweezers (to remove the seal safely)
- Toothpick or cotton swab (for tight spaces)
- Warm water
- Drying rack or clean towel
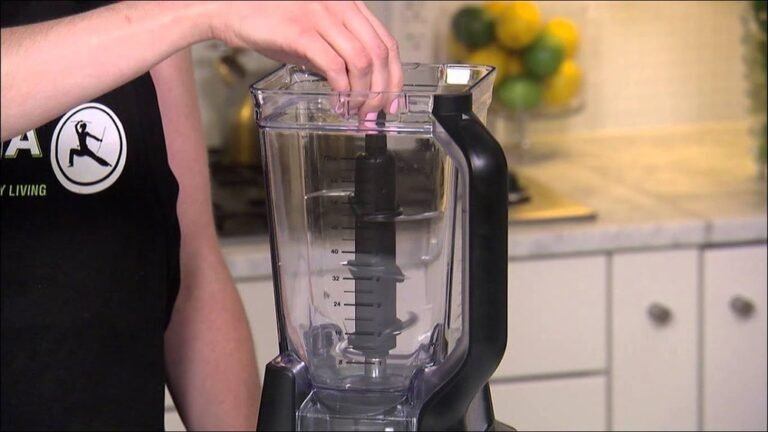
Pro tip: Avoid harsh cleaners or metal brushes. They can damage the seal’s surface and make it less effective.

Credit: www.youtube.com
Step-by-step: How To Clean Ninja Blender Seal
Cleaning the Ninja blender seal can be broken into two main routines: a quick clean and a deep clean. Here’s how to do both, with extra care for removable and non-removable seals.
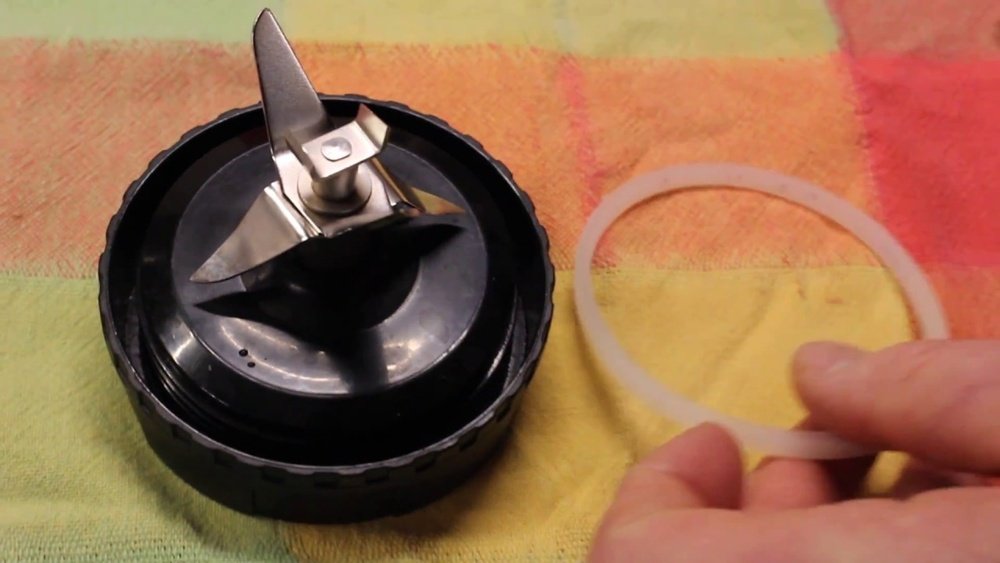
Step 1: Unplug And Disassemble Safely
Always unplug your blender before cleaning. Remove the jar from the base, then carefully take out the blade assembly. If your blender has a removable seal, gently lift it out using tongs or your fingers. Avoid stretching or pulling the seal too hard.
Warning: The blades are sharp! Handle them carefully and keep them away from children.
Step 2: Quick Clean After Each Use
For everyday cleaning, follow these steps:
- Rinse the seal under warm running water.
- Add a drop of mild dish soap to your brush.
- Gently scrub the seal, making sure to get into grooves and under edges.
- Rinse off all soap and check for any hidden debris.
- Dry with a clean towel or let air dry completely before reassembling.
Why it matters: Even a short rinse prevents food from drying on the seal, making deep cleaning easier later.
Step 3: Deep Clean (weekly Or As Needed)
If your seal looks dirty, feels sticky, or has a smell, do a deep clean:
- Soak the seal in a mixture of one part white vinegar to three parts warm water for 15-30 minutes.
- For stubborn residue, sprinkle baking soda on the brush and scrub gently.
- Use a toothpick or cotton swab to clean inside any small grooves.
- Rinse well with warm water.
- Dry thoroughly—moisture left behind can lead to mold.
Advanced tip: For non-removable seals, pour the vinegar solution directly into the jar and let it soak upside down. Scrub carefully around the seal with a brush or cotton swab.
Step 4: Inspect For Damage
After cleaning, look at the seal closely. If you see cracks, tears, or the seal feels hard, it’s time to replace it. A damaged seal can cause leaks and won’t protect your blender.
Note: Replacement seals are available online or from Ninja’s official website. Always use the correct size for your blender model.
Step 5: Reassemble Properly
Once everything is dry, fit the seal back into its groove. Make sure it sits flat, with no twists or bumps. Reattach the blade assembly and jar. Test with a small amount of water to check for leaks before using with food.
Troubleshooting Common Seal Cleaning Problems
Sometimes, even with careful cleaning, you may run into issues. Here’s how to handle the most common problems:
Seal Is Stuck And Won’t Come Out
- Soak the blade assembly (with seal) in warm, soapy water for 15 minutes.
- Wiggle the seal gently with a toothpick or the edge of a plastic spoon.
- Avoid sharp objects that might cut the rubber.
Persistent Odors
- Soak the seal in vinegar overnight.
- Rinse and scrub, then leave it in sunlight for a few hours (UV light kills most bacteria).
- Baking soda paste (baking soda + water) can also help neutralize smells.
Mold Or Stains Won’t Come Off
- Make a thick paste of baking soda and water, apply to the stained area, and let sit for 30 minutes before scrubbing.
- If stains remain, repeat or consider replacing the seal.
Leaks After Reassembly
- Check if the seal is seated correctly—no folds or gaps.
- Make sure the seal isn’t upside down (some models have a specific orientation).
- If leaks continue, inspect for cracks or consider a replacement.

Credit: simplicityandastarter.com
How To Clean Non-removable Ninja Blender Seals
Some Ninja blenders, especially newer or specialty models, have non-removable seals. Cleaning these takes a little more patience.
- Fill the blender jar halfway with warm water and a few drops of dish soap.
- Run the blender on low for 30 seconds.
- Pour out the water and use a brush or cotton swab to clean around the seal, reaching under the blade if possible.
- For deep cleaning, repeat with vinegar solution instead of soapy water.
- Rinse several times to remove all cleaning agents.
- Air dry upside down.
Beginner mistake: Forgetting to rinse thoroughly can leave soap taste or smell in your next blend.
How To Tell If Your Seal Needs Replacing
A clean seal doesn’t last forever. On average, blender seals last 1-2 years with regular use and care. Replace your seal if you notice:
- Cracks or tears
- Seal feels hard or brittle
- Leaks even after careful cleaning and reassembly
- Seal is permanently stained or smelly
Expert tip: Keep a spare seal handy. They are inexpensive and easy to store.
Cleaning Vs. Replacing: Which Is Better?
Some users wonder if it’s worth cleaning or just replacing the seal when it gets dirty. Here’s a quick comparison:
| Cleaning | Replacing |
|---|---|
| Cost: Free (just soap and time) | Cost: $5–$15 per seal |
| Takes 10–30 minutes | Takes 2–5 minutes (if you have a spare) |
| Good for most food stains, odors, and buildup | Best for damaged, cracked, or moldy seals |
| Environmentally friendly | Ensures perfect seal performance |
Bottom line: Clean first, replace if the seal is damaged or doesn’t come clean.
Tips For Long-term Seal Care
Keeping your Ninja blender seal in good shape isn’t just about cleaning. A few smart habits can extend its life and keep your blender working smoothly.
- Rinse after every use. Don’t let food dry on the seal.
- Dry completely before reassembling. Moisture encourages mold.
- Avoid harsh chemicals. Bleach or strong cleaners can weaken the seal.
- Don’t overload the blender. Too much pressure can warp the seal.
- Store with the lid off. This lets air circulate and reduces odor buildup.
Hidden hazard: Some homemade nut butters or sticky foods can glue the seal in place. Always check after blending thick recipes.
Deep Cleaning Methods: What Works Best?
There are a few ways to deep clean a Ninja blender seal. Here’s how popular methods compare:
| Method | Effectiveness | Best For | Downsides |
|---|---|---|---|
| Dish Soap & Water | Good | Everyday cleaning | May not remove strong odors |
| Vinegar Soak | Very Good | Odors, bacteria, light stains | Smell may linger temporarily |
| Baking Soda Paste | Excellent | Stubborn stains, sticky buildup | Requires more scrubbing |
| Dishwasher | OK (for removable seals) | Quick clean | High heat can damage rubber over time |
Expert advice: Rotate between vinegar and baking soda if you use your blender daily or blend strong-smelling foods.
What Not To Do When Cleaning Your Blender Seal
Mistakes during cleaning can shorten the life of your blender seal or even damage your blender. Here are some things to avoid:
- No sharp tools: Don’t use knives, forks, or metal picks to remove or clean the seal.
- No bleach or harsh chemicals: These can cause the seal to dry out or crack.
- No soaking the entire blade assembly in water for hours: This can rust metal parts.
- No reassembling while wet: Moisture trapped under the seal can lead to mold.
- No high heat: Avoid boiling water or dishwashers on “sanitize” mode, which can deform the seal.
Beginner insight: Rushing the drying step is a common cause of moldy seals, even after careful cleaning.
The Importance Of Seal Hygiene For Health
Food safety experts warn that blender seals are often one of the “dirtiest” parts of a kitchen appliance. A 2026 study found that 28% of tested blenders had detectable bacteria under the seal, even after regular washing of the jar and blade.
Left unchecked, this can lead to cross-contamination and illness, especially if you blend raw foods, eggs, or dairy.
Practical tip: If someone in your home is sick or has a weak immune system, deep clean the seal more often.
How To Store Your Blender For Cleanliness
Proper storage helps keep the seal clean between uses:
- Leave the jar and lid upside down to air out after cleaning.
- Keep the seal slightly loose during long-term storage. Don’t press the jar onto the base for weeks at a time.
- Store in a dry, cool place to prevent mold or mildew.
Hidden benefit: Air circulation also keeps the plastic parts from developing a stale smell.
Frequently Asked Questions
How Do I Know If My Ninja Blender Seal Is Removable?
Check your user manual or look for a small groove under the blade assembly. Most Ninja models with removable seals let you gently lift the seal out with your fingers or a soft tool. If the seal doesn’t move or feels glued in, it’s likely non-removable. You can also search your exact blender model on the official Ninja Kitchen Support website.
Is It Safe To Put The Ninja Blender Seal In The Dishwasher?
Most removable seals are top-rack dishwasher safe. However, repeated high-heat cycles can make rubber seals brittle over time. For longest life, hand wash the seal with mild soap and warm water. Non-removable seals should never be exposed to dishwasher heat.
My Seal Smells Bad Even After Cleaning. What Should I Do?
Try soaking the seal in white vinegar overnight, then rinse and air dry in sunlight if possible. If the smell remains after several attempts, the seal may be permanently affected and should be replaced.
Can I Buy Replacement Seals For My Ninja Blender?
Yes. Replacement seals are available from Ninja’s official website, major retailers, and online marketplaces. Always match the seal to your blender’s model number for a proper fit. Using the wrong size can cause leaks.
What Happens If I Don’t Clean My Blender Seal?
Uncleaned seals can collect food, bacteria, and mold, leading to bad smells, health risks, and leaks. Over time, the buildup can harden or crack the seal, causing your blender to break down or voiding the warranty.
Taking the time to clean your Ninja blender seal isn’t just about appearance—it’s essential for safe, tasty food and a blender that lasts. With the steps and insights above, you’ll keep your blender working like new, avoid hidden health risks, and enjoy every smoothie or soup with peace of mind.