How To Get Water Out Of Immersion Blender Easily and Safely
Getting water inside your immersion blender can feel frustrating and worrying. You might notice drops inside the motor housing after cleaning, or maybe you rinsed it and now the blender won’t work right. This problem is more common than people think, especially for those who use immersion blenders often or clean them with too much water.
If you don’t remove the water properly, your blender may stop working, rust, or even cause an electric shock. But don’t panic—there are reliable ways to get water out, prevent future issues, and keep your blender safe and working. In this guide, you’ll learn practical methods, smart tips, and what mistakes to avoid.
Whether you’re a beginner or have used immersion blenders for years, you’ll find clear steps to help you solve this problem.
Why Water Gets Inside Immersion Blenders
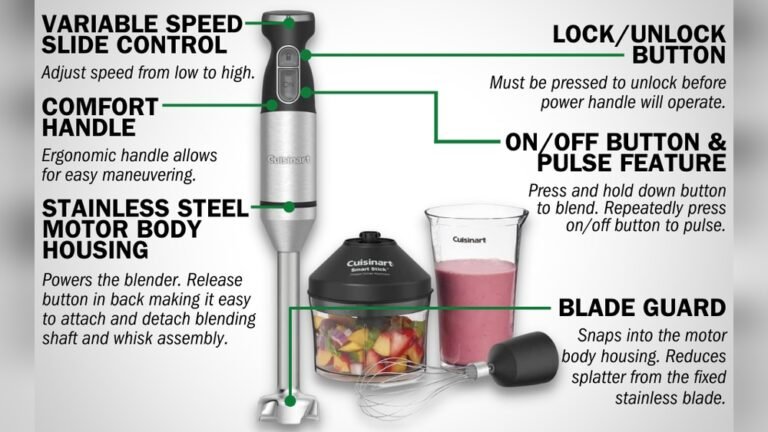
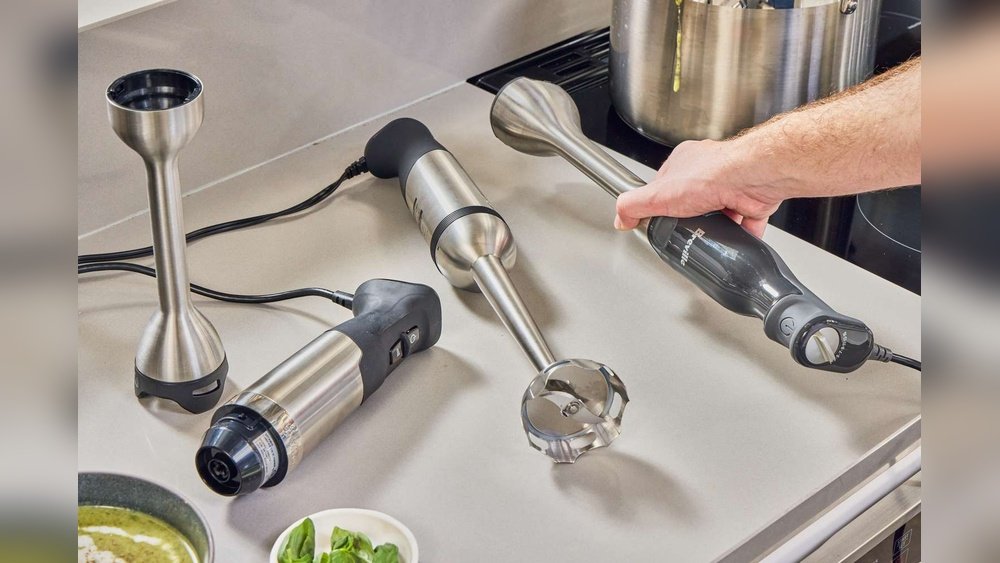
Immersion blenders, also known as stick blenders, are handy kitchen tools. They blend soups, sauces, and smoothies right in the pot. But their design makes them vulnerable to water damage.
Most immersion blenders have two main parts:
- The blending shaft (the stick with the blade)
- The motor housing (the top where you hold it)
The blending shaft is safe to wash. But the motor housing is not waterproof. Small gaps or seams, especially where the shaft connects to the housing, can let water seep inside. Common reasons water gets in:
- Washing the motor housing under running water
- Splashing liquids while blending
- Cleaning with wet cloths that drip
- Leaving the blender in a sink or wet area
It’s easy to make these mistakes. Even steam from hot food can sometimes condense inside the motor part. Knowing why water gets in helps you avoid the issue next time.
Signs Your Immersion Blender Has Water Inside
Before you try to remove water, check for clear signs. Not every malfunction means water is inside, but these are the most common indicators:
- Visible water droplets inside the motor housing (seen through vents or seams)
- Strange noises when turned on (buzzing, gurgling, or crackling)
- Blender won’t turn on or turns off after a few seconds
- Burning smell or unusual odor
- Rust forming around screws or seams
- Sticky buttons (water may cause residue or make them hard to press)
If you notice one or more of these, water is likely inside your immersion blender. Acting quickly can prevent permanent damage.
Safety Precautions Before Removing Water
Water and electricity don’t mix. Before you start, make sure you’re safe:
- Unplug the blender immediately.
- Do not turn it on—even to check if it works.
- Keep away from children or pets.
- Work in a dry area (avoid wet counters or sinks).
- If you see sparks or smell burning, stop and contact a professional.
These simple steps prevent shock, injury, or further damage. Never skip them.
Step-by-step: How To Get Water Out Of Immersion Blender
Getting water out takes patience and care. Here’s a clear process:
1. Shake Out Excess Water
Hold the blender with the motor housing facing down. Shake gently but firmly. Sometimes, drops will come out through vents or seams. Don’t shake too hard—you don’t want to damage internal parts.
2. Dry With A Cloth
Use a dry microfiber cloth. Wipe around all seams, vents, and buttons. Microfiber absorbs well and leaves fewer fibers. Avoid paper towels—they can leave dust or fibers that get inside.
3. Air Dry In A Warm Place
Set the blender upright on a towel in a warm, dry spot. Avoid direct sunlight—too much heat can warp plastic. A well-ventilated room is best.
- Leave it for at least 24–48 hours.
- If possible, point a fan at the motor housing to speed drying.
For more stubborn moisture, you can use a hair dryer on cool or low heat. Hold it 8–10 inches away and blow air into the vents for 5–10 minutes. Never use high heat—it can damage the motor.
4. Use Silica Gel Or Rice (optional)
If water is deep inside, try this trick:
- Place the blender (motor housing only) in a container of uncooked rice or with several silica gel packs.
- Seal the container and leave for 24 hours.
Rice and silica gel absorb moisture. This method works best for light water exposure, not heavy flooding.
5. Check Again Before Using
After drying, inspect the blender:
- Look for any remaining water droplets.
- Smell for burning or strange odors.
- Shake gently again—listen for sloshing.
If all seems dry, plug in and test. If the blender still doesn’t work, water may have damaged the motor or circuit board. In that case, consider professional repair or replacement.

Credit: bakinghermann.com
How To Disassemble For Deeper Drying
Some immersion blenders allow partial disassembly for better drying. This depends on the model, so check your manual or manufacturer’s site.
Common Disassembly Steps
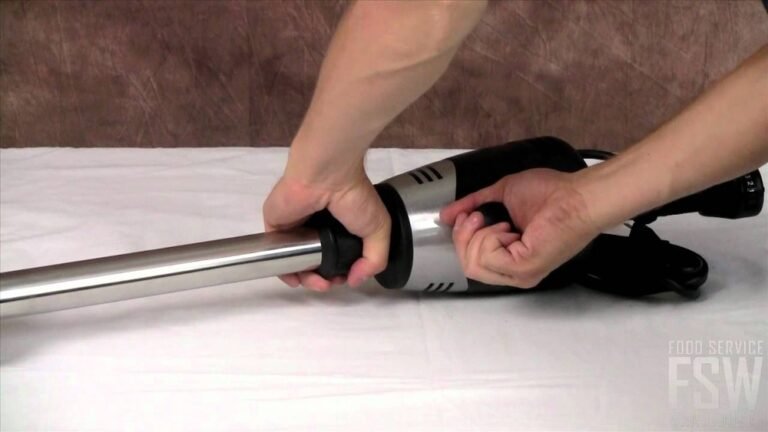
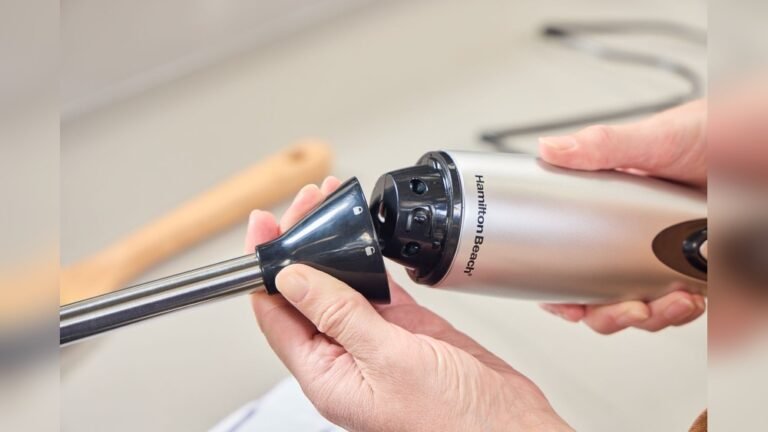
- Remove the blending shaft (usually twists off)
- Locate screws on the motor housing—often hidden under rubber or plastic covers
- Unscrew carefully (use a small Phillips screwdriver)
- Open the housing—do not force
Inside, you may see the circuit board and motor. Wipe gently with a dry cloth. Never touch the circuit board with wet hands or tools. Leave open parts in a warm, dry area for several hours.
Some models are sealed and cannot be opened without breaking the warranty. If unsure, contact customer support.
Comparing Popular Immersion Blender Designs
Different brands and models resist water differently. Here’s a quick comparison:
| Brand | Water Resistance | Ease of Cleaning | Disassembly Allowed |
|---|---|---|---|
| KitchenAid | Moderate | Easy (shaft separates) | Partial (shaft only) |
| Breville | High | Easy (shaft separates) | Limited (motor sealed) |
| Braun | Low | Moderate | Partial |
| Hamilton Beach | Moderate | Easy | Partial |
| Cuisinart | Low | Moderate | Limited |
Some higher-end models have better seals and are less likely to let water in. Always check the manual for cleaning instructions.
What Not To Do When Removing Water
Many beginners make mistakes that can damage their blender:
- Do not use high heat (oven, microwave, hot air gun)
- Do not submerge the motor housing
- Do not use compressed air (can push water deeper)
- Do not poke inside with metal tools
- Do not turn on if wet
These mistakes can burn the motor, melt plastic, or cause electric shock. Patience and gentle drying are safest.
Real-life Example: Fixing A Wet Blender
Let’s look at a common scenario. Maria, a home cook, washed her immersion blender under the faucet. Water got inside the motor housing. She noticed it wouldn’t turn on and smelled a faint burning odor.
Maria unplugged the blender, shook out the water, wiped it dry, then left it in a warm room for two days. She also put it in a box with rice overnight. After 48 hours, she checked for moisture, plugged it in, and it worked again.
Maria learned to clean only the shaft and avoid water near the motor. This story shows that quick action and proper drying can save your blender.
How Long Does It Take To Dry?
Drying time depends on how much water got inside and the drying method used.
| Water Exposure | Drying Method | Estimated Drying Time |
|---|---|---|
| Light (drops) | Air dry + shake | 12–24 hours |
| Moderate (splash) | Air dry + rice/silica gel | 24–48 hours |
| Heavy (submerged) | Disassembly + air dry | 48–72+ hours |
If after 72 hours the blender still doesn’t work, internal damage may have occurred.
Preventing Water Damage In The Future
The best solution is prevention. Here’s how to keep water out:
- Never wash the motor housing under running water
- Clean only the blending shaft (detach and wash separately)
- Use a damp—not wet—cloth for wiping the motor part
- Store upright in a dry place
- Avoid blending very hot, steamy foods (steam can condense inside)
- Check seals—if rubber gaskets are worn, replace them
Some blenders come with water-resistant seals. If your model doesn’t, consider adding a silicone cover to protect seams.
What If Your Blender Is Still Not Working?
Sometimes, water causes permanent damage. Here’s what to do:
- Check the warranty—many brands offer coverage for electrical faults (not for water damage)
- Contact customer support for repair options
- Compare the cost of repair vs. replacement
If you decide to buy a new blender, look for models with better water resistance and detachable shafts.
Comparing Immersion Blender Cleaning Methods
Let’s compare different cleaning methods and their risks:
| Cleaning Method | Water Exposure Risk | Safe for Motor Housing? | Recommended? |
|---|---|---|---|
| Wiping with damp cloth | Low | Yes | Yes |
| Running under faucet | High | No | No |
| Dishwasher | Very high | No | No |
| Detaching shaft and washing | Low | Yes (shaft only) | Yes |
Always follow your blender’s manual for cleaning instructions.
:max_bytes(150000):strip_icc()/sea-immerison-blenders-criteria-b7c39d149076405481659d9eb8b1da10.png)
Credit: www.seriouseats.com
Non-obvious Tips For Removing Water
Many guides skip these clever tricks:
- Use gravity: Store the blender upside down while drying. Water will move toward the vents and evaporate faster.
- Rotate during drying: Every few hours, change the blender’s angle. This exposes different seams to air flow.
These tips help moisture escape from hard-to-reach places.
When To Replace Your Immersion Blender
If you’ve tried all drying methods and the blender still doesn’t work, check for these signs:
- Corrosion inside the motor housing
- Repeated failure after drying
- Strange sounds or smells even after drying
- Visible damage to the circuit board
Replacing is safer and often cheaper than repairing. Modern models have better sealing and are less likely to suffer water damage.

Credit: foodcrumbles.com
Expert Advice: Choosing A Water-resistant Immersion Blender
If you live in a humid climate or use your blender often, look for features like:
- Sealed motor housing
- Detachable shaft
- Rubber gaskets
- Warranty coverage
Ask for advice at your local appliance store or check online reviews. Brands like Breville and KitchenAid have good reputations for water resistance.
For more technical details, check the manufacturer’s official cleaning guidelines. You can also learn about electrical safety for kitchen appliances at Consumer Reports.
Frequently Asked Questions
How Can I Tell If Water Is Inside My Immersion Blender?
Look for water droplets inside the motor housing, strange noises, or the blender not turning on. A burning smell is also a strong sign. If you see any of these, water is likely inside.
Is It Safe To Use A Hair Dryer To Dry My Blender?
Yes, but only on cool or low heat. Hold the dryer about 8–10 inches away from the motor housing and blow air into the vents. Never use high heat—it can damage the motor.
Can I Put My Immersion Blender In Rice To Dry It?
You can place the motor housing in rice or with silica gel packs. Seal it in a container for 24 hours. Rice absorbs moisture, but this works best for minor water exposure.
What Should I Do If My Blender Still Doesn’t Work After Drying?
Check for visible damage, corrosion, or strange smells. If the blender won’t turn on after drying, it may be permanently damaged. Contact customer support or consider replacing it.
How Can I Prevent Water From Getting Inside My Immersion Blender?
Never wash the motor housing under running water. Clean only the blending shaft, use a damp—not wet—cloth for the motor, and store upright in a dry place. Check for worn seals and replace them as needed.
Immersion blenders are useful tools, but they need careful handling. Water inside the motor is a common problem, but with patience and smart drying methods, you can often fix it. Remember to act quickly, avoid risky cleaning habits, and invest in a water-resistant model if you use your blender often.
With these tips, you’ll keep your kitchen safe and your blender running for years.