How To Make Ice Cream In A Ninja Blender: Easy Step-by-Step Guide
Making homemade ice cream used to require a bulky ice cream maker, lots of ice, and sometimes even rock salt. But today, with the power of a Ninja blender, you can create creamy, delicious ice cream in your own kitchen in minutes. Whether you’re a beginner or a home cook looking to impress, using a Ninja blender is one of the fastest and easiest ways to turn simple ingredients into a frozen treat that rivals store-bought brands.
In this guide, you’ll discover everything you need to know to make perfect ice cream in a Ninja blender. You’ll get step-by-step instructions, practical tips, and creative flavor ideas. You’ll also learn how to avoid common mistakes, store your ice cream for best results, and even troubleshoot texture problems.
By the end, you’ll feel confident making your own custom ice cream flavors—no special machine needed.
Why Use A Ninja Blender For Ice Cream?
The Ninja blender has become a favorite for home cooks because it’s powerful, versatile, and easy to use. Its high-speed blades can crush frozen ingredients quickly, creating a smooth and creamy texture. Unlike traditional ice cream makers, which require pre-freezing bowls or adding salt and ice, the Ninja uses direct blending power. This means less time and less mess.
Some Ninja models even have a dedicated “ice cream” or “frozen dessert” setting, which optimizes the blending cycle for frozen treats. Even basic models can handle ice cream recipes with the right technique.
Key Advantages
- Speed: Ninja blenders can make ice cream in under 10 minutes, compared to hours for traditional methods.
- Texture Control: You can adjust the creaminess or chunkiness by blending more or less.
- Versatility: Make dairy or non-dairy ice cream, sorbets, gelato, or “nice” cream.
- Easy Cleanup: The blender pitcher is simple to clean compared to traditional ice cream makers.
What You Need To Make Ice Cream In A Ninja Blender
Before you start, gather the right ingredients and equipment. While recipes can vary, the basics remain the same.
Essential Equipment
- Ninja blender (any model with ice-crushing blades)
- Spatula for scraping down sides
- Freezer-safe container with lid (for storage)
- Ice cream scoop (optional but helpful)
- Measuring cups and spoons
Core Ingredients
The classic ice cream base requires:
- Dairy or non-dairy base: Heavy cream, whole milk, coconut milk, or almond milk
- Sweetener: Sugar, honey, maple syrup, or a sugar substitute
- Flavorings: Vanilla extract, cocoa powder, fruit, or mix-ins
- Frozen elements: Ice cubes, frozen fruit, or pre-frozen base
Ingredient Quantities
For a standard batch (serves 4):
- 2 cups heavy cream (or coconut cream for vegan)
- 1 cup whole milk (or almond/oat milk for vegan)
- 1/2 cup granulated sugar (or 1/3 cup honey/maple syrup)
- 2 teaspoons vanilla extract
- Pinch of salt
- 2 cups ice cubes OR 2 cups frozen fruit (for fruit ice cream)
Tip: For firmer ice cream, use more frozen ingredients. For softer ice cream, use more liquid.
Optional Add-ins
- Chocolate chips, cookie pieces, nuts, berries, caramel swirls
- Protein powder for a high-protein treat
- Natural colorings like matcha or beet powder
Step-by-step: Making Ice Cream In A Ninja Blender
Let’s walk through the basic process for homemade vanilla ice cream. This method works for most flavors—just swap out or add ingredients.
1. Prepare The Ingredients
- Measure all ingredients before starting.
- Freeze fruit or base ingredients ahead of time if needed. For best results, use very cold dairy or non-dairy milk.
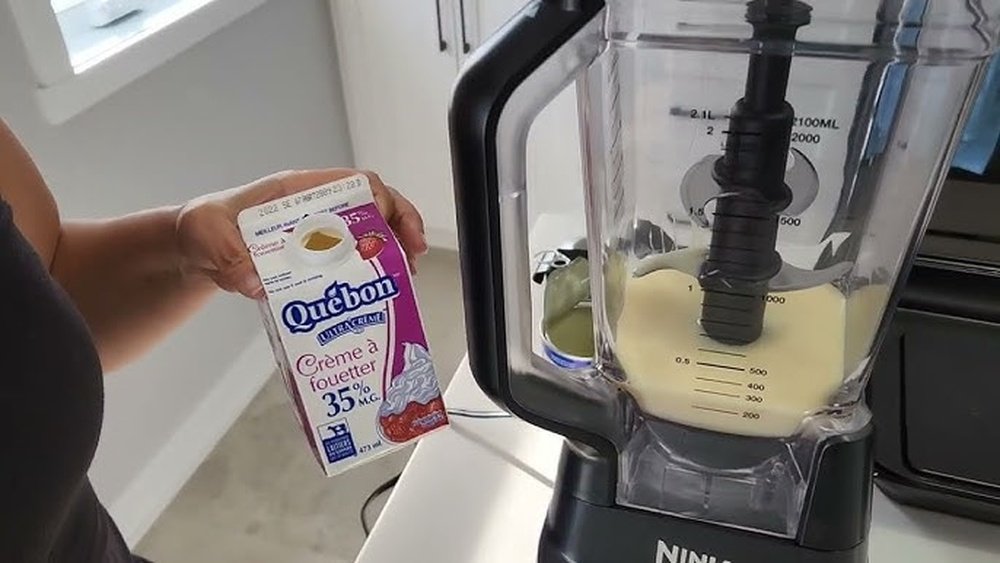
2. Add Ingredients To The Blender
- Pour the cream, milk, sugar, vanilla, and salt into the Ninja pitcher.
- Add the ice cubes or frozen fruit on top (never underneath the blades).
Why this order? Placing liquids first helps the blades move freely, reducing strain on the motor.
3. Blend Until Smooth
- Lock the lid and select the “Ice Cream” or “Frozen Dessert” setting.
- If your model doesn’t have this, blend on high for 1-2 minutes.
- Pause every 30 seconds to scrape down the sides with a spatula.
- Stop when the mixture is thick, smooth, and creamy.
Insight: Over-blending can make the ice cream too soft or even melt it, so watch texture closely.
4. Check Texture And Sweetness
- Taste a small spoonful. Add more sweetener or flavoring if needed.
- If too thick, add a splash of milk. If too thin, add more frozen ingredients and blend briefly.
5. Transfer And Freeze
- For soft-serve texture, enjoy immediately.
- For scoopable ice cream, transfer to a freezer-safe container.
- Smooth the top, cover with a lid or plastic wrap, and freeze for 2-4 hours.
6. Serve And Enjoy
- Let the ice cream sit at room temperature for 5-10 minutes before scooping to soften slightly.
- Scoop into bowls or cones. Add toppings if desired.
Popular Ice Cream Variations For Ninja Blender
The Ninja blender lets you experiment with endless flavors. Here are some crowd-pleasing options:
1. Classic Chocolate Ice Cream
- Swap 1/4 cup cocoa powder for 1/4 cup of the sugar.
- Add 1/3 cup mini chocolate chips after blending.
2. Strawberry Ice Cream
- Use 2 cups frozen strawberries instead of ice cubes.
- Reduce milk to 1/2 cup for thicker texture.
3. Vegan Coconut Ice Cream
- Replace dairy with 2 cups full-fat coconut milk and 1 cup almond milk.
- Sweeten with maple syrup or agave.
4. Banana “nice” Cream
- Use 3 frozen bananas, sliced.
- Add 1 tablespoon peanut butter and a dash of cinnamon.
5. Cookies And Cream
- Blend vanilla base. After blending, pulse in 6 crushed chocolate sandwich cookies.
6. Mint Chip
- Add 1/2 teaspoon peppermint extract to vanilla base.
- Fold in 1/3 cup mini chocolate chips after blending.
7. Espresso Mocha
- Dissolve 1 tablespoon instant espresso in the milk.
- Add 2 tablespoons cocoa powder.
Tip: Always add mix-ins like chocolate chips or cookies after blending to keep them chunky.

Credit: www.youtube.com
Data Table: Common Ice Cream Bases Compared
To help you choose, here’s a comparison of common ice cream bases for Ninja blender recipes:
| Base Type | Creaminess | Flavor | Vegan? | Notes |
|---|---|---|---|---|
| Heavy Cream + Milk | Very Creamy | Rich, classic | No | Traditional taste and texture |
| Coconut Milk | Creamy | Coconut undertone | Yes | Great for vegan or dairy-free |
| Almond/Oat Milk | Less creamy | Nutty/grainy | Yes | Lower fat, lighter texture |
| Frozen Banana | Soft, smooth | Banana flavor | Yes | “Nice” cream, no added sugar needed |
Tips For Best Results
Making ice cream in a Ninja blender is simple, but these tips help you get the creamiest texture and best flavor.
Use Very Cold Ingredients
Colder ingredients freeze faster and blend better. Chill your cream and milk in the fridge for several hours, or use frozen fruit.
Don’t Overfill The Pitcher
Leave space for blending. Most Ninja pitchers work best when filled only halfway with frozen ingredients. Overfilling can strain the motor and create uneven texture.
Add Liquids First
Always pour liquids in before frozen items. This protects the blender and makes blending smoother.
Blend In Short Bursts
Short blending pulses prevent overheating and melting. If your blender struggles, pause and stir.
Avoid Over-blending
Extra blending heats the mixture, making it runny. Stop as soon as the ice cream looks smooth and thick.
Use A Spatula
Scrape down the sides often to help all ingredients blend evenly.
Freeze For Scoopable Texture
For classic, scoopable ice cream, freeze after blending. For soft-serve, enjoy immediately.
Experiment With Flavors
Don’t be afraid to try extracts, spices, or different mix-ins. The Ninja blender is forgiving and easy to clean if you want to try again.
Common Mistakes And How To Fix Them
Even with the right recipe, things can go wrong. Here’s how to solve the most frequent ice cream problems:
Ice Cream Too Hard
- Solution: Let it thaw at room temperature for 10-15 minutes before scooping. Next time, add a tablespoon of alcohol (like vodka or liqueur) or corn syrup for a softer texture.
Ice Cream Too Soft
- Solution: Freeze longer. If it stays soft, reduce liquid or increase frozen ingredients next time.
Grainy Or Icy Texture
- Solution: Blend longer to fully incorporate ice. Use heavy cream or coconut cream for higher fat content. Avoid large ice pieces.
Blender Stops Or Struggles
- Solution: Pause and stir. Add a bit more liquid. Never force the motor—use smaller batches if needed.
Bland Flavor
- Solution: Add more vanilla, salt, or sweetener. Flavors often taste weaker when frozen.
Insider Tip: Home ice cream always tastes less sweet when cold. Adjust your recipe a little sweeter before freezing.
Creative Mix-in Ideas
Mix-ins make homemade ice cream fun and unique. Try these ideas:
- Chopped cookies, brownies, or candy bars
- Fresh or dried fruit (berries, mango, pineapple)
- Swirls of jam, peanut butter, or caramel
- Cereal pieces (for kids’ flavors)
- Crushed pretzels or salted nuts for crunch
Add these after blending for the best texture.
How To Store Homemade Ice Cream
Proper storage keeps your Ninja blender ice cream fresh and scoopable. Unlike store-bought brands with stabilizers, homemade ice cream can get hard or icy if not stored well.
Use The Right Container
Choose a shallow, flat container with a tight lid. Metal pans or silicone containers work best for even freezing.
Cover The Surface
Press a piece of wax paper or plastic wrap directly onto the ice cream before sealing. This reduces ice crystals.
Freeze Quickly
Place the container in the coldest part of your freezer. The faster ice cream freezes, the smoother it will be.
Shelf Life
Homemade ice cream is best eaten within 1-2 weeks. After that, texture and flavor can decline.
Data Table: Homemade Vs. Store-bought Ice Cream
Here’s how Ninja blender ice cream compares to popular store-bought brands:
| Feature | Ninja Blender Homemade | Store-Bought Premium | Store-Bought Economy |
|---|---|---|---|
| Ingredients | Simple, fresh | High-quality, some stabilizers | Many additives |
| Texture | Creamy, customizable | Very creamy, consistent | Airy, sometimes icy |
| Flavor Options | Unlimited | Limited to brand | Few basic flavors |
| Cost per Pint | $1–$2 | $4–$7 | $2–$3 |
| Prep Time | 10–15 min (+ freeze) | None | None |
Observation: Homemade ice cream is more affordable and customizable, with control over every ingredient.

Credit: www.reddit.com
Cleaning Your Ninja Blender After Ice Cream
Sticky ice cream residue can be tough to clean, especially with creamy or oily bases. Here’s how to keep your blender spotless:
- Rinse Pitcher Immediately: Fill halfway with warm water and a drop of dish soap.
- Blend for 30 Seconds: The blades clean themselves.
- Rinse Well: Dump the soapy water and rinse thoroughly.
- Remove Blade Assembly: For deep cleaning, detach the blades and wash separately.
- Dry Completely: Prevents odors and mildew.
Extra Tip: For stubborn residue, soak the pitcher in warm water for 10 minutes before scrubbing.
Data Table: Ninja Blender Models For Ice Cream
Not all Ninja blenders are the same. Here’s a quick look at popular models and how they handle ice cream:
| Model | Power (Watts) | Ice Cream Setting? | Ideal For |
|---|---|---|---|
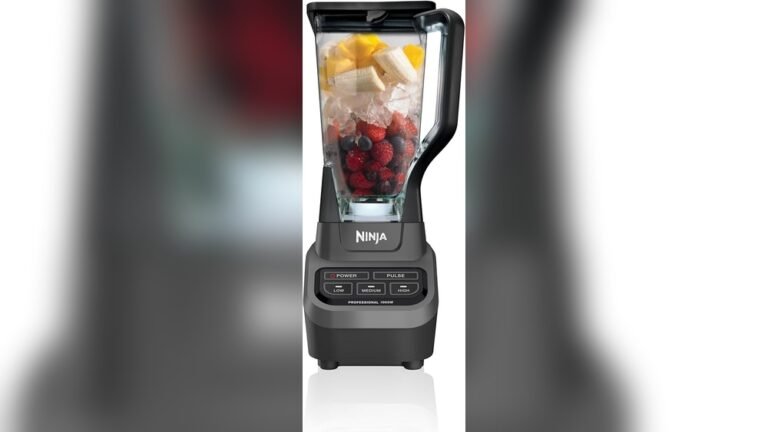
| Ninja Professional | 1000 | No | Basic, small batches |
| Ninja Foodi Power Blender | 1200 | Yes | Frequent ice cream makers |
| Ninja Creami | 800 | Specialized | Dedicated frozen desserts |
| Ninja Nutri-Blender | 900 | No | Single servings, smoothies |
Advice: If you make ice cream weekly, consider a model with a “Frozen Dessert” setting. For occasional use, basic models still work well.

Credit: www.businessinsider.com
Making Dairy-free And Allergy-friendly Ice Cream
The Ninja blender is perfect for those with dietary restrictions. You can easily make ice cream that’s:
- Vegan: Use coconut, almond, or oat milk.
- Sugar-Free: Swap sugar for stevia, monk fruit, or erythritol.
- Nut-Free: Use coconut or rice milk bases.
- Gluten-Free: Most homemade ice cream is naturally gluten-free—just check your mix-ins.
Practical Example: For a vegan, nut-free chocolate ice cream, blend 2 cups coconut milk, 1/2 cup cocoa powder, 1/3 cup maple syrup, and 2 cups ice cubes.
Upgrading Your Ice Cream: Advanced Tips
Ready to go beyond the basics? Try these techniques for gourmet results:
Make A Custard Base
Instead of blending cold ingredients, heat milk, sugar, and egg yolks to make a custard. Chill, then blend with the Ninja for ultra-creamy texture.
Use Stabilizers
Add a pinch of xanthan gum or guar gum for smoother texture and less ice crystallization.
Layer Flavors
Blend two different bases separately (like chocolate and coffee) and swirl together for a marbled effect.
Alcohol For Softness
A tablespoon of vodka, rum, or liqueur lowers the freezing point, keeping ice cream scoopable.
Note: Too much alcohol can make ice cream slushy, so use small amounts.
Ninja Blender Ice Cream For Special Diets
People following keto, paleo, or low-carb diets can still enjoy homemade ice cream. Here’s how:
- Keto: Use heavy cream, almond milk, and erythritol. Add cocoa, vanilla, or nut butters for flavor.
- Paleo: Use coconut milk and honey or maple syrup.
- Low-Calorie: Use non-fat milk, sugar substitutes, and lots of frozen fruit.
Example: For keto vanilla ice cream, blend 2 cups heavy cream, 1 cup unsweetened almond milk, 1/3 cup erythritol, 2 tsp vanilla, 2 cups ice.
Safety Tips When Using Ninja Blender For Ice Cream
Blending frozen ingredients can be tough on machines. Protect your blender and yourself:
- Never force the lid or run the blender when stuck—pause and stir.
- Don’t use boiling hot liquids in a Ninja blender.
- Let the motor cool if making multiple batches.
- Keep hands away from blades at all times.
- Use only freezer-safe containers for storage.
When To Use The Ninja Creami Vs. Regular Ninja Blenders
The Ninja Creami is a special model designed just for ice cream and frozen desserts. It operates differently from classic Ninja blenders.
- With the Creami, you freeze the base in a container, then the machine “shaves” it into ice cream. This creates a very creamy result.
- Regular Ninja blenders blend frozen ingredients directly, which is faster but may have a slightly different texture.
Which to choose? If you love experimenting and want the smoothest texture, the Creami may be worth it. For quick, easy ice cream and multi-purpose blending, a regular Ninja is best.
For more details on the science of homemade ice cream, see the Ice Cream Wikipedia article.
Frequently Asked Questions
How Long Does Homemade Ninja Blender Ice Cream Last In The Freezer?
Homemade ice cream made in a Ninja blender is best enjoyed within 1-2 weeks. After that, it can become icy or lose flavor. For best results, cover tightly and press wax paper or plastic wrap directly onto the surface to minimize ice crystals.
Can I Make Ice Cream In A Ninja Blender Without Dairy?
Yes! Use coconut milk, almond milk, oat milk, or cashew milk as your base. For extra creaminess, use full-fat coconut milk or add soaked cashews. Sweeten as desired and blend with frozen fruit or ice for texture.
Why Is My Ninja Blender Ice Cream Icy Instead Of Creamy?
Icy ice cream usually means not enough fat or too much liquid. Try using heavy cream or full-fat coconut milk, and make sure to blend thoroughly. Freezing too slowly or using large ice cubes can also cause iciness.
What Is The Difference Between Ninja Blender Ice Cream And Ninja Creami Ice Cream?
The regular Ninja blender blends frozen ingredients to make soft or scoopable ice cream quickly. The Ninja Creami requires you to freeze the base first, then it processes into a very creamy texture, closer to store-bought. Both methods are easy, but the Creami is more specialized.
Can I Double The Recipe In My Ninja Blender?
It’s best not to double the recipe unless your blender pitcher is very large. Overfilling can strain the motor and blend unevenly. Make ice cream in batches for best results and to protect your machine.
Making ice cream in a Ninja blender is a fast, fun way to enjoy frozen desserts at home. With simple ingredients, you can create flavors that beat anything in the store. The key is using very cold, quality ingredients, blending in short bursts, and experimenting with flavors and mix-ins. Whether you prefer classic vanilla, vegan options, or wild new combos, the Ninja blender makes it easy. Start with the basics, then customize to your taste. With a little practice, you’ll never run out of delicious ideas for your next ice cream night.