How To Remove Blade From Nutribullet Blender Pitcher
To remove the blade from a Nutribullet blender pitcher, unscrew the blade assembly counter-clockwise while holding the pitcher firmly — it comes off by hand, no tools. Twist the flat blade base about a quarter turn until it releases, then lift it straight out of the cup.
Several things change how easy that is: whether the blade is stuck from dried fruit or seeds, which way you’re turning it, how well you can grip the cup, and how hard you tightened it last time. Each one needs a slightly different grip.
If the blade won’t budge, stop pulling. Run hot tap water over the outside of the blade base for a minute, then try again. The warm water softens and dissolves the dried residue that has glued the threads. Never reach your fingers into the cup while the blade is on — that’s how people cut themselves.
Grip the tall cup by its side, not the rim. On the short cup, press the base flat against your palm and turn the pitcher instead of the blade.
If it still resists, fill the cup with warm water and let it sit for ten minutes. Don’t use pliers. You’ll crush the plastic collar, and a cracked collar leaks from then on.
Who this page is actually for
Three kinds of people type this question, and they don’t need the same answer. The first owns a NutriBullet they’ve used for months and has never once taken the blade off — they want to know if it even comes apart, and the answer is yes.
The second has a blade that won’t budge after a thick smoothie sat in the cup overnight, and they’re worried about breaking something. The third is cleaning properly for the first time after reading that the blade base traps old food, and they want the full routine.
This page serves all three, but it assumes one thing: you’re working by hand, on a standard NutriBullet pitcher or cup, with the blade assembly still screwed onto the container. If your model has a different locking system, the steps below won’t match and you should check your model’s manual first.
It’s not for anyone trying to open the blade housing itself, replace a bearing, or fix a blade that spins loosely inside its base. That’s a sealed part on most models, and Nutribullet tells you to replace the whole blade assembly rather than repair it. If you’re there, buy a new blade base — don’t take the old one apart.
What actually decides how hard this is
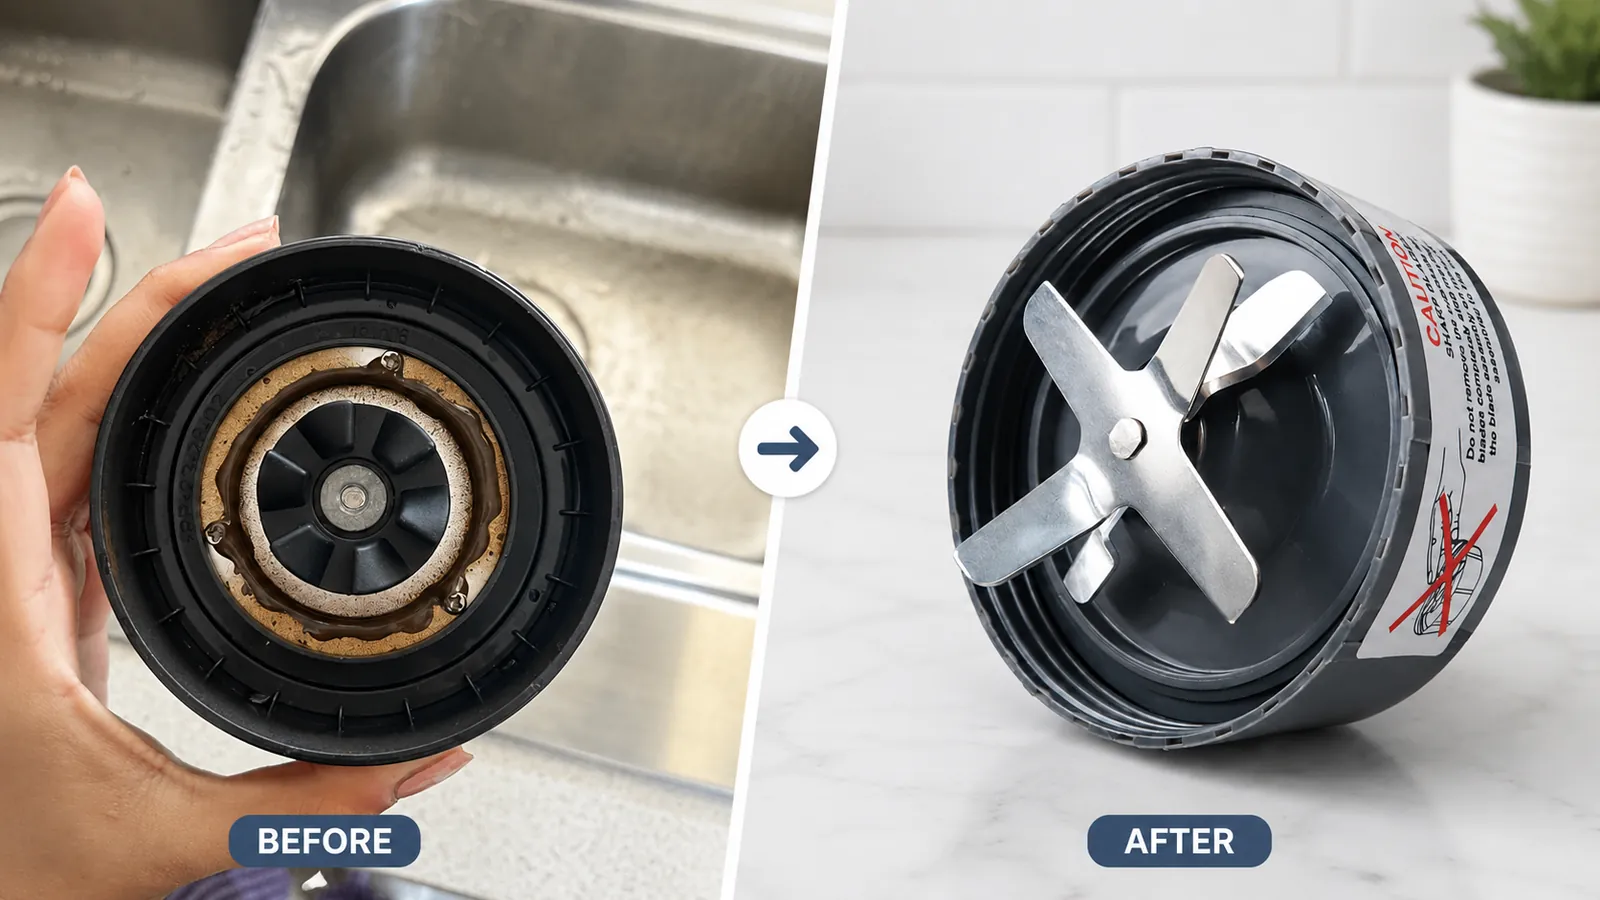
The single biggest factor is dried residue in the threads. Sugary smoothies, nut butters, and seed-heavy blends leave a sticky film that sets like glue once it dries. A blade that came off easily last week can feel welded on today. Run warm water into the cup and let it sit for a few minutes before you twist — that alone solves most stuck blades.
The second factor is which way you’re turning it. The blade base unscrews counter-clockwise, same as a normal jar lid. People who’ve been twisting the wrong way for a minute or two often assume it’s stuck when it was never tight. Look at the blade from above and turn the flat base to the left.
Third is your grip on the pitcher. The cup is smooth plastic and your hand slides when you twist hard. A rubber band around the cup, or a dish towel, gives you enough friction to hold it still while the other hand turns the blade. This matters most on the tall 32-ounce cup, which has more surface to grip.
Fourth is over-tightening when you put it back. Hand-tight is enough — the seal does the work, not the torque. If you crank it down hard every time, you’re creating tomorrow’s stuck blade. This is the one people get wrong most often, and it costs them a wrestle every single morning.
Removing the blade, step by step
Unplug the motor base. Pull the cord from the wall socket. You’re handling a sharp blade next, and you don’t want the unit live. The sign it worked: no light on the base.
Empty the cup. Pour or spoon out whatever’s inside into the sink or a bowl. If it’s thick, add 1 cup of warm water, screw the blade back on, and pulse twice on the base to loosen it. Then pour it out.
Fill with warm water and let it sit. Add about 2 cups of warm — not boiling — water and leave it 3 to 5 minutes. Boiling water can warp the plastic cup and soften the gasket. The sign it worked: the blade base turns freely when you twist it.
Grip the cup with a towel or rubber band. Wrap a dish towel around the middle of the cup, or stretch a rubber band around it twice. Hold it in your non-dominant hand, blade side up.
Turn the blade base counter-clockwise. Put your other hand flat on the blade base and twist left, about a quarter turn. You’ll feel it release and stop resisting.
Lift the blade straight up and out. Keep it level so drips don’t run down your wrist. The sign it worked: the blade base comes free with the gasket still seated in it.
Wash both parts separately. Rinse the blade under warm running water, then wash the cup with dish soap and a soft sponge. Never put your fingers near the blade — use a bottle brush or hold the blade base by its outer rim.
Dry and reassemble. Let both parts air-dry upside down on a rack. Screw the blade back on hand-tight — a quarter turn past snug, no more.
The judgement call is the gasket. That thin rubber ring sits inside the blade base, and if it’s cracked, stretched, or missing, the cup will leak no matter how tight you screw it. Check it every time you take the blade off. If it’s damaged, replace the blade assembly — a new gasket alone usually isn’t sold separately.
Which situation are you in?
| Your situation | What to do | What it takes | What to watch for |
|---|---|---|---|
| Blade came off easily | Rinse and wash both parts | 2 minutes | Gasket still seated |
| Blade stuck after drying | Soak in warm water 3-5 min | 5-10 minutes | Don’t use boiling water |
| Cup is slippery | Wrap a towel or rubber band | 1 minute | Firm grip, no force |
| Gasket looks cracked | Replace blade assembly | Cost of new blade | Check before each use |
| Blade spins loosely in base | Replace, don’t repair | Cost of new blade | Sealed part, not fixable |
| You need it clean fast | Warm water, 2 drops soap, pulse | 30 seconds | Rinse before drinking |
What careful hands do differently
They prep before they twist
Anyone who’s done this a few times rinses the cup the moment they finish blending, before the residue sets. Warm water and 2 drops of dish soap, screwed back on, pulsed twice on the base — that’s a 30-second habit that means the blade never gets stuck in the first place. It’s not about being tidy. It’s that dried banana and chia seeds are what actually fuse the threads.
They check the gasket and the threads
Before screwing the blade back on, run a finger around the gasket to feel for cracks or a stretched edge, and look at the threads for grit. A gasket can lose its shape over time, especially with repeated exposure to high heat.
If the blade base wobbles when you seat it, stop — that’s a sign the gasket isn’t sitting flat, and it’ll leak. Experienced users also skip the dishwasher for the blade base on most models and wash it by hand, because heat is hard on the seal.
When it won’t come off
| What you notice | What it usually means | What to do first | How to stop it happening again |
|---|---|---|---|
| Blade won’t turn at all | Dried residue in threads | Soak in warm water 5 min | Rinse right after blending |
| Blade turns but stays on | You’re turning it the wrong way | Turn counter-clockwise | Mark the direction once |
| Cup slips in your hand | Smooth plastic, no grip | Wrap a towel around it | Keep a rubber band nearby |
| Water leaks when blending | Gasket cracked or missing | Replace blade assembly | Check gasket each time |
| Blade feels loose in base | Internal seal has failed | Replace the assembly | Don’t try to open it |
What the maker says
Nutribullet generally recommends hand-washing the blade assembly and cups in warm soapy water, and many models’ manuals state the blade base and cups aren’t dishwasher-safe — check your model’s manual, because some versions differ. The company typically sells replacement blade assemblies rather than individual gaskets or blades, so a failed seal usually means a new base.
On safety, the U.S. Consumer Product Safety Commission maintains recall records for blenders and small kitchen appliances. If your unit is old or was bought secondhand, check the CPSC’s recall database by brand and model before you keep using it.
One hard line: never try to open the blade housing to reach the bearing or the shaft. It’s sealed, it’s not a user-serviceable part, and the blades inside are sharp on both sides. If the assembly is damaged, replace it. That’s the whole repair.
What this costs you in time and money
Taking the blade off costs nothing but a few minutes — 2 minutes if it’s clean, up to 10 if it’s stuck and needs soaking. The real cost shows up when things go wrong. A replacement blade assembly is the main expense, and the price varies by model and where you buy it, so check Nutribullet’s own site or the retailer listing for your exact model rather than trusting a number here.
What moves that cost up: buying a full new pitcher set when only the blade failed, or replacing the whole machine when an inexpensive replacement part would’ve fixed it. What moves it down: rinsing immediately, hand-washing the blade base, and checking the gasket before it cracks. Time-wise, the 30-second rinse habit saves you the 5-to-10-minute soak several times a week.
The mistake that costs the most is diagnosis by guesswork. If the motor still spins and only the blade wobbles or leaks, you need the blade assembly. If nothing spins at all, the base is the problem and a new blade won’t help.
Buy the part by model number, not by the name on the front. Two machines that look identical on the shelf can take different blades, and a return plus a second wait is a week without your smoothies.
If you use the machine daily, keep one spare blade assembly on hand. Shipping time, not price, is what actually keeps you waiting.
Keeping the blade and cup in good shape
Store the blade assembly screwed onto the cup, not loose in a drawer where the blades can nick other things or your hand. If you keep it off, set it blade-side down on a shelf where nothing can fall on it. Hand-wash the blade base with warm water and dish soap, and let it air-dry upside down so water doesn’t pool in the threads.
The sign it needs attention again is simple: a leak at the base while blending, or a blade that wobbles when you seat it. Both point to the gasket. Replace the blade assembly rather than tightening harder — over-tightening just makes the next removal harder and doesn’t fix a worn seal. You don’t need to start over with a new pitcher; the blade base is the part that wears.
When this isn’t the right fix
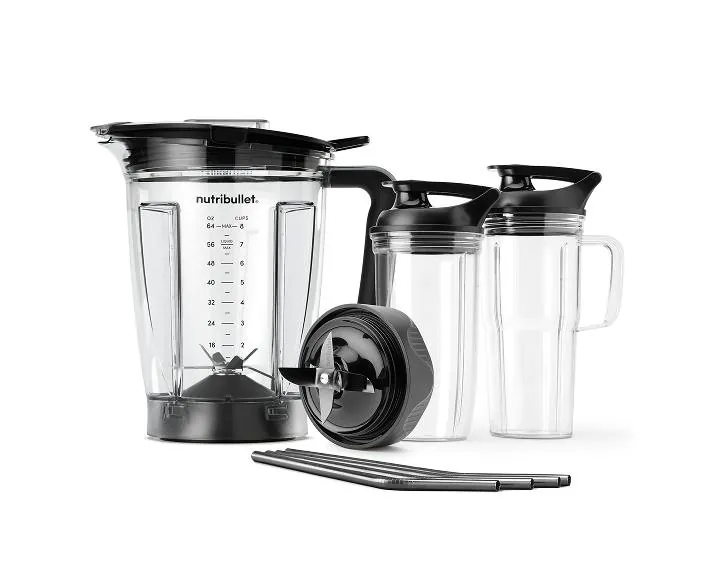
If your blade assembly is cracked, bent, or the blades have chips, stop. Don’t try to remove and reuse it — replace the whole assembly, because a damaged blade can shed metal into your smoothie. Nutribullet sells replacements by model.
A single small nick on one blade is different from a crack. If the blade still sits flat and spins true, you can keep using it and watch for change. Any wobble, any crack in the base, any missing piece of metal, and it goes in the bin.
If your motor base smells hot, sparks, or won’t run, that’s not a blade problem and this page won’t help. Unplug it and contact Nutribullet support or a qualified appliance technician. Don’t open the motor housing yourself — it holds a capacitor that can carry a lethal charge even when unplugged.
And if your unit is under warranty, check the terms before you buy parts. Some damage from forcing a stuck blade isn’t covered, and a support call may get you a replacement cheaper than paying for one.
One more thing worth knowing before you order: blade assemblies are matched to cup size and motor wattage, so the part that fits a 600-watt base may not fit a 900-watt one. Have your model number ready when you buy.
Frequently asked questions
Can you remove the blade from a Nutribullet pitcher?
Yes. The blade assembly unscrews from the cup by hand — turn the flat base counter-clockwise about a quarter turn and lift it out. No tools are needed on standard models. If it won’t turn, soak it in warm water for a few minutes first.
Why is my Nutribullet blade stuck?
Dried smoothie residue in the threads is the usual cause. Sugary and seed-heavy blends set hard once they dry. Fill the cup with about 2 cups of warm water, let it sit 3 to 5 minutes, then twist counter-clockwise. Boiling water can warp the plastic, so keep it warm.
How long should I soak the blade to loosen it?
About 3 to 5 minutes in warm water is enough for most stuck blades. If it sat for days with dried residue, give it 10 minutes. The sign it’s ready: the threads feel slick when you touch them. Longer soaking doesn’t hurt the plastic.
Is it safe to put the Nutribullet blade in the dishwasher?
No, not on most models. Nutribullet’s guidance is to hand-wash the blade assembly in warm soapy water. Dishwasher heat can damage the gasket that seals the cup. Check your model’s manual, because a few newer versions differ. Hand-washing takes about a minute.
What happens if the gasket is missing?
The cup will leak at the base while blending, and the blade base may feel loose when seated. The gasket isn’t usually sold on its own, so you’ll need a new blade assembly. Check the gasket each time you remove the blade so you catch damage early.
Does it matter which way I turn the blade?
Yes — counter-clockwise, the same as a normal jar lid. Turning it the wrong way feels stuck when it isn’t. If it won’t budge after a minute, you’re probably turning the wrong direction. Look down at the blade base and turn left.
How often should I take the blade off to clean it?
Every time you use it, if you can. A quick rinse right after blending takes 30 seconds and stops residue from setting. A deeper hand-wash of the blade base once a day keeps the threads and gasket in good shape. Let both parts air-dry.
Can I replace just the blade, not the whole base?
No. On Nutribullet models the blade is sealed inside the base, and the company sells the complete assembly as one part. Don’t try to open the base to swap a blade — it’s not user-serviceable and the blades are sharp on both sides.
Conclusion
Get a towel or rubber band in your hand and try the counter-clockwise twist now — most blades come free in under a minute, and the soak only matters if it’s been sitting. Expect the base to lift out cleanly with the gasket still seated inside it. If it still won’t move after a 10-minute warm soak, or if you see cracks in the base or a wobbling blade, stop twisting and order a replacement assembly instead.