How To Use Immersion Blender Without Scratching Surfaces
Using an immersion blender can feel like a small kitchen victory—smooth soups, creamy sauces, and quick smoothies, all in minutes and with less cleanup than a countertop blender. But many cooks, both new and experienced, worry about scratching their pots, pans, or mixing bowls. If you’ve ever seen gray marks at the bottom of your favorite saucepan after blending, you know the frustration. The good news is, with the right techniques and a few simple tools, you can use your immersion blender without scratching your cookware.
In this guide, you’ll find practical advice to blend safely, useful tips you may not know, and solutions for common mistakes. Whether you’re new to immersion blenders or want to protect a pricey nonstick pan, you’ll learn how to blend with confidence—and keep your kitchen tools looking new.
Why Immersion Blenders Scratch Surfaces
Understanding why scratches happen is the first step to avoiding them. Most immersion blenders have stainless steel or metal blades and a protective guard (also called the bell or shield) around the blade. While the blade rarely touches the pot directly, the guard often does, especially when you move or tilt the blender.
Some guards have rough edges or small metal feet that scrape the bottom or sides of your cookware. Nonstick, ceramic, and enameled surfaces are especially at risk, but even stainless steel pots can show marks if you’re not careful. The risk increases if:
- You press down hard while blending
- The guard has sharp or unfinished edges
- You blend in thin or lightweight containers
It’s not just about the material, though. The way you hold and move the blender, the type of food you’re blending, and even the shape of your cookware all play a role.
Choosing The Right Cookware For Immersion Blending
Not all pots and bowls are safe for use with an immersion blender. Some materials resist scratches better than others.
| Cookware Material | Scratch Resistance | Best for Immersion Blending? |
|---|---|---|
| Stainless Steel | High | Yes |
| Nonstick (Teflon) | Low | With Caution |
| Enamel-Coated | Medium | Yes, Gently |
| Glass | Medium | Yes |
| Ceramic | Low | With Caution |
| Plastic | Low | Not Recommended |
Stainless steel is the safest and most durable for immersion blending. Glass is also a good choice, but be careful of sudden temperature changes, which can crack some types. Nonstick and ceramic pots are easiest to scratch, so extra care is needed.
If you want to blend in a nonstick or ceramic pot, always use a protective layer (see next sections) or blend in a separate, sturdy container.
Features To Look For In An Immersion Blender
Not every immersion blender is designed with your cookware in mind. If you’re shopping for a new one, or want to know if your current model is up to the job, here are features that matter:
- Blade Guard Design: Look for a rounded, smooth guard without sharp feet or rough edges. Some brands add plastic or silicone coatings for extra protection.
- Material: Stainless steel is durable but can scratch. Some blenders have plastic guards, which are gentler but may stain or crack.
- Removable Blending Shaft: Easier to clean and check for rough edges.
- Variable Speed: Lets you start slow, reducing splashing and accidental pressure.
- Included Accessories: Some come with blending cups designed to fit the blade guard perfectly.
Before buying, check user reviews. Many users mention scratches—if you see a pattern, choose another model. If your blender is old, run your finger around the guard to check for sharp spots.
How To Prepare Cookware For Safe Blending
Protecting your pots and bowls before you start blending makes a big difference. Here’s how to get your cookware ready:
1. Choose The Right Container
If you’re blending hot soups or sauces, use a heavy-bottomed stainless steel or glass pot. For cold foods or smoothies, a sturdy glass or stainless steel mixing bowl works well.
Never use thin plastic bowls—they scratch easily and can even be damaged by the blender’s power.
2. Add A Protective Layer
For extra protection, line the bottom of your pot with a silicone baking mat, silicone trivet, or even a folded kitchen towel (for cold foods only). These layers act as a barrier between the blender guard and your cookware.
Example: When blending a hot soup in an enameled Dutch oven, place a round silicone trivet at the bottom before using the blender.
3. Avoid Empty Or Shallow Blending
Always make sure there’s enough food or liquid to cover the blades and most of the guard. Blending in a nearly empty pot increases the risk of the guard scraping the surface.
A good rule: The blender’s guard should be at least half-submerged.
4. Check For Damage
If your pot or bowl already has scratches, avoid using an immersion blender in that spot. Scratches can get worse and be harder to clean.

Credit: prudentreviews.com
Correct Techniques To Avoid Scratching
Technique matters as much as equipment. Here are the most effective ways to use your immersion blender safely:
Hold The Blender Vertically
Keep the blender shaft as straight as possible. Tilting the blender increases the chance the guard will press against the sides or bottom.
- Start with the blender fully submerged, then turn it on.
- Move the blender up and down gently rather than side to side.
Don’t Push Down Hard
Let the blender’s weight do most of the work. Pressing down adds force between the guard and the pot. If you need more blending power, use the pulse or higher speed setting instead.
Keep The Blender Moving
Blend in short bursts, moving the blender around the pot but always with a gentle touch. Avoid scraping the guard against the bottom.
- For smooth soups, blend in the center, away from edges.
- For thick foods, move the blender slowly to avoid suction.
Start Slow, Then Increase Speed
Using a high speed right away can create suction, pulling the blender into the pot and increasing scratch risk. Start on a low setting, then speed up as needed.
Use A Circular Motion For Even Blending
Move the blender in small circles above the bottom, lifting slightly as you move. This keeps the guard from dragging.
Pause Before Removing
Always turn off the blender before lifting it out of the pot. This prevents splattering and accidental contact with surfaces.
Non-Obvious Insight: Many scratches happen when removing the blender while it’s still spinning. Always stop first.
Practical Accessories To Prevent Scratching
A few inexpensive accessories can make immersion blending safer for your cookware.
Silicone Blade Guards
Some brands sell silicone covers that fit over the blade guard. These are heat-resistant, soft, and food-safe. If your blender doesn’t come with one, universal versions are available online.
Silicone Baking Mats Or Trivets
Placing a silicone mat at the bottom of your pot works for most blending tasks. Make sure it’s fully submerged in the food or liquid to avoid splattering.
Dedicated Blending Jars
Some immersion blenders come with a tall blending cup or jar. These are designed to fit the blade guard perfectly and are less likely to scratch.
Blending Shields
A blending shield is a ring that sits between the guard and the pot, creating a buffer. These are less common but can be found for some brands.
Kitchen Towels
For cold foods or batters (not hot liquids), a folded towel at the bottom of a bowl can protect against scratches. Never use towels for hot blending—they can scorch or stick.
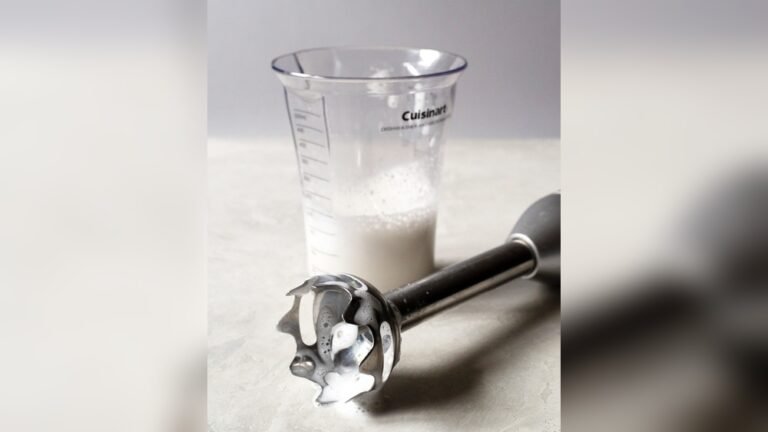
:max_bytes(150000):strip_icc()/sea-primary-immersion-blenders-sep-24-rkilgore-0658-89167e1e4bd44afb93d9c847674b09e4.jpeg)
Credit: www.seriouseats.com
Common Mistakes That Lead To Scratching
Even experienced cooks make small errors that cause scratches. Here’s what to watch out for:
- Using the Wrong Container: Blending in nonstick or ceramic pots without protection is the most common mistake.
- Pushing Too Hard: Applying extra force doesn’t speed up blending—it just increases friction.
- Blending With Too Little Food: If the guard isn’t covered, it will scrape the bottom.
- Ignoring the Guard’s Condition: Over time, the metal can develop rough spots. Check regularly and sand gently if needed.
- Letting the Blender Run While Lifting: Always turn off the blender before moving it out of the food.
- Not Cleaning Immediately: Food residue can harden on the guard, making it rougher and more likely to scratch next time.
- Not Using Accessories: Skipping simple tools like silicone mats or guards can lead to unnecessary damage.
Cleaning And Maintaining Your Immersion Blender
A clean, well-maintained blender is less likely to scratch. Here’s how to care for your tool:
Clean After Every Use
Disassemble the blender (if possible) and wash the blade guard, shaft, and accessories in warm, soapy water. Use a soft brush to remove food from crevices.
Avoid abrasive pads—they can roughen the guard and increase scratch risk.
Inspect For Damage
Run your finger around the edge of the guard and blade. If you feel any roughness, use fine sandpaper (at least 400 grit) to gently smooth the surface.
Dry Thoroughly
After washing, dry all parts completely. Water left in the guard can rust or cause buildup.
Store Properly
Keep your immersion blender in a dedicated spot, not tossed in a drawer with other tools. This prevents accidental dings or rough edges.
Replace Worn Parts
If the blade guard, shaft, or accessories show deep scratches or chips, replace them if possible. Many brands sell replacement parts.
Real-world Examples And Expert Tips
Learning from others’ experience can be valuable. Here are some real examples and advice from cooks and kitchen pros:
Example 1: A home cook used a powerful immersion blender in her nonstick soup pot. She pressed down hard to break up cooked vegetables, and after cleaning, found gray marks at the bottom. She switched to using a glass mixing bowl for blending and never saw marks again.
Example 2: A professional chef blends soups directly in stainless steel stockpots. He uses a silicone mat at the bottom and always starts at low speed, increasing only as needed. After years, his pots have no visible scratches.
Expert Tip: If you’re blending in a nonstick or enameled pot, pour the soup or sauce into a stainless steel or glass bowl for blending. Then return it to the pot to finish cooking. It adds a step but saves your cookware.
Expert Tip: Some cooks recommend sanding the blade guard lightly with ultra-fine sandpaper before first use, especially if it feels sharp or rough. This simple step can prevent most scratches.
Non-Obvious Insight: Many scratches are caused not by the blade but by small metal “feet” on the guard. If your blender has these, cover them with tiny silicone caps or food-safe heat-resistant tape.
When To Blend In The Pot (and When Not To)
Blending directly in the pot is convenient, but it’s not always the best choice. Here’s when it works—and when to use a separate container instead.
Blend In The Pot When:
- You have a stainless steel or thick glass pot
- The blade guard is smooth and fits the pot well
- You’re blending soups or sauces with enough liquid to cover the guard
Use A Separate Container When:
- Your pot is nonstick, ceramic, or enameled, and you don’t have protection
- The pot is lightweight or thin (easier to scratch)
- You’re blending thick foods (like hummus or mashed potatoes) that need extra force
Best Practice: If in doubt, transfer the food to a safe container for blending, then return it to the original pot.
Comparing Immersion Blender Models For Scratch Safety
If you’re shopping for a new immersion blender, here’s a comparison of popular models and their suitability for scratch-prone cookware.
| Brand & Model | Blade Guard Material | Scratch Protection | Best For |
|---|---|---|---|
| Breville Control Grip | Stainless Steel (nonstick safe) | High (with silicone mat) | All-purpose |
| Braun MultiQuick 5 | Stainless Steel (soft edges) | Medium | Soups, sauces |
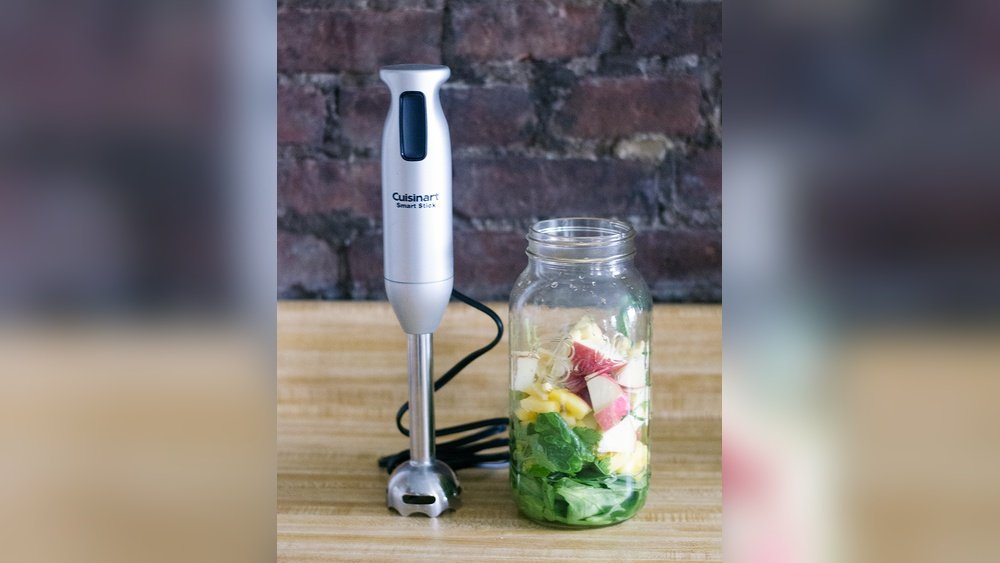
| Cuisinart Smart Stick | Plastic | High | Nonstick pots |
| KitchenAid Variable Speed | Stainless Steel (removable guard) | Medium | Baking, smoothies |
| All-Clad KZ750D | Stainless Steel (large guard) | Medium | Large batches |
Tip: Look for reviews that mention “does not scratch” or “safe for nonstick.” Some brands advertise this as a feature.
Useful Kitchen Habits To Protect Cookware
Developing a few simple habits can keep your pots and bowls looking new, even with regular immersion blender use.
Always Rinse Immediately
Right after blending, rinse both the blender and the pot. This prevents food from sticking and becoming harder (and rougher) to clean.
Use Non-metal Tools For Scraping
When transferring blended food, use silicone spatulas or wooden spoons instead of metal. This avoids extra scratches.
Rotate Your Cookware
If you blend often, rotate between different pots and bowls to prevent wear in one spot.
Check For Residue
After blending, check the bottom of your pot for any hidden food bits. Dried-on food can be rough and increase scratching next time.
Store Properly
Stack pots and bowls with a soft liner (like a kitchen towel or paper towel) between them. This prevents scratches from stacking.
What To Do If Your Cookware Gets Scratched
Sometimes, even with care, scratches happen. Here’s how to handle them:
- Stainless Steel: Minor scratches can be buffed with a non-abrasive cleaner. Deep scratches are mostly cosmetic.
- Nonstick: If you see deep scratches, stop using the pot for food safety. The coating can flake off into food.
- Enameled/Ceramic: Small scratches are usually safe, but chips or cracks can harbor bacteria. Replace if needed.
- Glass: Minor scratches are safe, but chips can break the bowl.
If the scratch is new, try gently rubbing with baking soda and a damp sponge. For nonstick or ceramic, avoid abrasive pads.
Safety Tips For Using Immersion Blenders
Protecting your cookware is important, but so is protecting yourself. Here are some key safety tips:
- Always unplug the blender before cleaning or changing accessories.
- Never immerse the motor (handle) in water—only the shaft and guard.
- Be careful of hot splatter, especially when blending soups.
- Keep fingers away from the blade, even when off.
- Store out of reach of children.
The Environmental Impact: Why Scratches Matter
Scratching your cookware isn’t just a cosmetic issue. Damaged nonstick and ceramic pots can release tiny particles into food, which isn’t healthy. Replacing scratched pots adds to landfill waste and costs money.
By learning to blend safely, you protect your health, save money, and reduce your environmental footprint.
When It’s Time To Replace Your Immersion Blender
Even the best-maintained blender will eventually wear out. Here are signs it’s time for a replacement:
- The blade guard is bent, chipped, or rough and can’t be smoothed.
- The motor is weak or inconsistent.
- Accessories no longer fit securely.
- Deep scratches or rust on the shaft or guard.
A new blender with improved design can be a smart investment if you cook often.
Summary: Blending Without Scratching Is Possible
With the right equipment, habits, and techniques, you can use your immersion blender every day—without leaving a trace on your favorite pots and bowls. Choose the right container, use protective accessories, blend gently, and keep your tools in top shape.
Remember, convenience doesn’t have to come at the cost of your cookware.
If you want to learn more about different types of cookware and their care, check out this helpful resource from Consumer Reports.
Frequently Asked Questions
Can I Use An Immersion Blender In A Nonstick Pot?
Yes, but only with extra care. Use a protective silicone mat or blend in a separate container. Avoid pressing down or dragging the guard on the surface.
How Do I Know If My Immersion Blender Will Scratch My Cookware?
Check the blade guard—if it’s metal and feels rough or has sharp feet, it can scratch. Look for smooth, rounded guards or those with a silicone or plastic coating.
Is There A Way To Repair Scratches From An Immersion Blender?
Minor scratches on stainless steel can be buffed out with a non-abrasive cleaner. For nonstick or ceramic, deep scratches can’t be repaired and may be unsafe for cooking.
What Foods Are Safest To Blend Directly In The Pot?
Soups, sauces, and purees with enough liquid to cover the blender guard are safest. Avoid thick foods that require force or scraping.
Are There Immersion Blenders Made Just For Nonstick Cookware?
Some models have plastic or silicone-coated guards designed for nonstick pots. Always read the manufacturer’s instructions and check reviews to confirm safety.

Credit: www.amazon.com