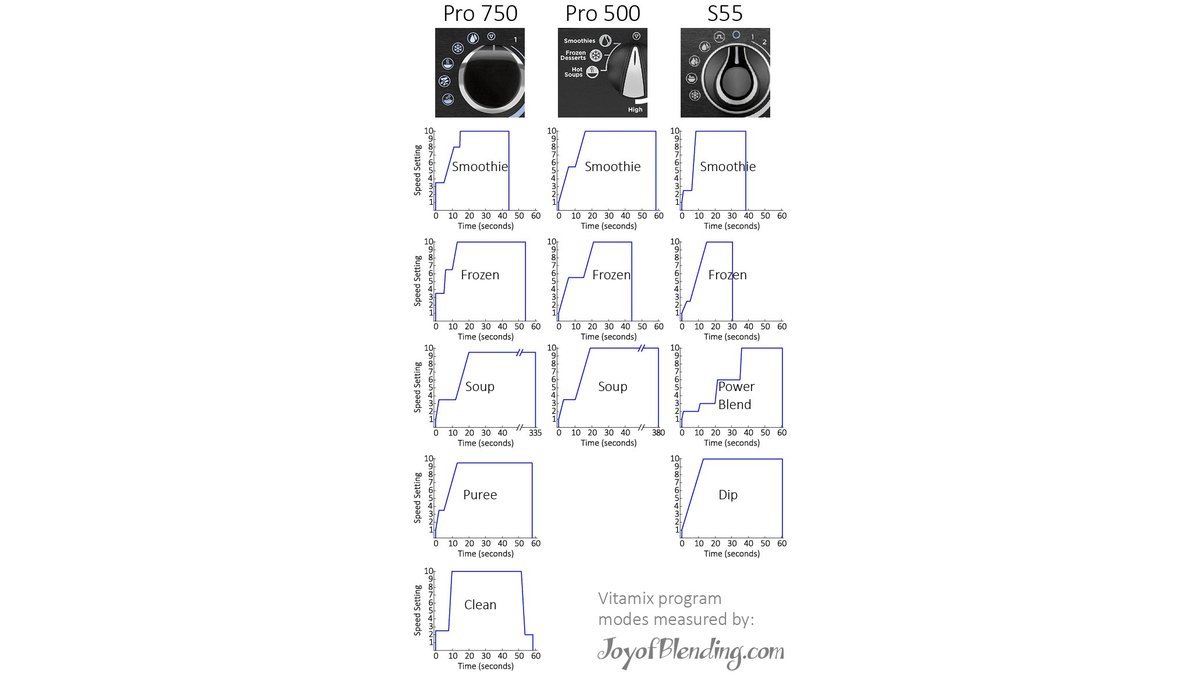
How To Program Vitamix Blender: Create Custom Timers
To program a vitamix blender, you create programs by using the timer and pulse controls on the base unit itself. This method lets you save time for repetitive tasks without guessing.
The exact steps depend on your model’s interface. Older models use a mechanical dial, while newer ones have digital touchpads. You’ll need to learn the rhythm of short pulses to build texture. It takes practice to get it right, but it’s simple once you know the pattern.
Who should program their vitamix blender
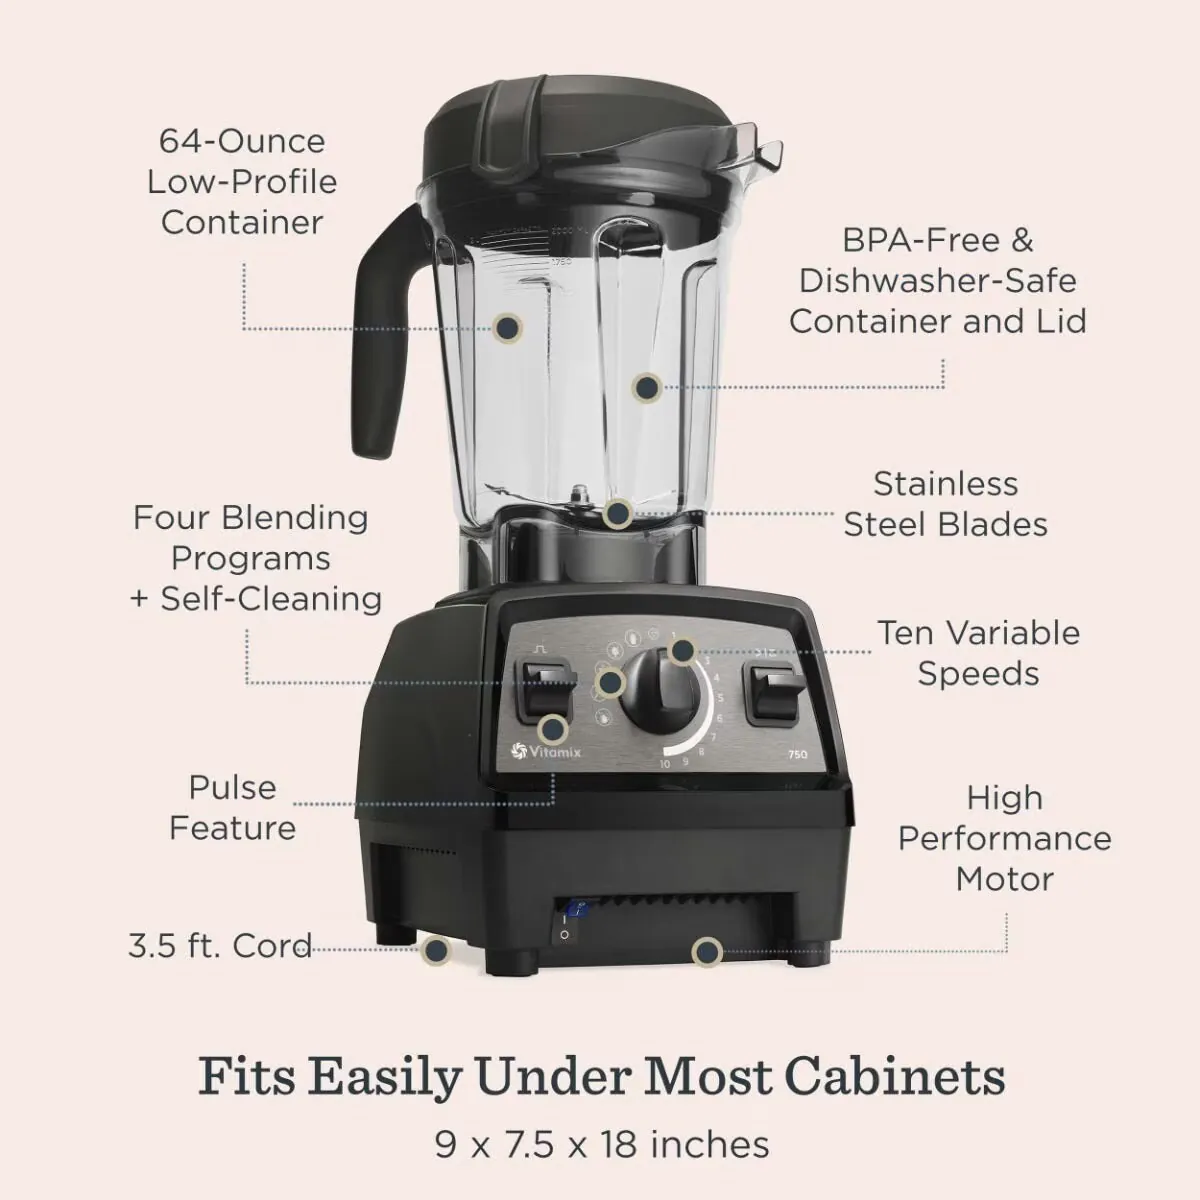
This page is for owners of standard Vitamix blenders who want consistency in their daily routine. If you make smoothies every morning, this method saves you from measuring ingredients twice. You’ll find the same texture in your oatmeal base or nut butter every time.
It also helps parents who need quick, safe lunches for kids. Blending vegetables into soup or purees becomes faster when you skip the trial-and-error phase. You just hit the buttons you memorized.
However, if you own a Vitamix with a pre-programmed setting, this guide isn’t for you. Those machines handle the timing automatically. You don’t need to press anything except start. Stick to the preset buttons instead of trying to override them manually.
Professional chefs might already know these rhythms. They blend hundreds of batches a day. For them, muscle memory replaces any need for a guide. But for home cooks, writing down the sequence is key.
The rest of this article assumes you have a manual control model. We focus on the timer knob and pulse lever.
What decides the outcome
Three things change how your blend turns out. First, the speed dial position matters most. Start low and go high slowly. Jumping to max speed too early creates air pockets. Your food won’t mix evenly.
Second, the liquid amount is critical for texture and consistency. Too little liquid makes the motor struggle. Too much makes it watery. The ideal ratio depends on what you’re making. Hard veggies need more water than soft fruits. Check your container’s fill line before starting.
Third, the pulse technique shapes texture. Pulses break down large chunks quickly. Without them, you get uneven bites. Experienced users pulse three times before turning up the speed. Beginners often forget this step.
People often ignore the lid seal. A loose lid lets steam escape. This cools the blades and slows blending. Always push the lid down firmly. Listen for the click. It’s a small detail that affects heat buildup.
The biggest mistake is rushing the speed dial. Turning it past 5 instantly is risky. It splatters contents everywhere. Go slow. Let the vortex form naturally. This takes seconds but ensures safety.
Finally, ingredient temperature plays a role. Frozen fruit blends slower than fresh. You may need extra pulses. Room-temperature items move faster. Adjust your timing based on what’s in the container. Cold stuff needs patience. Warm stuff moves quickly. Know your ingredients well.
Step by step to master manual blending
Add all ingredients to the container. Start with liquids first. Then add soft foods. Place hard items on top last. This order helps the blades catch everything smoothly. Don’t overfill past the max line.
Secure the lid tightly. Press down until you hear a snap. Check the tamper tool fits through the lid hole. If it doesn’t, remove some ingredients. A tight seal prevents leaks during high-speed spinning.
Set the variable speed dial to 1.
Use the pulse lever three times. Tap the pulse button briefly each time. This breaks up large chunks. It ensures even distribution before increasing speed. You should see a swirling motion forming inside.
Slowly turn the speed dial up. Let the mixture settle at each level. This gradual increase creates a smooth vortex. It pulls ingredients toward the center blades efficiently.
Continue increasing speed to 10. Once you reach maximum speed, let it run for the desired time. Watch the texture closely. Stop when it looks uniform. Use the tamper tool if needed. Push food down safely without stopping the machine.
Turn the speed dial back to 1. Switch off the power. Wait for the blades to stop completely. Open the lid carefully. Steam might escape. Use a spoon to check consistency. Adjust if necessary by adding more liquid or ice.
Clean immediately after use. Add warm water and a drop of soap. Run on high speed for 30 seconds. Rinse thoroughly. This keeps the blades sharp and prevents residue buildup. Store the container upside down to dry.
The judgment call here is knowing when to stop. Visual cues matter more than timers. Look for a smooth, glossy surface. If lumps remain, pulse again. Don’t guess. Trust your eyes.
The variations at a glance
Different ingredients require different approaches. Here is how to adjust for common cases. Each row shows the situation and the specific action needed.
| Situation | What to do first | Time/Cost/Effort | Watch for |
|---|---|---|---|
| Frozen berries | Pulse 5 times before speed | Low effort | Ice shards remain |
| Nut butter | Start low, pause often | High effort | Motor overheats |
| Leafy greens | Blend wet first, then dry | Medium effort | Unblended stems |
| Hot soup | Vent lid slightly | Medium risk | Steam burns |
| Thick dough | Use tamper frequently | High effort | Motor strain |
| Soft fruits | Speed 1 to 5 quickly | Low effort | Air bubbles form |
| Hard roots | Cube small, add water | Medium effort | Uneven chunks |
Adjust your technique based on what’s inside. Harder items need more prep. Softer items blend fast. Always prioritize safety over speed.
What separates good results from poor ones
Experienced users know the sound of a healthy vortex. It hums steadily. Poor blends make gurgling noises. This means air is trapped. Beginners often panic and stop. Pros keep going slowly.
Preparing ingredients correctly
Cut hard veggies into cubes. Smaller pieces blend faster. Whole carrots jam the blades. Peel skins if they’re thick. Kiwi and pineapple have tough centers. Remove them first. This reduces strain on the motor.
Liquid ratios are critical too. Add enough to cover the blades. Find the sweet spot for your recipe. Test small batches first.
Timing the speed transitions
Slow increases create emulsions. Fast jumps create separation. Oil and vinegar separate if mixed too quickly. Start at speed 1. Move to 5 slowly. Hold there for ten seconds. Then go to 10. This builds stability.
Use the tamper wisely. Push food down gently. Don’t force it against the blades. This damages the plastic. Keep the tool moving in circles. It guides ingredients into the path of the blades. Patience yields smoother textures.
What goes wrong, and what to do
Mistakes happen during blending. Here is how to fix them quickly. Each issue has a clear cause and solution.
| What you notice | What it usually means | What to do first | How to stop it happening again |
|---|---|---|---|
| Loud grinding noise | Blades hitting hard chunk | Stop immediately | Cut ingredients smaller |
| Liquid leaking out | Lid not sealed tight | Turn off, reseat lid | Check rubber gasket wear |
| Food stuck on sides | Not enough liquid added | Stop, add water | Increase liquid ratio next |
| Motor smells hot | Overworking the motor | Let cool down | Take breaks between blends |
| Uneven texture | Speed increased too fast | Pulse to mix further | Increase speed gradually |
| Bitter taste | Over-blending nuts | Stop earlier next time | Watch color change closely |
| Vibration shaking | Container not locked | Re-lock container base | Ensure click sound is heard |
Fix issues before they worsen. Small adjustments prevent big problems. Listen to your machine. It tells you when something is wrong.
The rules that apply
Vitamix warranties cover defects, not misuse. Read the manual for limits. Most containers hold up to 64 ounces. Don’t exceed this volume. Overfilling strains the motor.
Electrical safety is paramount. Plug directly into a wall outlet. Avoid extension cords. They can overheat. Ground the appliance properly. Never submerge the base in water. Only wash the container.
Food safety rules apply too. Cooked foods must be cooled slightly before blending. Hot liquids expand. Steam pressure can blow lids off. Vent the lid if blending hot soups. Let solids cool to room temp.
Local electrical codes vary by region. Check your home’s voltage. Vitamix units typically run on 120V in the US. In Europe, they use 230V. Buy the correct model for your country. Using the wrong voltage destroys the motor.
Always follow the manufacturer’s cleaning instructions. Use mild soap. Avoid abrasive sponges. They scratch the container. Scratches harbor bacteria. Clean after every use. This extends the life of your blender significantly.
What it costs you
Blending costs very little relative to the alternative of buying prepared meals. Electricity usage is minimal. Running a Vitamix for five minutes uses less than one cent. Water for cleaning is cheap. Soap costs pennies per batch. The machine itself is the only significant upfront expense. You buy it once, and it lasts for years.
Time is the real cost. Mastering the technique takes practice. Expect three failed attempts before success. Each failure wastes ingredients. Smoothie mistakes mean thrown-away fruit. Soup errors mean ruined dinner. This learning curve frustrates beginners who expect instant perfection. They quit too early. Don’t give up after the first bad batch.
Effort comes in prep work. Cutting vegetables takes time. Peeling skins adds minutes. But the result is worth it. Consistent texture improves meal quality. You spend more time chopping, less time fixing blends. Pre-cutting produce on Sunday saves hours during the week. Keep a dedicated knife set nearby.
Risk is low if you follow rules. No special tools needed. No expensive additives required. Just basic kitchen skills. The main expense is the initial purchase price. After that, operating costs are negligible. Avoid overfilling the jar. It causes motor strain and uneven blending. Listen to the sound. A high pitch means trouble.
Compare this to buying pre-made juices. They cost dollars per bottle. Homemade blends cost cents. The savings add up over months. Invest in good ingredients. Save money on processed alternatives. Buy seasonal produce when prices drop. Store leftovers in freezer bags. Thaw overnight for smooth morning routines.
Keeping it right afterwards
Store the container upside down on a clean rack. This position forces air to circulate through the interior, drying residual moisture much faster than an upright stance. Moisture trapped in the bottom creates a breeding ground for mold within days.
By flipping it, you ensure every surface dries completely before storage. Wipe the blade assembly with a dry cloth immediately after use. Sticky residue hardens quickly, making removal difficult later. Clean edges stay sharper longer because food particles don’t bond to metal surfaces that are free of gunk.
Check the rubber gasket monthly under bright light. Look closely for tiny cracks or tears along the seal. Replace it if damaged, as leaks start here silently. A new gasket costs just a few dollars but saves the entire container from ruin. Inspect the lid holes too. Clogs affect performance by blocking steam release. Use a toothpick to clear them without scratching the plastic.
Clean the base unit regularly with a damp cloth. Never immerse it in water. Dust accumulates around vents and blocks airflow. Use a soft brush to remove debris from these areas. Good airflow keeps the motor cool during operation. This simple habit extends its lifespan significantly.
Record your successful settings in a notebook. Write down speeds and times alongside ingredient amounts. Create a personal logbook to track what works. Update it as you experiment with new ratios. Your best recipes become repeatable when documented clearly. Share tips with friends to build your own reference guide over time.
When this is the wrong approach

Don’t use manual blending for tiny portions. Half a cup of sauce blends poorly. The vortex won’t form because there isn’t enough liquid to create the necessary suction against the blade assembly. Instead, use a mini chopper or food processor designed for small volumes. These tools have wider bases and sharper blades that can handle low quantities without leaving unmixed pockets at the bottom.
Save your high-end Vitamix for larger batches where the motor’s power can be fully utilized. If you must blend small amounts, add water or oil to reach the minimum fill line. This ensures proper circulation and prevents damage to the drive socket from dry friction.
You can speed this up by transferring the liquid to a wide bowl. Or use a dedicated hot soup program if available on your model. Safety comes first. Never rush hot blends. Always remove the center cap and cover it with a thick towel. Hold the lid down firmly with one hand while starting the machine on low speed. Gradually increase to high only after steam has dissipated. This simple step prevents burns and protects your kitchen from scalding spills.
Skip manual control for simple tasks. Need chopped onions? Use the pulse feature only. No need for full speed cycles. Waste less energy. Wear out parts slower. Match the tool to the job. Efficiency matters.
Frequently asked questions
Can I program a Vitamix to remember my settings?
Learn the rhythm instead.
Why does my blender smell like burning?
Overworking the motor causes this. Running it too long without cooling leads to heat buildup. Stop immediately. Let it cool for thirty minutes. Check for blocked vents. Reduce workload next time. Don’t ignore the smell.
How long should I blend nuts for butter?
Blend for two to four minutes total. Start low, increase slowly. Pause to scrape sides. Nuts release oil eventually. Texture changes from crumbly to smooth. Watch closely. Stop when creamy. Don’t over-blend or it turns to oil.
Is it safe to blend hot soup?
Yes, but vent the lid carefully. Steam pressure builds quickly. Loosen the cap slightly. Use a towel to hold it. Blend on low speed first. Then increase gradually. Never fill beyond half capacity. Safety prevents burns and messes.
What happens if I skip the pulse step?
Large chunks remain unblended. Texture becomes uneven. You waste ingredients. Pulsing breaks down hard pieces early. It ensures smooth mixing. Skip it only for soft fruits. Always pulse for frozen or hard items. It’s crucial for quality.
Does the order of ingredients matter?
Yes, liquids first, then soft, then hard. This helps blades catch everything. Dry powders fly if added last. Liquids anchor them. Follow this order consistently. It reduces splashing and improves efficiency. Small changes yield big differences in results.
What to do next
Start with a simple smoothie today. Use frozen fruit and milk. Follow the speed steps we outlined. Watch the vortex form. Expect a smooth texture within three minutes. If lumps appear, pulse again. Stop when satisfied.
Add one tablespoon of chia seeds to thicken the mixture without altering the flavor profile significantly. This small addition creates a gel-like consistency that keeps you fuller for longer. Don’t skip this step if you plan to drink it immediately after blending. The seeds need time to hydrate properly.
If your blender struggles, add liquid first. Then layer the soft ingredients on top. Place the frozen items last. This order reduces strain on the motor blades. It also ensures a more uniform blend. Avoid overfilling the container beyond the max line. Overloading prevents proper circulation. You’ll end up with chunky remnants at the bottom.