How To Operate Vitamix Blender: Speed Dial & Pulse Guide
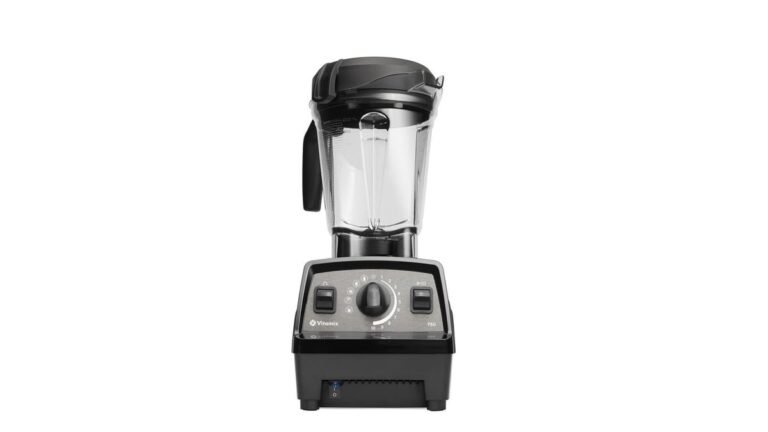
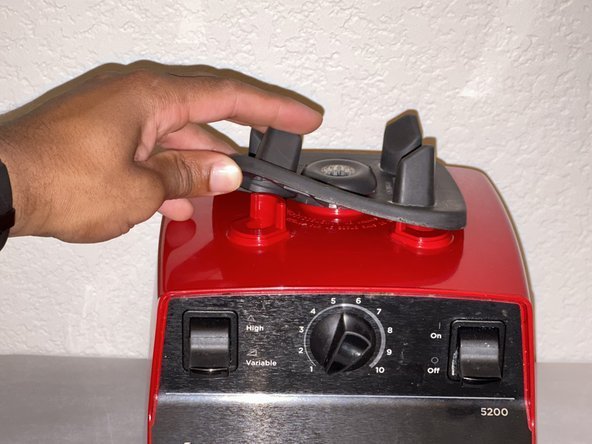
Operating a vitamix blender is simple once you understand the speed dial and pulse feature. Start on low speed, then slowly turn up to high. Use the tamper only for thick mixtures while the machine runs. Never force ingredients down with anything other than the tool provided.
The result depends on your recipe’s thickness, the liquid amount, and how long you blend. These three factors decide if you get smooth soup or chunky salsa. We’ll cover exactly how to adjust them for every task.
Who should operate a vitamix blender
This page helps home cooks who bought a Vitamix and feel overwhelmed by its power. You have the machine, but you’re afraid of breaking it or making a mess. You need clear steps, not theory.
It also helps parents making baby food or green smoothies. You want consistency without lumps. You need to know how much liquid to add so the blades catch everything.
Professional chefs might find this too basic. They already know the physics of vortex creation. If you’re an expert, skip this and check the manual for specific commercial protocols. This guide assumes you’re new to high-speed blending. We focus on safety and basic technique. Your goal is likely healthy meals, not industrial processing. Start here if you want reliable results at home.
The distinction matters because technique changes based on your experience level. A novice often adds ingredients in the wrong order. This creates air pockets that stall the motor. You must start with liquids first. Then add soft solids. Finally, pack hard items on top. The guide corrects this error before it costs time.
You should read further only if you blend weekly. Daily users may outgrow this content quickly. Monthly blenders benefit most from the detailed explanations. The instructions cover common pitfalls like overheating the container. They explain why certain textures fail. This prevents wasted ingredients. It saves money on failed attempts. The advice applies to all Vitamix models. It doesn’t cover commercial-grade units. Those require different handling procedures. Stick to this path if you cook at home.
What decides the outcome
The texture of your blend changes based on four main things. First, the liquid ratio matters most. Too little liquid stops the blades from spinning freely. The motor strains, and you get uneven chunks. Add enough water, milk, or broth to create a vortex. This pulls ingredients into the blades naturally.
Second, the order of ingredients affects speed. Soft items like bananas go in first. Hard items like frozen berries go on top. This layering helps the blades grab everything quickly. If you put hard items at the bottom, they sit still until the liquid moves them.
Third, the lid position is critical. It must be locked fully. If it’s loose, steam escapes, and ingredients fly out. Always check the seal before starting.
Fourth, the tamper usage changes the flow. Use it only when the mixture is thick. For thin liquids, the vortex works alone. Using the tamper on thin blends can splash contents over the lid. Know when to hold it back.
Most people get the liquid ratio wrong. They think less liquid makes thicker smoothies. It actually makes the motor work harder and leaves unblended bits. Start with more liquid, then reduce it next time if needed.
Step by step blending guide
- Place the container on the base. Ensure it clicks into place. Pour in your liquid first. This protects the blades and helps them spin.
- Add soft ingredients next. Put fruits, yogurt, or leafy greens in the center. These move easily and help push harder items down.
- Layer hard items on top. Add frozen fruit, ice cubes, or nuts last. Gravity pulls them toward the blades as the vortex forms.
- Secure the lid tightly. Press down until it locks. Check that the clear plug is in place if your model has one. This prevents spills.
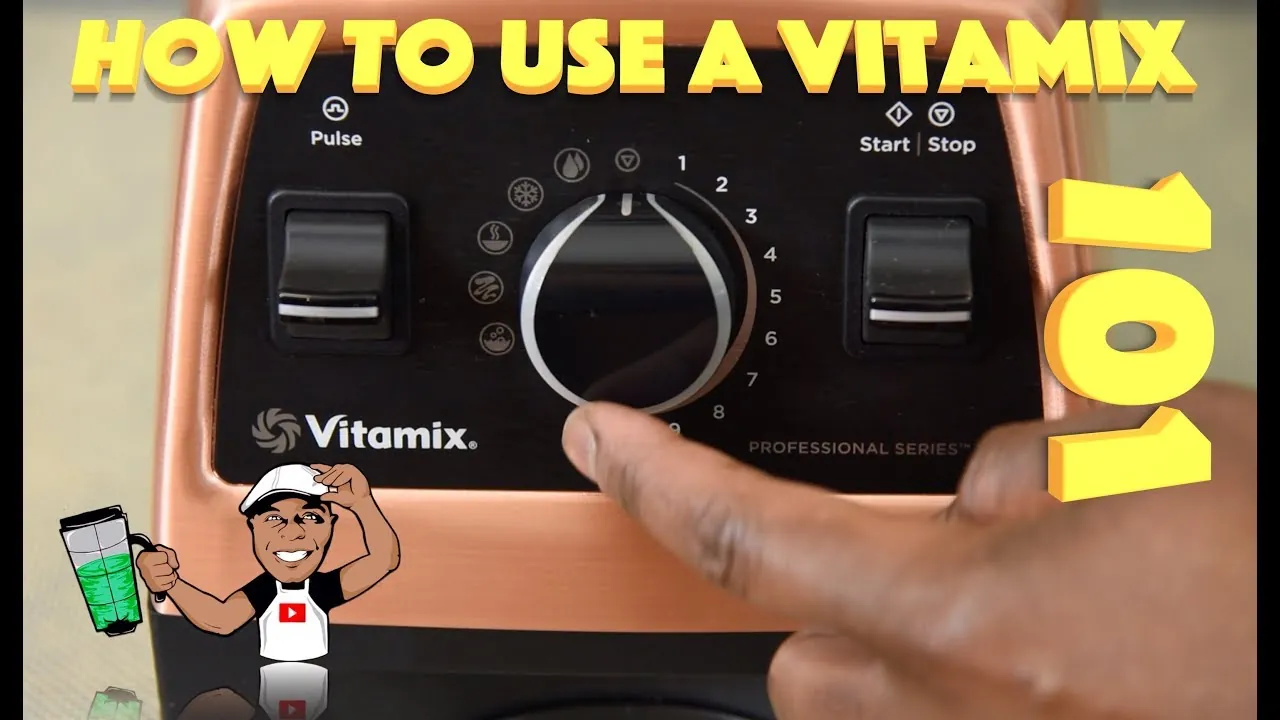
- Set speed to 1. Turn the variable speed dial to the lowest setting. Start the machine on low. This gently begins the movement without splashing.
- Increase speed gradually. Over five seconds, turn the dial to 10 (high). This slow increase creates a strong vortex. It pulls all ingredients into the blades smoothly.
- Blend for the required time. Keep the speed high for 30-60 seconds. Watch the mixture. It should look uniform and smooth. Stop if you see large chunks.
- Use the tamper if needed. For thick mixes like nut butter, stop the machine. Insert the tamper through the lid hole. Push ingredients down while running. Never use utensils other than the tamper.
- Purge the mixture. Once done, turn the speed back to 1. Then switch off the machine. Remove the lid carefully to avoid steam burns.
- Clean immediately. Add warm water and a drop of dish soap. Run the machine on high for 30 seconds. Rinse thoroughly. This prevents residue from drying.
The key judgment is knowing when to stop. Don’t rely solely on the timer. Look at the texture. If it’s smooth, it’s done. Over-blending can heat soups too much or make smoothies frothy. Trust your eyes, not just the clock.
The variations at a glance
Different recipes need different approaches. Here is how to adjust for common tasks.
| Situation | What to do | Time/Cost | What to watch for |
|---|---|---|---|
| Green Smoothie | Liquid first, then greens | 60 sec | Leaves stuck to sides |
| Hot Soup | Blend raw veggies + hot water | 5-6 min | Lid pressure buildup |
| Nut Butter | Dry nuts, no liquid | 4-5 min | Motor overheating |
| Ice Cream | Frozen fruit + heavy cream | 2 min | Blades clogging |
| Salsa | Chunky veggies, minimal liquid | 30 sec | Uneven chopping |
| Dough | Flour + water, low speed | 1 min | Dry flour flying out |
| Frozen Drinks | Ice + liquid + fruit | 45 sec | Ice shattering loudly |
What separates good results from poor ones
Preparation habits
Experienced users prep their ingredients properly. They chop large items into smaller pieces. This reduces strain on the motor. Beginners throw whole apples or carrots in. The blades struggle, and the blend is uneven. Cut items to fit the container width. This ensures even circulation.
Also, measure liquids accurately. Use a cup, not a guess. Too little liquid causes a “dead zone” where ingredients don’t move. Too much makes the blend watery. Stick to the recommended ratios in your recipe book. Consistency comes from precision.
During the blend
Pros watch the vortex closely. They see if ingredients are falling back into the blades. If not, they use the tamper correctly. Beginners ignore the vortex. They wait for the timer and get lumps. Move the tamper in a circular motion. Don’t press down hard. Let the machine do the work.
Another difference is cleaning timing. Experts rinse the jar right after use. Soap and water clean it in seconds. Beginners let dried food stick. Then they scrub for minutes. Quick rinsing saves time and keeps the jar clear.
What goes wrong, and what to do
If something seems off, check these common issues.
| What you notice | What it usually means | What to do first | How to stop it happening again |
|---|---|---|---|
| Loud grinding noise | Blades hitting hard item | Stop, rearrange items | Chop hard items smaller |
| Leak under lid | Seal misaligned | Stop, reseat lid firmly | Check gasket for damage |
| Burnt smell | Motor overheating | Stop, let cool down | Reduce run time, add liquid |
| Chunks remain | Not enough liquid | Stop, add more liquid | Increase liquid ratio next time |
| Vibration shaking | Container not locked | Stop, re-lock container | Ensure click sound is heard |
| Slow blending | Dull blades or old motor | Check blade sharpness | Replace blades if worn |
The rules that apply
Safety is the main rule for Vitamix blenders. Always keep the lid locked during operation. High-speed blending creates pressure. An open lid can cause hot liquid to spray out. This is a burn hazard. Follow the user manual’s warning about hot foods.
Electrical safety is also important. Keep the base dry. Never submerge the base in water. Unplug the machine before cleaning or changing parts. This prevents accidental starts.
Warranty rules matter too. Don’t modify the motor or blades. Voiding the warranty leaves you responsible for repairs. Vitamix offers a 7-10 year warranty depending on the model. Keep your receipt. Register your product online to activate coverage.
Check local electrical standards. Most Vitamix models are dual voltage. Verify your country’s plug type. Use a proper adapter if needed. Don’t use damaged cords. Report any fraying to customer service immediately.
What it costs you
The initial price tag is only half the story. Entry-level models are inexpensive relative to the alternative, but that figure often excludes essential accessories. You might need a separate dry grain container for nut flours. Professional series can exceed the cost of entry-level options, yet this premium buys industrial-grade motors. These machines handle continuous heavy loads without overheating.
Cheap blenders look similar on shelf tags. Their plastic housings crack under thermal stress. The motor burns out after six months of daily use. Vitamix containers last for years because they resist heat warping. Cheap jars cloud over time from abrasive ingredients. This opacity signals structural weakness. You can’t see if blades are dulling inside.
Running costs are low, but hidden fees exist. Electricity usage is minimal. A typical blend uses less than 0.01 kWh. That’s pennies per use. However, warranty terms vary significantly. Extended service plans add hundreds to the total cost. Replacement parts are affordable. Tamper kits cost about $20. Blades rarely need replacing, unlike cheap alternatives that shatter.
Time cost is low too. Blending takes 1-5 minutes. Cleaning takes 30 seconds with self-cleaning cycles. This saves time compared to chopping by hand. But manual prep adds up. If you chop onions daily, that hour weekly matters. Invest in a good model once. It pays off in longevity and convenience. Avoid mid-range traps. They offer neither durability nor performance.
Keeping it right afterwards
Store the container upside down on a clean, dry rack. This simple position prevents dust from settling inside the vessel where it can mix with your next batch of food. Keep the lid separate and placed nearby to allow airflow around both pieces. This critical step stops mold growth in the gasket area, which thrives in trapped moisture. If you stack them together, condensation forms overnight, creating an ideal breeding ground for bacteria that soap alone can’t remove.
Clean the jar immediately after every use while residues are still soft. Warm water and mild dish soap are enough to break down oils without damaging surfaces. Avoid abrasive sponges or steel wool entirely. They scratch the plastic or glass surface, creating microscopic grooves. These scratches harbor bacteria and look bad over time, making the container appear older than it is. Use a soft brush to reach corners without causing damage.
Check the blades yearly for dull edges or cracks. Look closely at the cutting teeth under bright light. If blending performance drops significantly, inspect the blades for visible wear. Replace them if damaged, as compromised blades strain the motor. Vitamix sells replacement parts directly through their official website. Using third-party blades may void warranties or fit poorly, leading to leaks or uneven processing.
Lubricate the drive socket occasionally to maintain smooth operation. Use only food-safe silicone spray designed for kitchen equipment. Apply a small amount to the bottom of the container’s drive socket. This ensures a smooth connection to the motor base during high-speed blending. Do this once a year, typically before winter storage. Excess lubricant attracts dirt, so wipe away any residue immediately after application. Proper maintenance extends the life of your appliance significantly.
When this is the wrong approach
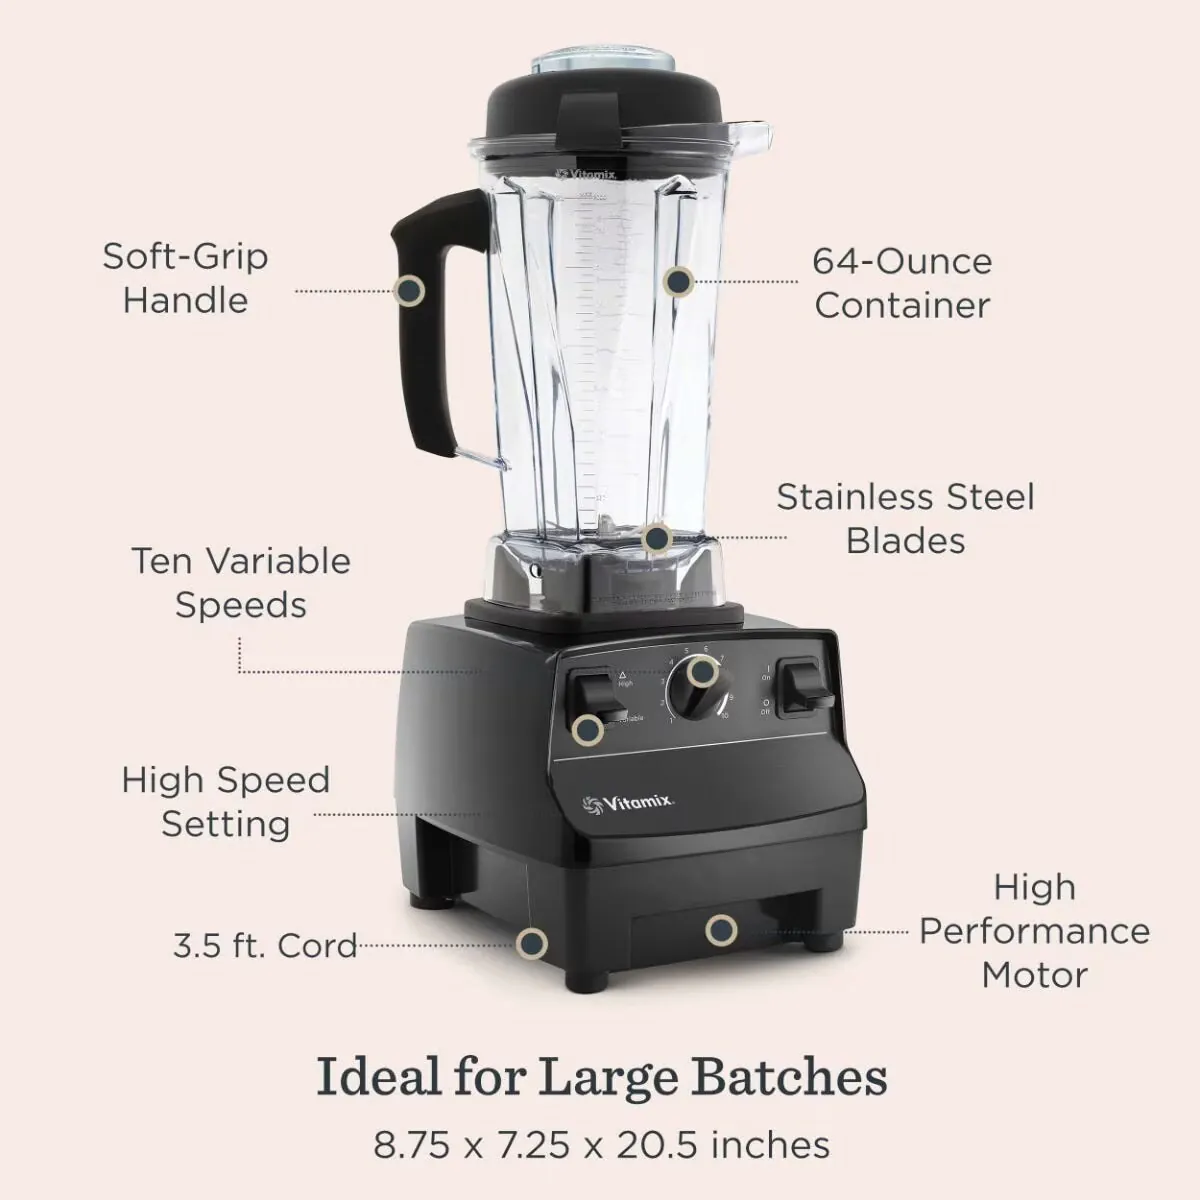
Don’t use a Vitamix for tiny batches. If you only need to blend two strawberries, the machine won’t work well. Ingredients won’t reach the blades. Use a mini chopper instead. The vortex requires volume to pull solids down.
Without enough mass, the blades just spin in air or push ingredients up the sides. You get uneven chunks and wasted time. A small blade spins faster relative to the container size. It creates a tight, efficient whirlpool with less liquid. This matters for single servings of smoothies or dips.
Avoid using it for very hard spices like whole nutmeg. The blades can chip. Use a mortar and pestle or spice grinder. These tools are better for small, hard items. High-speed impact shatters brittle crystals against steel. Over time, this wears down the edge geometry. You lose sharpness on softer tasks too. A dedicated spice grinder isolates these impacts. It protects your main blender’s investment. Keep them separate for hygiene as well.
Don’t blend boiling liquids directly. Steam pressure can blow the lid off. Cool hot soups slightly before blending. Or vent the lid carefully. Safety first. Water expands significantly when heated. Trapped steam seeks escape routes. The seal isn’t designed for rapid expansion. Letting it sit for five minutes reduces risk. Always remove the center cap if possible. Cover with a towel while holding the lid. This absorbs any accidental spray.
For doughs requiring kneading, a stand mixer is better. Blenders mix but don’t knead. Gluten development needs mechanical stretching. Use the right tool for the job. Blades chop rather than fold. They create friction heat that kills yeast activity. Stand mixers use hooks to stretch and rest. This builds structure without overworking the surface. You get even crumb and better rise.
Frequently asked questions
Can I blend hot liquids in a Vitamix?
Yes, but remove the center lid plug. Cover with a towel. Vent steam slowly. This prevents pressure buildup and burns. Always start on low speed.
Why does my Vitamix leak?
The gasket might be misaligned or damaged. Remove the lid. Check the rubber seal. Reinstall it evenly. If cracked, replace the gasket immediately.
How long do Vitamix blades last?
Blades typically last for years with regular use. Heavy daily use may shorten this. Sharpening isn’t possible. Replace the entire blade assembly if dull.
Is it safe to leave the blender plugged in?
No. Always unplug when not in use. This prevents accidental starts. It also protects against power surges. Safety is the primary reason.
What happens if I overload the container?
The motor may overheat and shut off. The blend will be uneven. Wait for the motor to cool. Reduce ingredient volume next time. Follow capacity lines.
Does it matter if I add ice first?
Yes. Ice should go on top of liquid. Adding it first can jam the blades. Liquid helps cushion the ice. This protects the motor and blades.
What to do next
Start with a simple smoothie today. Use the step-by-step guide above. Expect a smooth texture within 60 seconds. Stop if you hear grinding noises. Get help if the motor smells burnt.
Choose fruit that’s fully ripe for natural sweetness. Frozen berries work best because they chill the drink without watering it down. Fresh bananas add creaminess but turn brown quickly, so use them immediately after peeling.
Add liquid first to protect the blades. Pour one cup of milk or water into the blender jar before dropping in solid ingredients. This creates a vortex that pulls everything toward the center efficiently.
Layer soft items like yogurt or spinach next. Place hard fruits such as apples or carrots on top. This arrangement prevents the motor from stalling under heavy resistance during the initial blend cycle.
Secure the lid tightly before plugging in the device. Check for any cracks in the container that might leak pressurized contents. A loose seal can cause messy spills and damage the base unit over time.
Blend on low speed for five seconds to break up large chunks. Then increase to high for thirty seconds until the mixture looks uniform. Pause halfway through to scrape down the sides with a spatula if needed.
Pour immediately into a glass to prevent oxidation. Drink within fifteen minutes for maximum nutrient absorption. Any leftovers should be stored in an airtight container in the refrigerator for no more than twenty-four hours.