How To Make Peanut Butter In Vitamix Blender: The Easy Fix
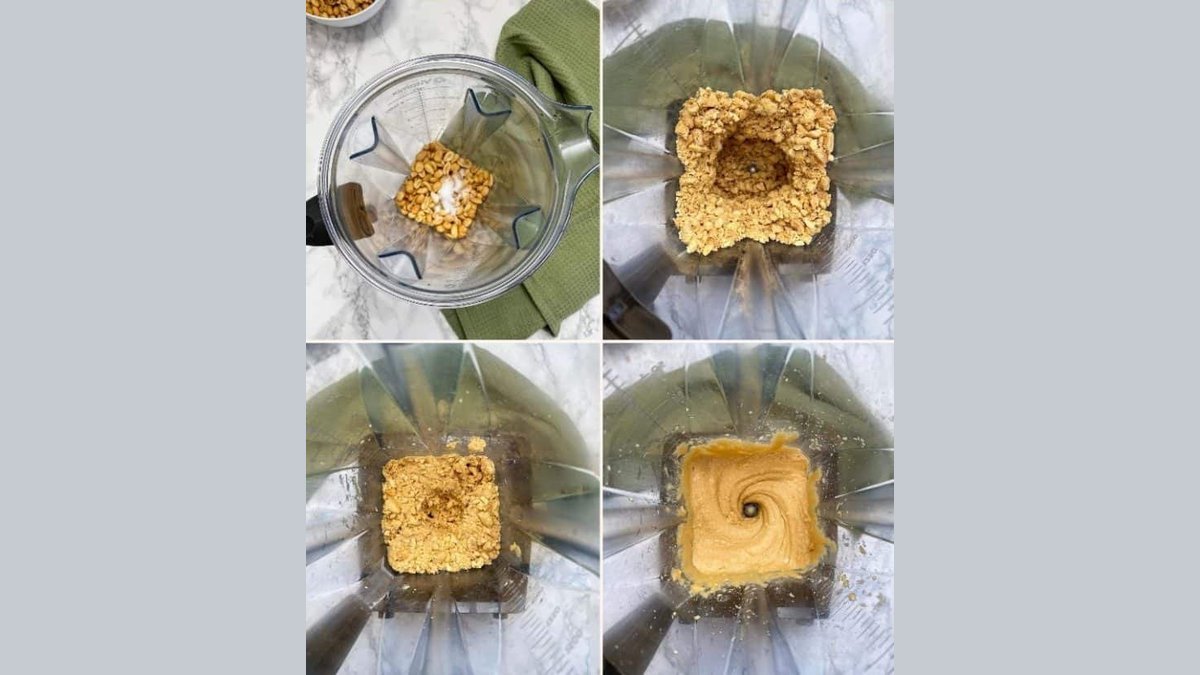
Making peanut butter in vitamix blender takes about five minutes of total time, but you must be patient during the blending. The machine does all the heavy lifting once you start it, and the nuts will turn from crumbly meal into a smooth, creamy spread before your eyes. You just need raw or roasted peanuts and optionally a pinch of salt.
The texture depends on two things: how long you blend and whether your peanuts are oily. A high-powered Vitamix will crush them faster than a standard blender, but you still have to let the motor do its work without rushing. If you want chunky butter, stop early; for smooth, keep going until it flows like honey.
Who should make peanut butter in vitamix

You’re likely here because you want control over what goes into your food. Commercial peanut butter often contains hydrogenated oils, sugar, or stabilizers that separate quickly. Making it yourself removes those additives entirely. You decide if it’s salty, sweet, or pure. This method works best for people who already own a high-performance blender capable of handling hot friction temperatures.
If you only have a cheap, low-wattage blender, this approach might burn out the motor. Those machines struggle with the thickening stage. They also leave gritty chunks behind. You should skip this if you’re looking for a quick, five-minute breakfast prep without waiting for the blend cycle. It’s not a speed hack; it’s a texture transformation.
This page serves home cooks who value ingredient purity and have the right equipment. We assume you have a Vitamix model with a tamper tool. The tamper is critical for pushing nuts toward the blades safely. Without it, you risk air pockets that stall the motor. If you don’t have one, read something else first.
What decides the outcome
Three factors change the final texture more than anything else. First is the oil content of the peanuts. Raw peanuts have less natural oil release than roasted ones. Roasting breaks down cell walls and releases fats earlier. This means roasted nuts reach smoothness faster. Raw nuts take longer and require more patience. You can check roasting levels by smell and color before you start.
Second is the temperature of the room and the nuts. Cold peanuts resist blending. Warm peanuts flow easier. If your kitchen is chilly, let the nuts sit out for ten minutes. This small step reduces strain on the motor. It also helps the fat emulsify evenly. You won’t see this difference immediately, but the final spread will be glossier.
Third is the blade speed progression. Starting too high creates a dust cloud of dry powder. Starting too low stalls the motor. You must begin at medium speed and gradually increase. This builds heat through friction, which melts the oils. The result is a creamy emulsion rather than a grainy paste. Most people get this wrong by jumping straight to high speed. That creates uneven chunks and burns the motor. Start slow, build heat, then finish smooth.
Step by step guide
- Measure two cups of unsalted peanuts. Roast them at 350°F for eight minutes if you prefer a deeper flavor. Let them cool slightly so they’re warm, not hot.
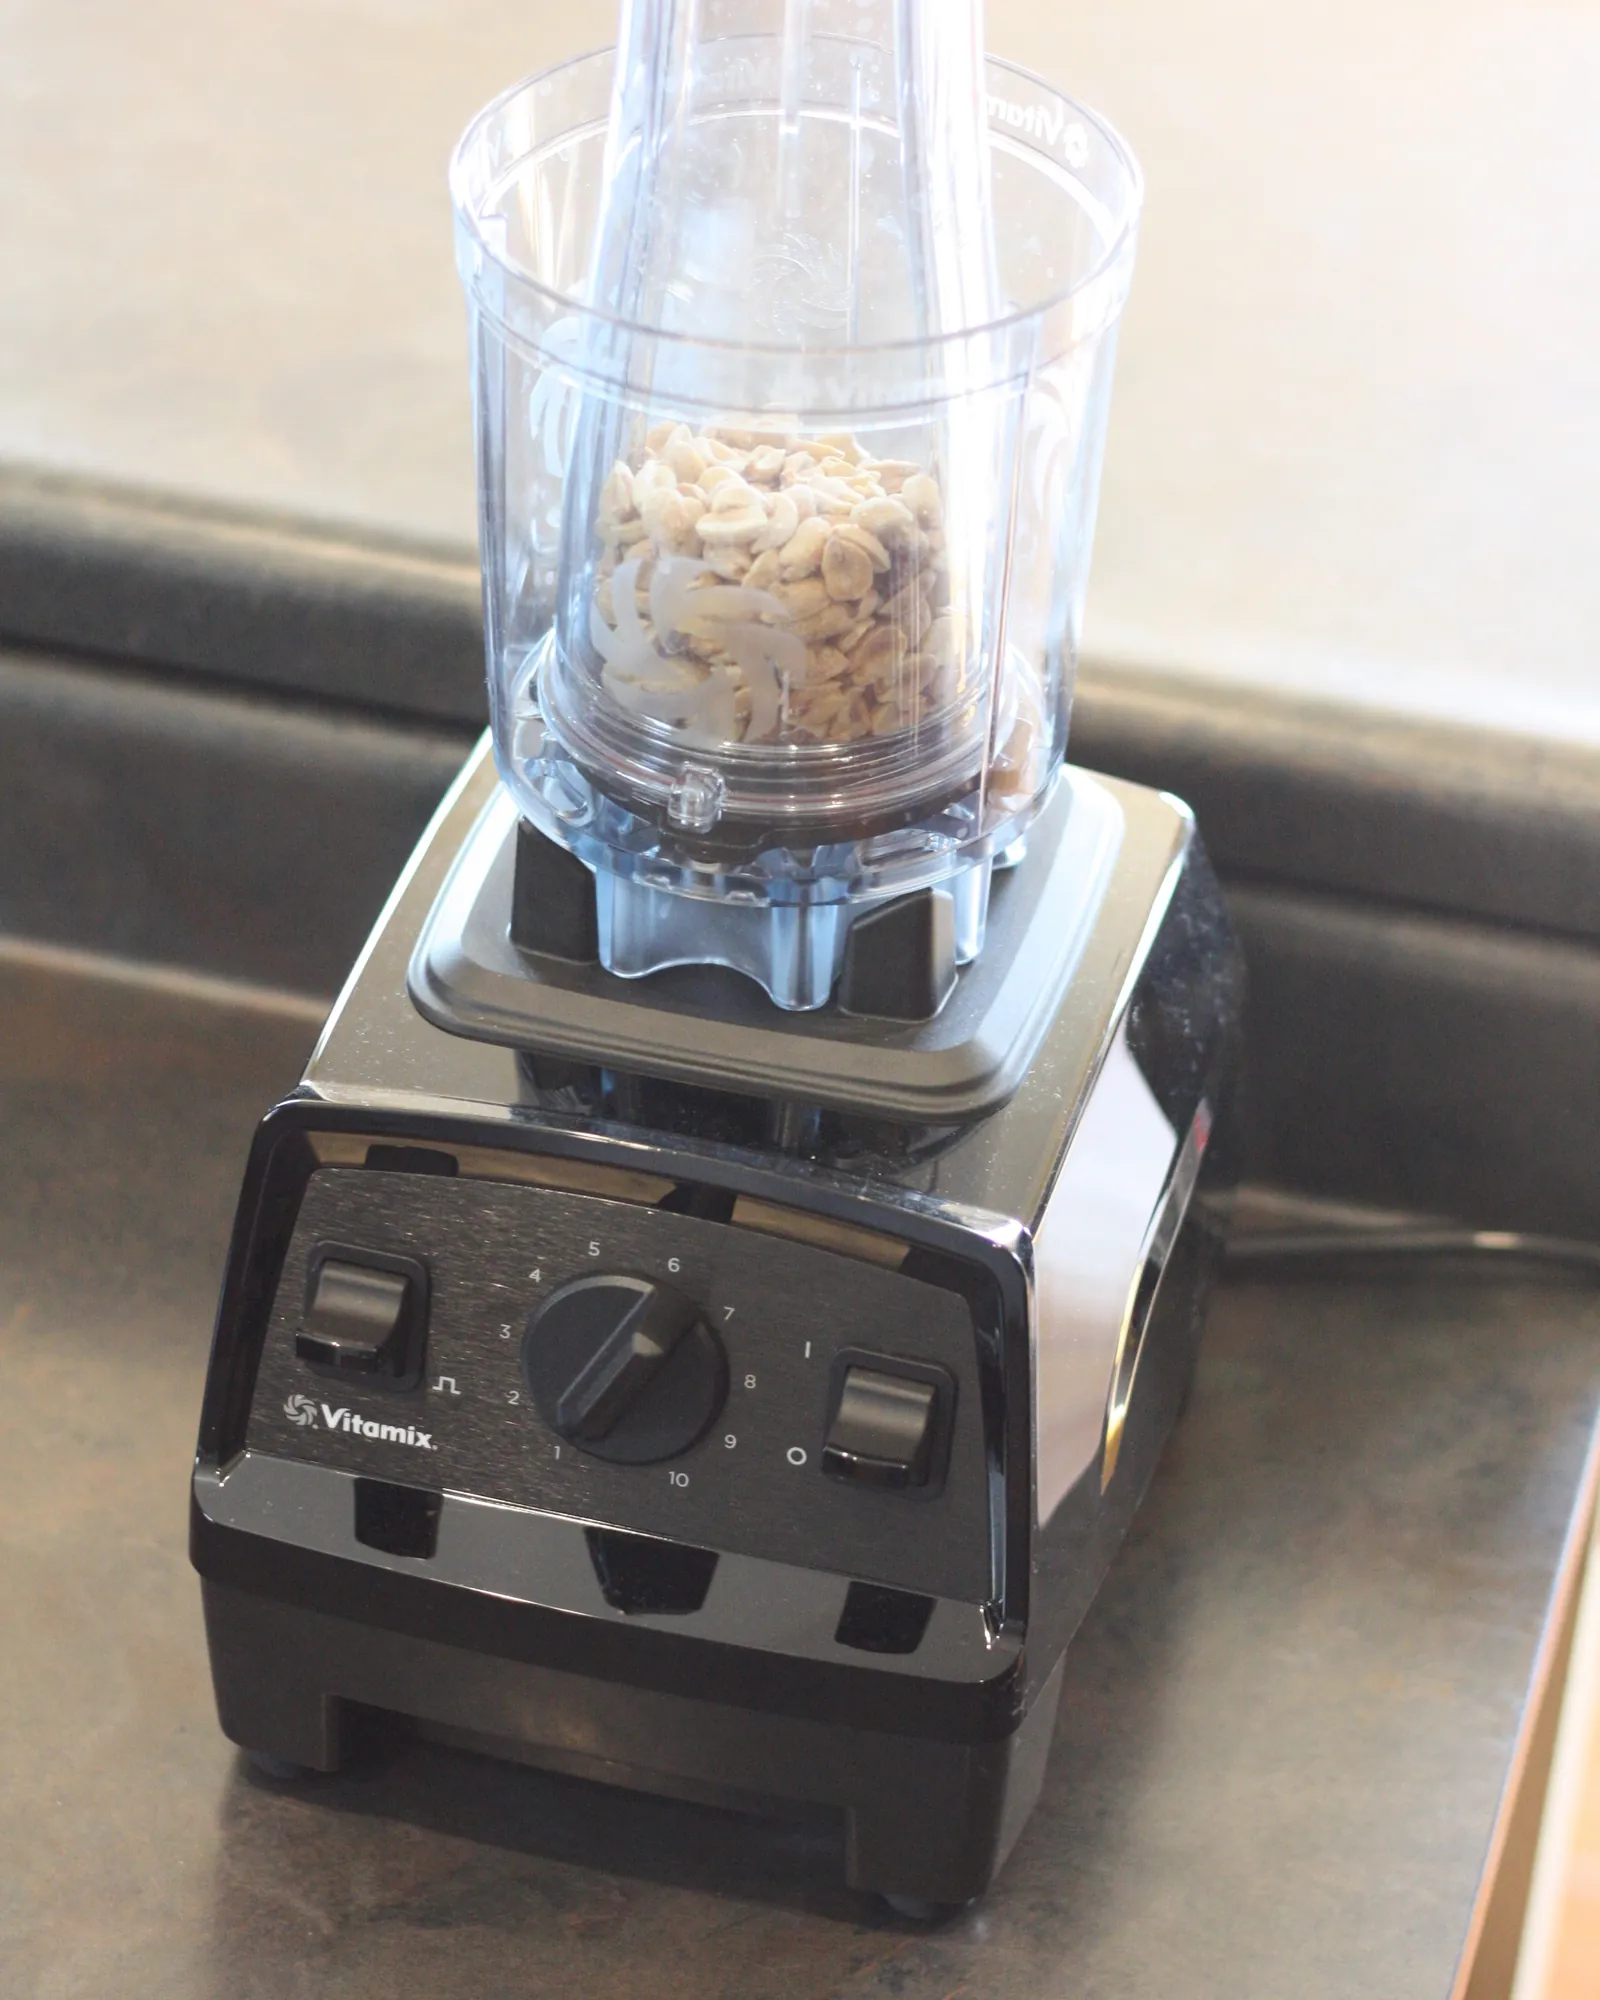
- Pour the peanuts into the Vitamix container. Secure the lid tightly. Place the tamper inside the lid opening. Keep your hand ready to use it.
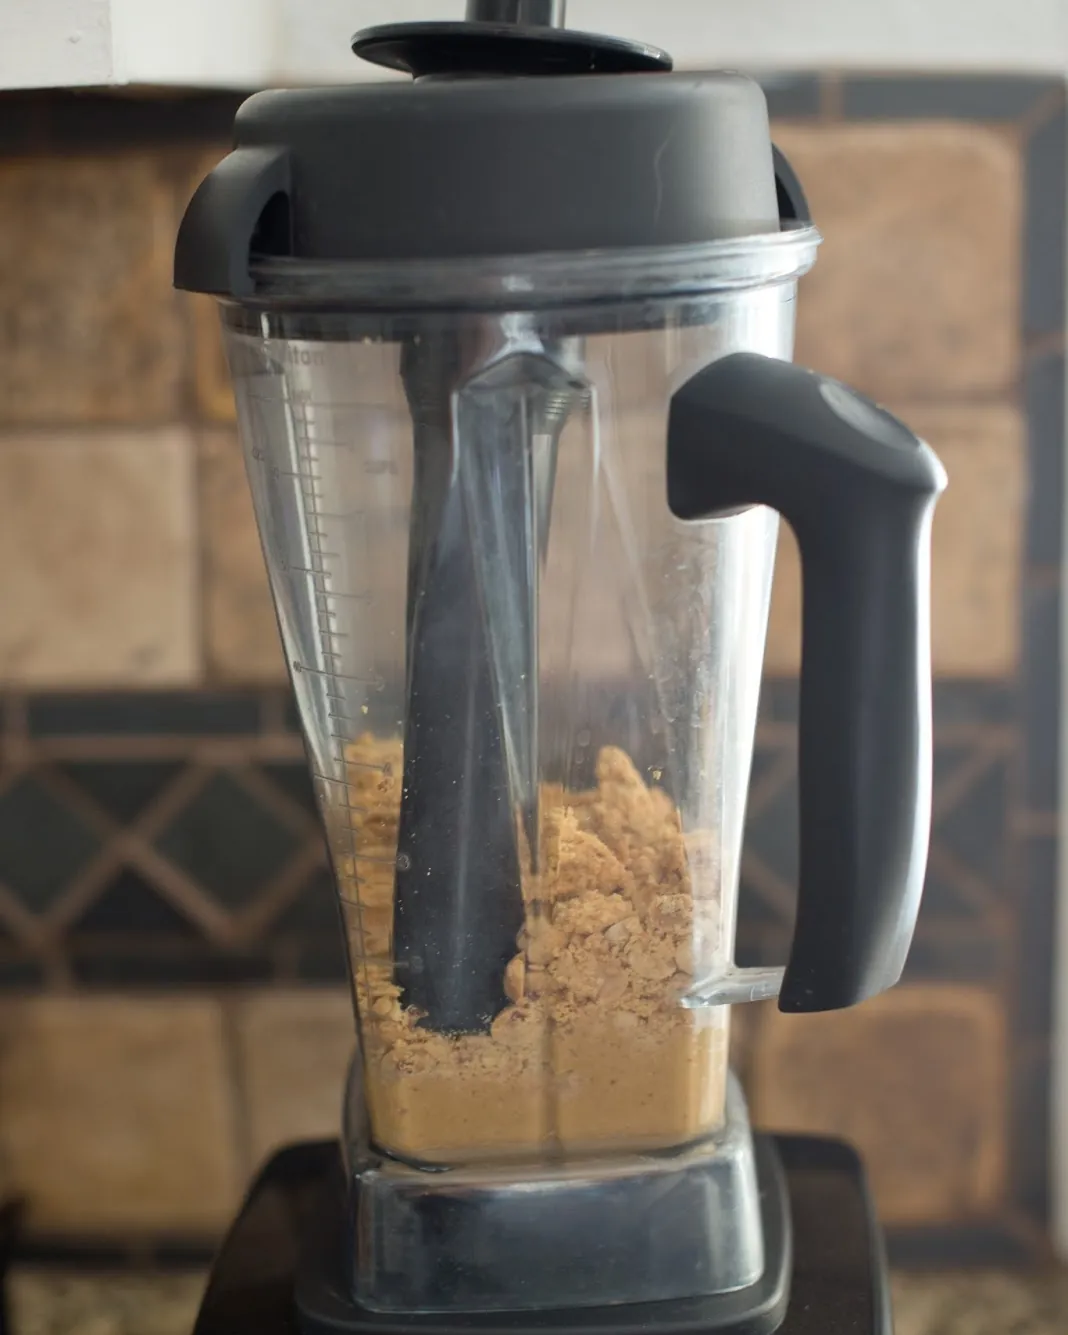
- Start the blender on variable speed three. Use the tamper to push peanuts down toward the blades. Do this gently to avoid splashing. Blend for thirty seconds until you see crumbs.
- Increase speed to six. Continue using the tamper to move nuts around. The mixture will become a thick paste. This stage takes about two minutes. Scrape sides if needed.
- Raise speed to eight or ten. The paste will suddenly become liquid as oils release. Keep blending for one to two minutes. Watch for smooth, glossy movement. Stop if it looks separated.
- Add a pinch of salt if desired. Blend for ten more seconds to mix. For chunky butter, transfer half the batch now and pulse briefly. Leave the rest for smooth texture.
- Pour the butter into jars while warm. It sets firm as it cools. Store in the fridge to prevent oil separation. Use within three months for best taste.
The single judgment call is when to stop. Beginners often over-blend, causing the butter to split or become too thin. Experienced users stop when the mixture flows freely off the tamper. It should look like melted chocolate. If it looks dry or grainy, blend thirty seconds longer. Patience wins here. Rushing creates lumps. Waiting creates creaminess.
The variations at a glance
| Situation | What to do | Time/Cost | Watch for |
|---|---|---|---|
| Raw Peanuts | Blend longer, add warm water drop | 7-9 mins | Dry powder stage |
| Roasted Peanuts | Standard blend, no extra heat | 4-5 mins | Oil separation early |
| Chunky Butter | Remove half, pulse briefly | +30 secs | Uneven texture |
| Sweetened Butter | Add honey after blending | +1 min | Sticky residue |
| Low-Watt Blender | Stop often, scrape sides | 10+ mins | Motor overheating |
| Salted Peanuts | Skip added salt step | Same | Over-salting risk |
What separates a good result from a poor one
Preparation details
Experienced users roast their peanuts lightly before blending. This step unlocks oils faster. Beginners often skip this, leading to a long, frustrating blend. Roasting at 350°F for eight minutes significantly accelerates the oil release process. The nuts release fat sooner. The texture becomes smoother quicker. You save time and motor life. Check the color. Light brown is enough. Dark brown tastes burnt. Don’t rush the roast. Let them cool slightly. Warm nuts blend better than cold ones.
Blending technique
Experts use the tamper constantly. They never let air pockets form. Beginners hold the tamper loosely or ignore it. This causes stalling. The motor struggles. The nuts stay chunky. Push firmly but gently. Move nuts in circles. Feel the resistance change.
When it drops, oils are releasing. Stop pushing then. Let the blades spin freely. This prevents overheating. Watch the consistency. Smooth means stop. Grainy means go. Listen to the sound. High pitch means done. Low rumble means stuck. Adjust speed accordingly.
What goes wrong, and what to do
| What you notice | What it usually means | What to do first | How to stop it happening again |
|---|---|---|---|
| Thick paste stays dry | Not enough oil released yet | Blend longer, use tamper | Roast nuts first next time |
| Butter splits/oils float | Over-blended or too hot | Stir manually, chill fridge | Stop blending earlier next time |
| Motor stops/stalls | Nuts too large or cold | Scrape sides, restart slow | Chop nuts smaller beforehand |
| Gritty texture left | Insufficient blending time | Blend 30s more, check smooth | Increase speed gradually |
| Burnt smell/taste | Motor overheating or nuts dark | Discard, clean thoroughly | Use cooler nuts, lower speed |
The rules that apply
The USDA guideline is a baseline, not a guarantee. Rancidity happens faster when you leave the jar on the counter. Heat accelerates oxidation in the oils. Keep it cold to slow that chemical breakdown. Mold is a different threat. It needs moisture to grow. That’s why dry utensils matter. A wet spoon introduces water into the paste. Water creates pockets where bacteria thrive.
You can’t see these pockets immediately. They spread from the center outward. Stirring separates the oil because gravity pulls the heavier solids down. This separation is natural. It doesn’t mean the butter is bad. Just mix it back in. Don’t add water to fix the texture. Use clean, dry tools instead. The FDA leaves homemade batches unregulated. You’re the inspector. Wash containers with hot soapy water.
Rinse well. Dry completely before filling. Moisture left on glass or metal becomes a breeding ground. Check for off-smells every time you open the jar. Rancid butter smells like crayons or old paint. If you smell that, toss it. Don’t taste it. Three months is the limit for quality. After that, flavor degrades even if it’s safe. Cold storage extends that window slightly. Room temperature shortens it drastically.
What it costs you
The financial math is straightforward but often misunderstood. Two cups of raw peanuts typically cost between $3 and $5, depending on your local market. Roasted varieties run slightly higher due to processing. Electricity usage remains negligible, adding mere pennies to the total per batch. However, the true expense is time. You can’t rush the blend cycle.
The machine must work until the oils release naturally. This patience is essential for success. If you choose store-bought butter, you pay a premium for convenience. Here, you trade effort for control. You eliminate hidden sugars and hydrogenated oils entirely. The savings accumulate significantly over months. A single jar lasts several weeks if stored properly. To maximize value, buy bulk peanuts whenever possible.
Local farmers markets often offer better deals than grocery chains. Always check expiration dates on bulk bins. Freshness impacts flavor more than price does. Remember that raw nuts require longer blending than roasted ones. Adjust your schedule accordingly. Don’t underestimate the cleanup time either. Scraping the sides takes extra minutes. Factor this into your daily routine. The purity gained justifies the initial investment of time.
Keeping it right afterwards
Store your peanut butter in an airtight glass jar in the refrigerator. This slows oil oxidation and keeps flavors fresh. Homemade butter lacks preservatives, so cold storage is essential. Expect oil separation after a few days. This is normal. Stir it well before using. If it becomes too hard to stir, let it sit at room temperature for ten minutes.
Check for mold or sour smells monthly. Discard if either appears. Clean your Vitamix immediately after use. Add warm water and a drop of dish soap. Blend on high for thirty seconds. Rinse thoroughly. Dry the container completely before storing. This prevents residue buildup and odors.
Glass jars are required because plastic absorbs oils over time, leading to rancid tastes that metal containers can’t prevent. Use wide-mouth mason jars for easier access with your spoon. The refrigerator must be set below forty degrees Fahrenheit to truly inhibit bacterial growth. Don’t leave the jar out for more than two hours during serving. Warmth accelerates spoilage faster than you might expect.
Oil separation happens naturally as solids settle. It doesn’t mean the batch is bad. You must reincorporate the liquid layer completely. Use a sturdy spoon to push from the bottom up. Avoid quick dips that leave dry pockets. Hardening in the cold is expected. Ten minutes at room temperature restores spreadability without warming the entire batch. Don’t microwave the jar directly.
Glass can shatter under rapid heat changes. Instead, place the sealed jar in a bowl of warm water for five minutes. This gentle approach protects the texture. Monthly checks should happen on the same day each month. Create a habit tied to another routine task. Look for fuzzy spots near the lid where air enters. Smell for any sharp, paint-like notes. These indicate lipid breakdown.
Discard the whole batch if contamination is suspected. Cross-contamination spreads quickly. Cleaning your blender right away prevents hardened crusts. Soaking helps loosen stuck bits. Never use abrasive sponges on the blade assembly. They dull the edges and create hiding spots for bacteria. Air drying is crucial. Moisture trapped in the base promotes rust and mildew. Store the lid upside down to ensure full airflow around the threads.
When this is the wrong approach
Skip this method if you need a quick, grab-and-go snack. Making butter takes time and cleanup. It’s not suitable for large families needing bulk supplies quickly.
The process demands patience. You must wait for the nuts to release their oils. This transformation takes several minutes of continuous blending. Rushing it yields grainy paste, not smooth spread. If your morning routine requires speed, buy pre-made options. The trade-off is convenience versus quality. Homemade offers superior flavor but costs time.
Also, avoid this if your blender isn’t a high-power Vitamix or similar. Cheap blenders will break trying to crush nuts. The motor struggles against dense nut masses. Plastic gears strip under heavy load. Metal blades dull without proper cooling. In those cases, use a food processor instead.
Food processors chop nuts finer but don’t emulsify oils as smoothly. They lack the vortex action needed for creaminess. You’ll get a thicker, less creamy result. Accept that trade-off if you don’t have the right machine. The texture will be slightly coarse. It works well for baking applications. Spreadability suffers compared to high-speed blending.
Don’t force a weak blender to do heavy work. It’s not worth the repair cost. Electrical fires are rare but possible with overheated motors. Listen for strain sounds during operation. Stop immediately if the unit smells like burning plastic. Replace the appliance rather than risking safety. Proper equipment ensures consistent results every time. Invest in durability over cheap initial savings. Long-term usage justifies the higher price point.
Related guides
- How To Make Peanut Butter In A Ninja Blender: Easy Steps
- How To Open A Ninja Blender Cup: Easy Fix for Stuck Lids
Frequently asked questions
Can I make peanut butter with other nuts?
Yes, you can use almonds, cashews, or walnuts. The process is identical. Almonds take longer to smooth. Cashews blend faster due to higher fat. Walnuts turn bitter if over-blended. Adjust times based on nut type. Results vary by oil content.
Why is my peanut butter oily?
Oil separation happens naturally in homemade butter. It occurs because no stabilizers are added. Stir the oil back in before eating. Store in the fridge to slow separation. Chilling firms the fat. This is normal and safe. Just mix well.
How long does it take to blend?
Blending takes four to seven minutes total. Roasted nuts blend faster, around four minutes. Raw nuts take closer to seven minutes. Speed depends on your model’s power. Watch for smooth texture, not just time. Patience ensures creaminess.
Is it safe to eat raw peanut butter?
Yes, if you use raw peanuts throughout. Ensure your blender reaches high speeds to kill surface bacteria. Heat from friction helps sanitize. However, some prefer roasted nuts for safety. Roasting kills pathogens. Choose based on preference. Both are safe if handled cleanly.
What happens if I over-blend?
Over-blending causes the butter to split. Oils separate from solids. The texture becomes greasy. Stir it manually to recombine. Chill it to firm up. Next time, stop blending when smooth. Don’t wait for liquid flow. Stop earlier to prevent splitting.
Does it matter if I add salt?
Salt enhances flavor but isn’t required. Add a pinch after blending for even distribution. Adding salt before can interfere with blade movement slightly. Most people prefer salted butter. Try unsalted first. Adjust taste later. Salt doesn’t affect texture significantly.
Can I sweeten it with honey?
Yes, add honey after blending. Mix it in manually or blend briefly. Honey changes texture slightly, making it thicker. Maple syrup works too. Liquid sweeteners may cause separation. Stir well before storing. Taste as you go. Add gradually.
What to do next
Start by measuring your peanuts and setting up your Vitamix. Blend slowly, watching for the oil release. Expect a smooth, creamy result if you follow the steps. Stop blending when the mixture flows freely. If it splits, stir it back together. Get help if your motor stalls repeatedly.
Use a digital scale to weigh exactly one pound of raw, unsalted peanuts. This precision prevents the machine from struggling with too much volume or producing too little butter. Place the dry nuts into the empty container before turning anything on. This simple order keeps the blades engaged immediately without splashing.
Turn the blender to speed one. Slowly increase the dial over ten seconds. Don’t jump to high speed. The friction must build gradually. You’ll hear the sound change as the oils release. Listen for that shift in pitch. It signals the transformation is working.
Watch the texture closely. It will go from crumbly to thick paste. Then it becomes fluid. Pouring should look like warm honey. If it separates into liquid and solids, stop immediately. Use a spatula to fold the mixture back together. Restart at low speed. Repeat this only once. More attempts can overheat the batch.
If the motor makes a grinding noise or stops completely, turn off the unit. Let it cool for twenty minutes. Forcing it risks burning out the motor. Check the lid seal first. A loose lid causes leaks that mimic stalling issues. Ensure the base is clean and dry. Proper maintenance extends the life of your equipment significantly.