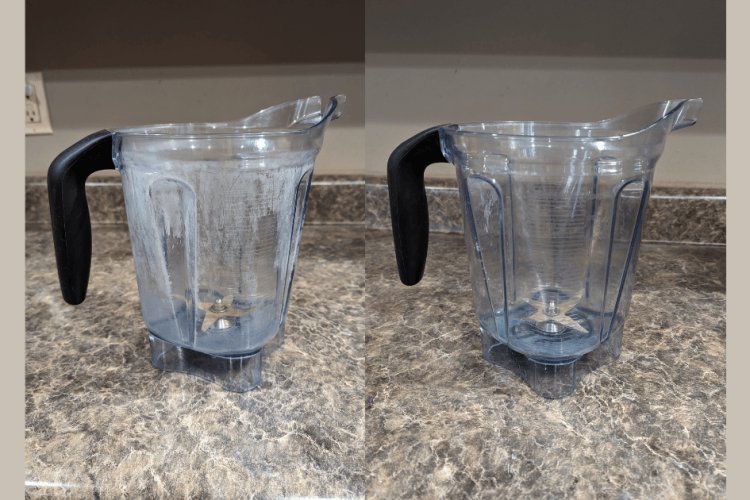
How To Clean A Cloudy Vitamix Blender: Fix With Vinegar
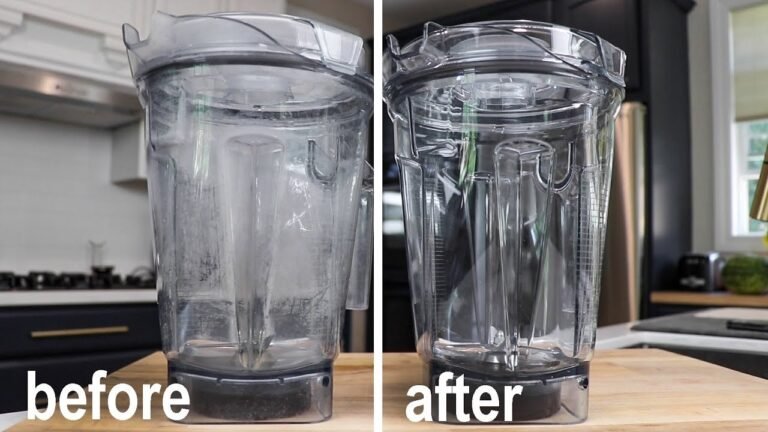
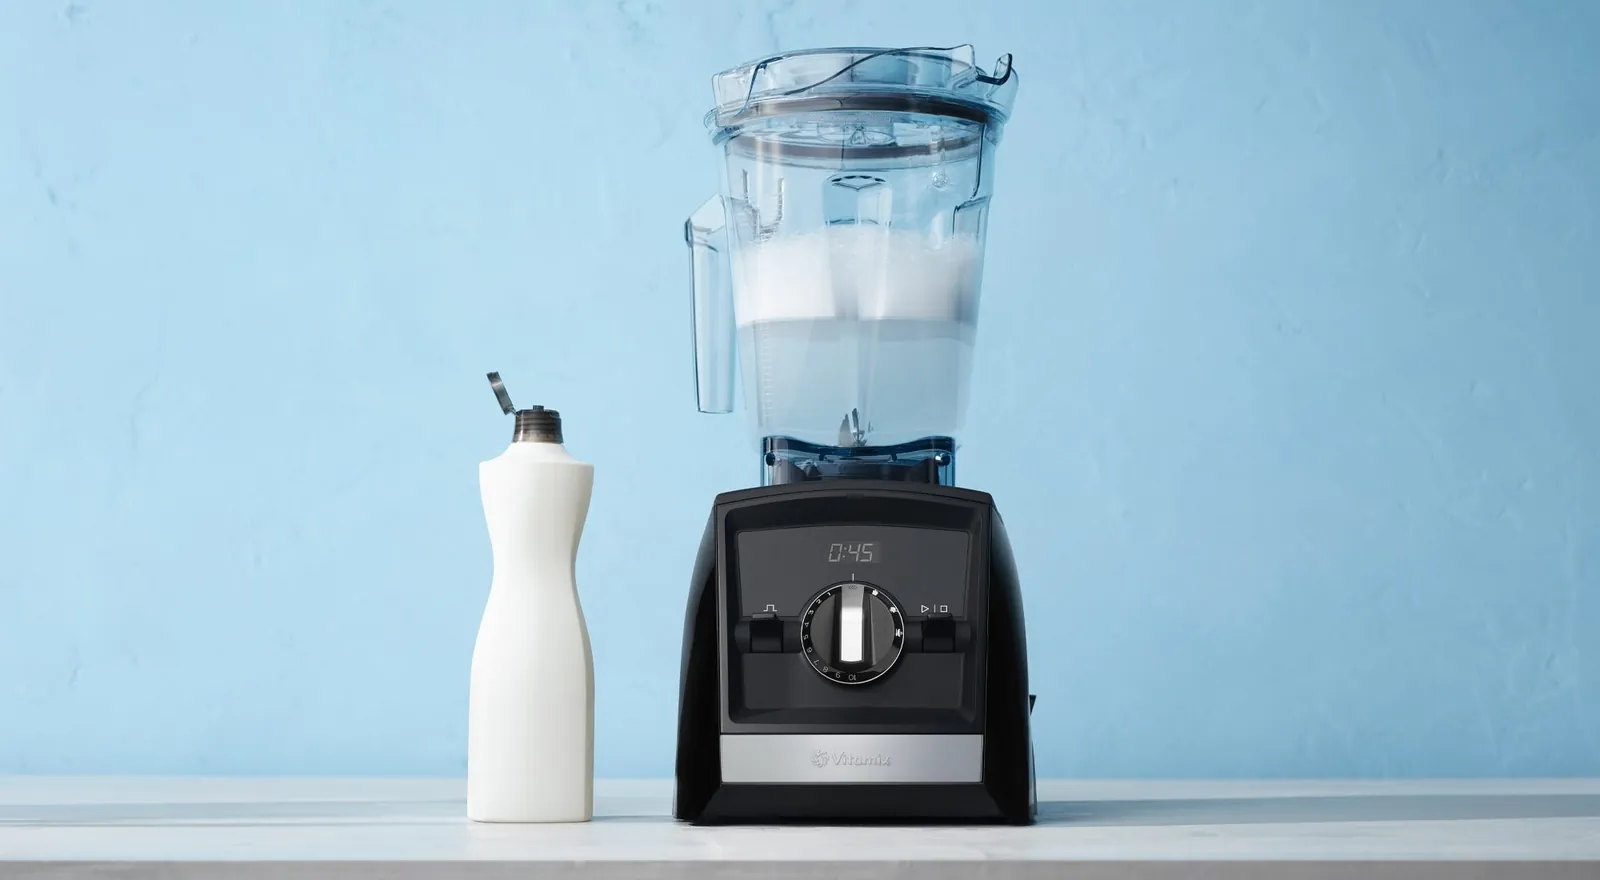
You can clear the cloudiness from your vitamix blender jar by washing it with a warm vinegar solution and a soft sponge. This method removes mineral buildup without scratching the plastic or glass. The result depends on how hard your water is, how long the cloud has been there, and whether you use the dishwasher.
Hard water leaves more minerals behind than soft water does. Older jars hold onto stains better than new ones. Dishwashers often make the cloud worse because the heat and harsh detergents etch the surface over time.
Why your Vitamix blender gets cloudy
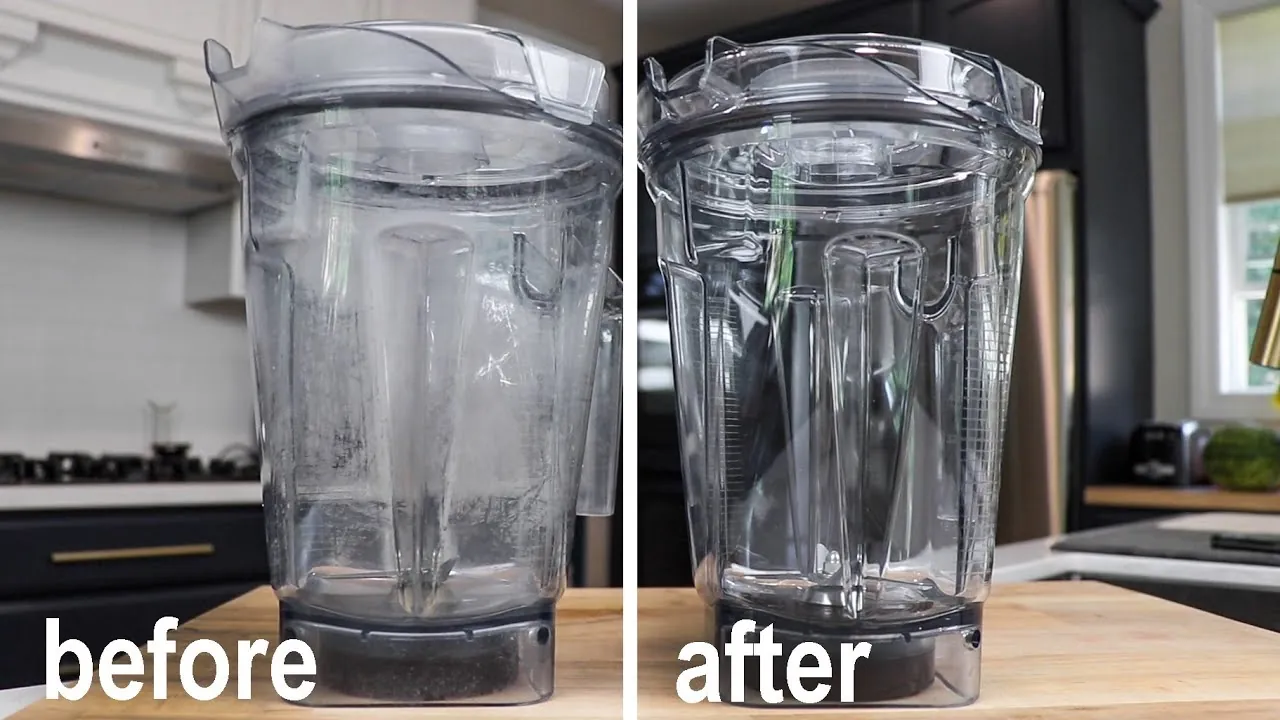
This page helps homeowners who see a milky film on their Vitamix jar after blending hot soups or smoothies. It also serves people who washed their container in the dishwasher and now regret it. You likely own a standard 64-ounce or 48-ounce jar made of Eastman Tritan copolyester or polycarbonate.
If you’re a professional chef using the machine daily, you might need a stronger industrial cleaner instead. If your jar is cracked or deeply scratched, no amount of scrubbing will fix it. We assume you have a sink, some white vinegar, and a bottle brush ready to go. Regular users who wash by hand usually avoid this problem entirely.
What changes the cloudiness result
Water hardness is the biggest factor here. Hard water contains high levels of calcium and magnesium that bake onto the plastic when heated. Soft water leaves far less residue behind, so the jar stays clearer for longer. You can check your local water report online to see if you live in a hard water zone.
Heat exposure accelerates the damage significantly. Hot liquids like soup or tea cause minerals to bond faster to the container walls. A jar used only for cold smoothies rarely clouds up compared to one used for steaming blends. The duration of exposure matters too; a thin film clears easily, but years of buildup may not.
Dishwasher detergent strength is the third major driver. High-alkaline detergents and rinse aids designed for dishes can slowly eat away at the plastic surface. This creates micro-scratches that trap minerals and make the cloud look permanent. Hand washing with mild soap keeps the surface smooth and prevents this etching process.
Step by step cleaning guide
- Fill the blender jar halfway with warm tap water and add one cup of distilled white vinegar.
- Secure the lid tightly and run the machine on low speed for 30 seconds to mix the solution.
- Increase the speed to high and blend for another 30 seconds to let the acid work on the spots.
- Let the mixture sit inside the jar for 15 minutes to dissolve the stubborn mineral deposits.
- Pour out the liquid and use a soft sponge or bottle brush to gently wipe the inside walls.
- Rinse the jar thoroughly with clean water until all vinegar smell disappears from the plastic.
- Dry the container immediately with a soft towel to prevent new water spots from forming.
The single judgment call here is how long you let the vinegar sit. If the cloud is light, five minutes works fine. For heavy buildup, wait the full 15 minutes, but never exceed 30 minutes as prolonged acid exposure can weaken the plastic over many years. Don’t use steel wool or abrasive pads, as they will scratch the surface permanently.
The variations at a glance
| Situation | Action Required | Time Needed | Watch Out For |
|---|---|---|---|
| Light cloud from last week | Vinegar soak for 10 mins | 15 mins total | No scrubbing needed |
| Heavy scale from hard water | Vinegar soak for 20 mins | 30 mins total | Repeat if still cloudy |
| Dishwasher etched surface | Gentle hand wash only | 5 mins total | Can’t reverse etching |
| Glass jar (older models) | Same vinegar method | 15 mins total | Check for cracks first |
| Tritan plastic (newer models) | Avoid bleach or harsh chemicals | 10 mins total | Don’t use metal tools |
| Stubborn spots near base | Use bottle brush carefully | 5 mins extra | Don’t force the brush |
| Smell remains after wash | Rinse with baking soda water | 5 mins total | Neutralize odor completely |
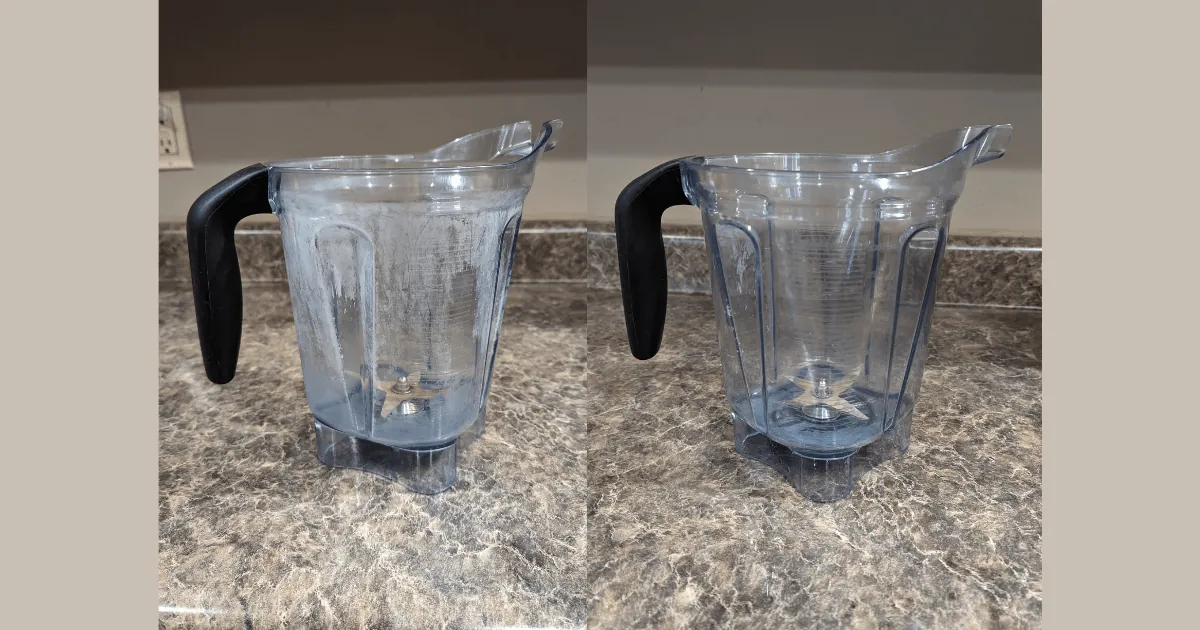
Good results vs poor results
Preparation details
Experienced users fill the jar with enough liquid to cover the blades completely before starting. Beginners often add too little water, leaving the bottom dry and untouched by the cleaning solution. The liquid level must reach the blade assembly to ensure the acid reaches every spot where minerals hide.
Handling the surface
Pros know to use a soft nylon brush rather than a wire scouring pad. They apply gentle pressure in circular motions to lift the film without digging into the plastic. Amateurs often scrub too hard, thinking more force equals better cleaning, which actually scratches the material and traps more dirt later.
What goes wrong and fixes
| What you notice | What it means | Fix first | Stop it next time |
|---|---|---|---|
| Cloud returns fast | Water is very hard | Add lemon juice to rinse | Install a water filter |
| Scratches appear | Used metal utensils | Switch to silicone tools | Never put knives in jar |
| Smell lingers | Mold grew in seal | Clean gasket separately | Dry gasket fully after wash |
| Spots stay stuck | Mineral layer too thick | Soak overnight in vinegar | Wash immediately after use |
| Plastic feels rough | Etching from dishwasher | Hand wash forever | Remove from dishwasher |
Rules that apply
Vitamix officially recommends hand washing their containers to preserve the warranty and clarity. The company states that dishwashers can void the warranty if they cause premature wear or cracking. Always check your specific model manual to confirm if your jar is dishwasher safe, though most newer Tritan jars are rated for top-rack use only.
Food safety guidelines from the FDA require that any food contact surface be cleaned with hot water and soap before reuse. Don’t use bleach or chlorine-based cleaners inside the blender jar as they can degrade the plastic and leave harmful residues. Stick to vinegar, lemon juice, or mild dish soap for regular maintenance.
What it costs you
Cleaning this yourself costs almost nothing in money terms. You only need white vinegar, which is cheap and available at any grocery store. The real cost is time, taking about 20 to 30 minutes depending on how bad the cloudiness is. If the cloudiness appears as a thin film that wipes away with a damp cloth, you’re dealing with surface residue that dissolves instantly.
This requires no soaking and takes less than ten minutes of your afternoon. However, if the glass feels rough or pitted under your fingernail, the damage is permanent and no amount of scrubbing will restore clarity. In that specific case, the twenty-minute effort is wasted because the structural integrity has already failed.
Replacing a damaged jar is expensive relative to the alternative. Preventing the cloudiness through proper care saves you hundreds of dollars in replacement fees. Ignoring the issue leads to a ruined jar that must be thrown away. Many people assume they can simply wait for the cloudiness to fade on its own, but mineral deposits only harden over time.
Waiting six months turns a simple cleaning job into a total loss of the vessel. Once the etching sets in, the jar becomes porous and traps bacteria inside the microscopic cracks. You can’t sanitize it anymore, so even if you replace the lid, the container itself is unsafe for food storage.
The financial difference between these two paths is stark. Spending five dollars on vinegar now prevents spending two hundred dollars later. If you choose to ignore the warning signs, you pay double by buying a new jar sooner than necessary. The rule is simple: treat every spot immediately before it spreads across the entire surface area. Don’t let a small stain become a full-scale replacement project.
Keeping it right afterwards
Dry the jar immediately after washing to stop water spots from forming again. Use a lint-free cloth to wipe every inch, paying special attention to the rim where droplets hide. If you can’t dry it right away, turn the jar upside down on a clean rack so gravity pulls the water out before it evaporates into a stain.
Store the lid off or loosely placed so air can circulate and prevent mold growth inside the seal. Tightening the lid traps moisture against the glass, creating a humid environment where invisible spores thrive within days. Even a small gap is enough to let fresh air in while keeping dust out, which stops the musty smell that often signals trouble.
Inspect the rubber gasket regularly for cracks or debris that could harbor bacteria. Run your finger along the groove to feel for grit or tears that a quick glance will miss. A single hairline fracture in the seal allows water to seep behind the ring, causing permanent clouding that no amount of scrubbing can fix.
If you notice the cloud returning quickly, test your water hardness or consider installing a filtration system. Hard water leaves mineral deposits faster than soft water, meaning you might need to clean twice a week instead of once. A simple test strip can tell you if your local supply is the culprit before you buy expensive equipment.
Cleaning once a week with the vinegar method keeps the jar looking new for years. Don’t wait for the cloud to become visible before you start the routine. Waiting until the white film covers the entire surface means the minerals have bonded too tightly to dissolve easily, requiring harsh chemicals that damage the glass over time.
When this is the wrong approach
If the cloudiness appears as deep, jagged lines that catch your fingernail rather than a hazy film, no amount of scrubbing or polishing will restore clarity. These marks are physical fractures in the plastic matrix where the material has been permanently displaced.
You might be tempted to try heavy-duty abrasives or heat treatments, but these actions only widen the cracks and release microplastics into your food. The damage is structural, not surface-level, so any attempt to fix it wastes time and risks further degradation of the container walls. In this specific scenario, you must purchase a new container immediately to ensure safe operation and true optical clarity.
When the jar leaks from the bottom seal or the base shows visible hairline fractures, stop using the unit entirely before attempting any cleaning routine. These defects create a pathway for liquid to reach the motor housing, which poses an immediate electrical shock hazard and can destroy the internal electronics. Don’t assume a quick patch with epoxy or silicone will hold under high-speed vibration; the centrifugal force generated during blending will eventually blow out any temporary repair.
If you hear a change in sound or feel increased vibration, inspect the base immediately for these signs of failure. Contact Vitamix support or an authorized dealer for a replacement unit if the structural integrity is compromised, as continuing to operate a damaged vessel voids your warranty and endangers your safety.
Frequently asked questions
Can I use bleach to clean my Vitamix?
No, never use bleach inside the blender jar as it damages the plastic and leaves toxic residues. Stick to vinegar, lemon juice, or mild dish soap for safe cleaning.
Why is my Vitamix cloudy after the dishwasher?
High heat and harsh detergents in the dishwasher etch the plastic surface, creating a permanent cloudy appearance. Hand washing with warm water and vinegar prevents this damage effectively.
How long does the vinegar soak take?
Let the solution sit for 15 minutes for light cloudiness and up to 20 minutes for heavy buildup. Longer soaking times don’t improve results significantly and may harm the plastic.
Is it safe to blend hot liquids in a cloudy jar?
Yes, cloudiness doesn’t affect safety or performance unless the jar is cracked or leaking. However, hot liquids accelerate future clouding, so clean the jar promptly after use.
What happens if I use a steel wool pad?
Steel wool scratches the plastic deeply, making the cloudiness worse and trapping more minerals over time. Always use a soft sponge or nylon brush instead.
Does hard water cause the cloud?
Yes, hard water contains minerals that bake onto the plastic when heated, creating a milky film. Using distilled water or a filter reduces this effect significantly.
Will the cloud come back if I don’t dry it?
Yes, water spots form quickly if the jar is left wet, especially in hard water areas. Wipe the jar dry immediately after rinsing to keep it clear.
Next steps to try
Start by mixing the vinegar solution today and running the cycle immediately. Expect the cloud to fade within minutes if it’s just mineral buildup. If the surface feels rough or scratched after drying, stop and replace the container.
If the cloud persists after a full second cycle with fresh white vinegar, the issue is likely etching from harsh detergents rather than temporary scale. Etching creates permanent microscopic pits that no amount of acid can smooth out, so don’t waste time on further cleaning attempts once you confirm this distinction.
You can tell the difference by holding the glass at a forty-five-degree angle under bright light; mineral deposits will shift and vanish as the angle changes, while etching remains a fixed, hazy texture that refuses to move regardless of your perspective.
When the water beads up into distinct droplets instead of sheeting off smoothly, the problem is often a residue left behind by previous wash cycles rather than hard water itself.
In this specific case, adding a half-cup of baking soda to the rinse aid dispenser helps neutralize the alkaline film without damaging the plastic or glass surfaces inside the machine. This simple adjustment works because the mild abrasive action lifts the stubborn soap scum that standard vinegar alone can’t dissolve effectively.
If the cloudiness returns within three days despite using distilled water for the test cycle, check the water heater temperature setting. Water hotter than 140 degrees Fahrenheit accelerates the breakdown of detergent polymers, creating a fine powder that settles on dishes before it has a chance to rinse away completely. Lowering the thermostat to 120 degrees usually resolves this rapid reoccurrence without sacrificing the machine’s ability to sanitize silverware or pots.
Don’t assume that switching to a different brand of detergent will fix the problem if the water hardness in your area exceeds ten grains per gallon. Hard water reacts with any phosphate-free formula to create insoluble salts that coat every surface instantly, meaning the solution requires a water softener or a specialized rinse aid designed specifically for high-minimum environments. Without addressing the source water chemistry, even the most expensive dishwasher tablets will fail to keep your glasses clear over time.