How To Make Homemade Mayo Without Immersion Blender Easily
Making mayonnaise at home is like unlocking a secret in your kitchen. It tastes richer, fresher, and you control every ingredient. But most recipes use an immersion blender or food processor. What if you don’t have one? The good news: you can make homemade mayo without immersion blender—using just a whisk, a bowl, and patience. This guide will show you how, step by step, and answer every common question. Along the way, you’ll learn practical tricks that even many experienced cooks miss.
Why Make Mayo Without Immersion Blender?
Store-bought mayo often contains preservatives, stabilizers, and sometimes sugar. Homemade mayonnaise can be made with simple ingredients: eggs, oil, acid, and salt. You decide the quality and flavor.
But immersion blenders are not in every kitchen. Maybe yours broke, or you don’t want extra appliances cluttering your counter. Using a whisk gives you full control and makes you feel connected to the process.
Making mayo by hand also teaches you about emulsification—a key kitchen skill. You learn to judge texture, thickness, and flavor with your senses, not just machines.
Understanding Emulsification: The Science Behind Mayo
Mayonnaise is an emulsion. This means you mix two liquids that don’t normally combine: oil and water (from eggs and acid). The egg yolk contains lecithin, a natural emulsifier that helps oil and water stick together.
When you whisk oil into egg yolk slowly, droplets of oil are suspended inside the water. If you rush, the oil separates and the mayo “breaks. ” This is why patience is essential.
Even without a blender, you can create a stable emulsion. A simple whisk works, but the secret is adding oil very slowly and whisking continuously.
Essential Ingredients And Tools
You don’t need fancy tools, but the right ingredients matter.
Ingredients
- 1 large egg yolk (room temperature)
- 1 teaspoon mustard (optional, for flavor and extra stability)
- 1 tablespoon lemon juice or vinegar
- 1 cup neutral oil (like canola, grapeseed, or sunflower)
- 1/2 teaspoon salt
- Pinch of sugar (optional, balances acidity)
Tools
- Medium mixing bowl (stainless steel or glass)
- Whisk (balloon whisk is best)
- Clean towel (to steady the bowl)
- Measuring spoons and cups
If you want to make more or less, adjust the ingredients proportionally.
Step-by-step Guide: Making Mayo By Hand
Here’s a clear, practical process for making homemade mayo without immersion blender. Follow each step closely for best results.
Step 1: Prepare Your Workspace
Place a clean towel under your bowl. This keeps it from sliding while you whisk. Gather all ingredients and tools before you start. Mayo must be made in one continuous process.
Step 2: Combine Egg Yolk, Mustard, And Acid
Add egg yolk, mustard, and lemon juice or vinegar to the bowl. Whisk together until smooth and creamy. Mustard is optional but helps stabilize the emulsion.
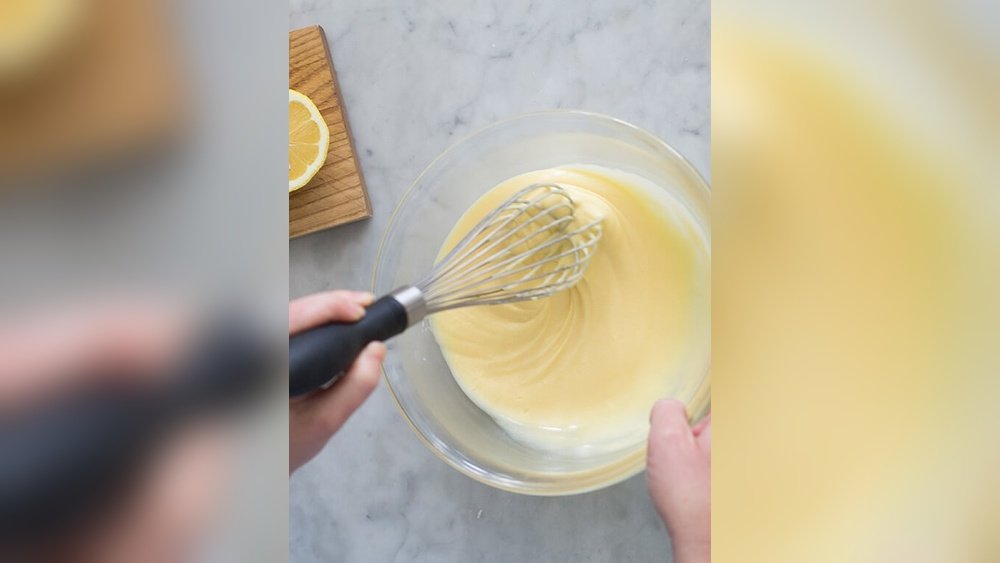
Step 3: Start Slow—add Oil Drop By Drop
Begin adding oil drop by drop. Whisk constantly. Do not rush. For the first few tablespoons, go extremely slow. This is the most critical stage.
You should see the mixture start to thicken and lighten in color. If it stays thin or separates, stop adding oil and whisk vigorously until it thickens.
Step 4: Increase Oil Gradually
Once the mixture has thickened, you can add oil in a thin stream. Continue whisking steadily. If you see oil pooling, stop and whisk until fully combined.
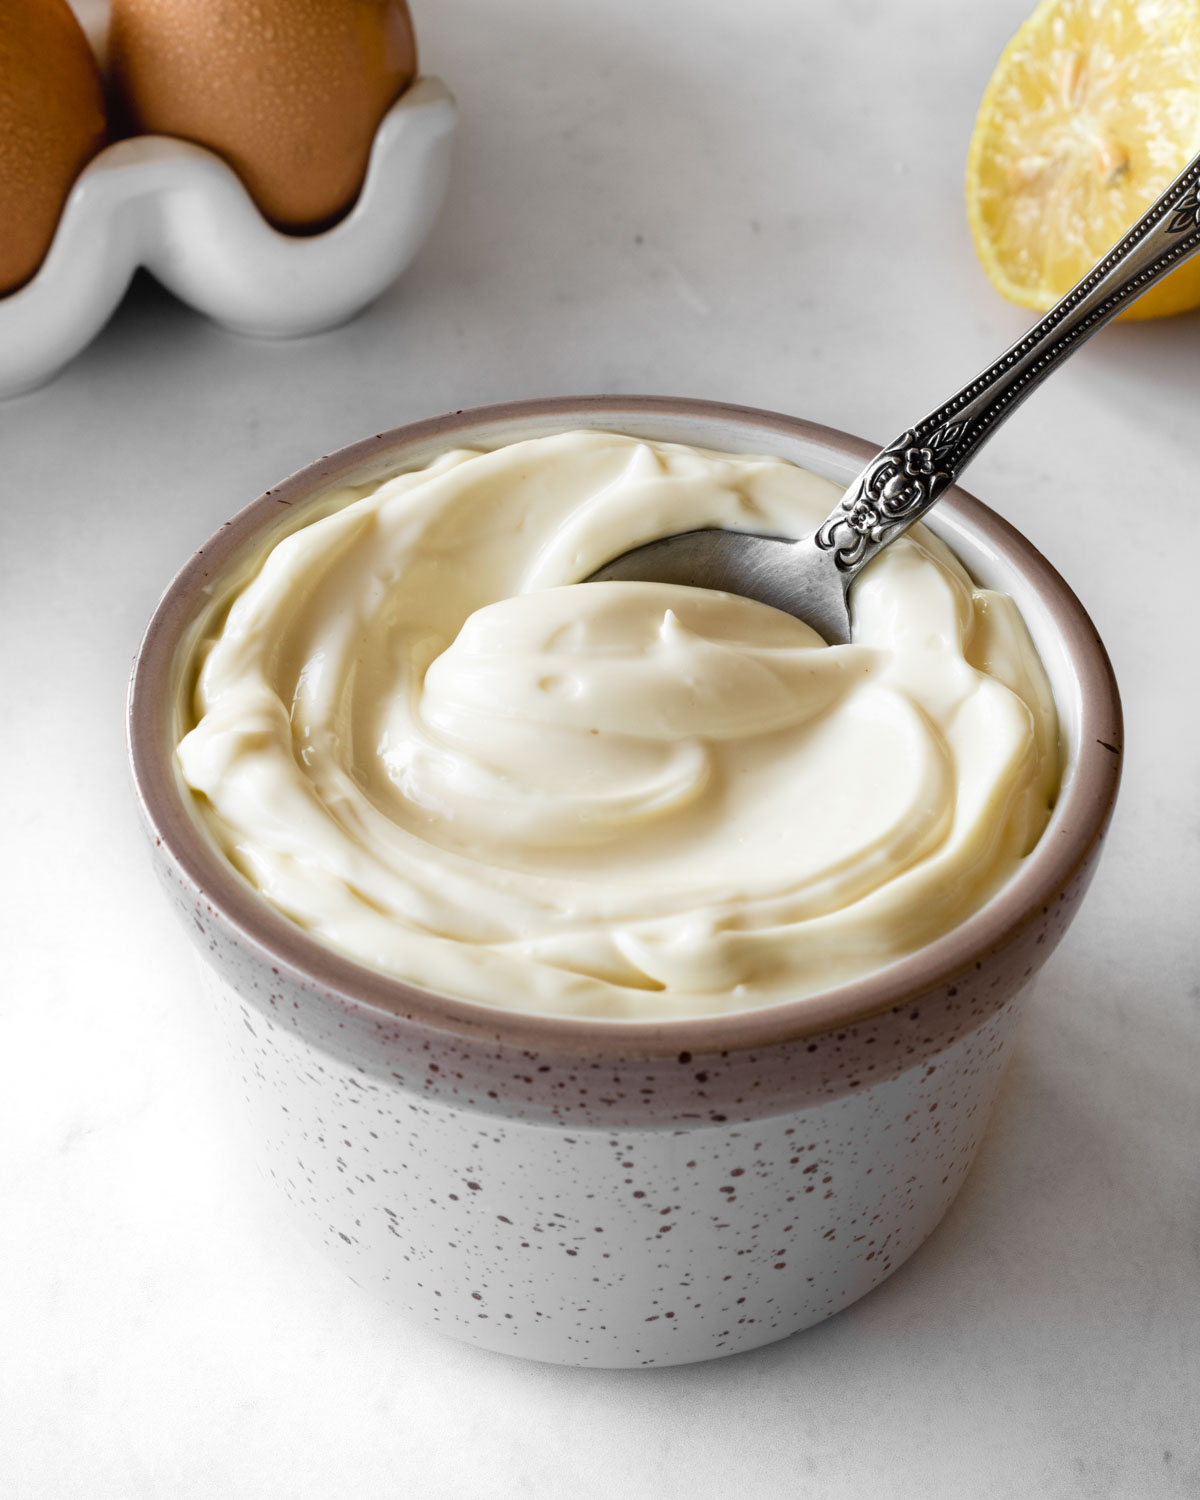
Step 5: Whisk Until All Oil Is Incorporated
Keep whisking and adding oil until you have a thick, creamy mayo. When all oil is in, add salt and sugar (if using). Taste and adjust seasoning.
Step 6: Store Properly
Transfer your mayonnaise to a clean jar. Refrigerate immediately. Homemade mayo keeps for about 3–5 days. Always use a clean spoon to avoid contamination.
Practical Tips For Success
Making mayo by hand is simple, but attention to detail is key. Here are tips that can make a big difference:
- Room temperature ingredients: Cold eggs or oil can cause the emulsion to break. Let everything sit out for 15–20 minutes.
- Whisk type matters: A balloon whisk traps air and makes emulsification easier.
- Stabilizers help: Mustard and lemon juice both stabilize the emulsion.
- Steady bowl: Use a towel under the bowl or ask someone to hold it.
- Oil choice: Neutral oils are best. Olive oil has strong flavor and can turn bitter if over-whisked.
- Add oil slowly: Rushing is the most common mistake.
- Taste at the end: Adjust salt and acidity to your preference.
Even experienced cooks often overlook these details. For example, some don’t realize that using cold eggs can ruin the emulsion. Others don’t know that olive oil can taste bitter if whisked too much.
Comparing Homemade And Store-bought Mayo
Homemade mayo offers freshness and control, but how does it compare to commercial versions? Here’s a side-by-side look.
| Aspect | Homemade Mayo | Store-Bought Mayo |
|---|---|---|
| Ingredients | Egg, oil, acid, salt | Egg, oil, acid, preservatives, stabilizers, sugar |
| Flavor | Fresh, customizable | Standardized, less fresh |
| Shelf Life | 3–5 days | Several months |
| Texture | Creamy, variable | Uniform, sometimes gummy |
| Control | Full control | Little control |
You gain freshness and flavor at the cost of convenience and shelf life.
Variations: Flavored Mayo Ideas
Once you master the basic recipe, you can add flavors. Here are some ideas:
- Garlic mayo (Aioli): Add 1 minced garlic clove with the egg yolk.
- Herb mayo: Stir in chopped fresh herbs (parsley, dill, chives).
- Spicy mayo: Add a teaspoon of sriracha or chili paste.
- Chipotle mayo: Mix in a teaspoon of chipotle in adobo sauce.
- Curry mayo: Add 1/2 teaspoon curry powder.
For these, add flavorings at the beginning with the egg yolk or at the end after emulsifying.
Common Mistakes And How To Fix Them
Even with care, homemade mayo can fail. Here’s how to fix or avoid problems.
Mistake: Mayo “breaks” Or Separates
This happens when oil is added too fast or ingredients are too cold.
Fix: Stop adding oil. Whisk vigorously until thickens. If it won’t fix, start with a new egg yolk in a clean bowl. Slowly whisk in the broken mayo, drop by drop.
Mistake: Mayo Is Too Thin
You may not have added enough oil, or whisked too little.
Fix: Keep whisking and add more oil slowly.
Mistake: Mayo Tastes Bitter
This often happens with extra virgin olive oil.
Fix: Use neutral oils for the base. Add a small amount of olive oil at the end for flavor.
Mistake: Mayo Won’t Thicken
Egg yolk might be too small or old.
Fix: Use a fresh, large egg. Make sure it’s room temperature.
Mistake: Mayo Is Too Salty Or Acidic
Seasoning should be added at the end and tasted carefully.
Fix: Add more oil to dilute. Avoid adding salt until the end.
The Role Of Different Oils In Mayo
Oil is the main ingredient in mayonnaise, and your choice affects flavor, texture, and even color.
| Oil Type | Flavor | Best Use | Notes |
|---|---|---|---|
| Canola | Neutral | Classic mayo | Affordable, light taste |
| Sunflower | Neutral | Light mayo | Works well for subtle flavor |
| Grapeseed | Mild | Premium mayo | Slightly more expensive |
| Olive oil | Strong, fruity | Flavored mayo | Can taste bitter if over-whisked |
| Avocado oil | Rich, buttery | Health-focused mayo | Higher price, unique flavor |
For beginners, start with canola or sunflower oil. Once you feel confident, try blending oils for new flavors.
Choosing Eggs: Safety And Quality
Eggs are a key ingredient in mayo, but they’re also a safety concern. Raw eggs can carry Salmonella. Here’s how to reduce risk:
- Use fresh eggs from reliable sources.
- Consider pasteurized eggs—these are heat-treated for safety.
- Always refrigerate mayonnaise promptly.
- Use within 3–5 days.
Some cooks use only the yolk for richer mayo, others use whole eggs for lighter texture. The yolk provides emulsifiers; whites dilute flavor and thickness.
Comparing Whisk Vs. Other Tools
What if you want to use other tools, like a fork or hand mixer? Here’s how they compare:
| Tool | Emulsification Power | Ease of Use | Best For |
|---|---|---|---|
| Whisk | High | Medium | Classic mayo |
| Fork | Low | Easy | Small batches |
| Hand mixer | Medium | Easy | Large batches |
| Immersion blender | Very high | Very easy | Quick mayo |
A whisk gives you the most control and best texture. Forks are good for tiny batches, but hard for thick mayo.
How Long Does It Take?
Making mayo by hand takes around 10–15 minutes. Most of that is whisking. If you rush, it fails. If you go slow, you get creamy, stable mayonnaise.
Many beginners underestimate the time. Patience is the real secret. You can rest your arm for a moment, but don’t leave the mixture unattended.

Credit: www.youtube.com
How Much Mayo Does One Batch Make?
With the recipe above, you get about 1 cup of mayo—enough for several sandwiches or a week’s worth of salads.
You can scale up, but it’s best to make small batches because homemade mayo has a short shelf life.
Mayo Safety: Storage And Food Safety
Homemade mayo is safe if you follow basic rules:
- Use fresh or pasteurized eggs.
- Store in the fridge at all times.
- Use clean utensils.
- Discard mayo after 5 days.
If mayo smells odd or separates badly, don’t eat it.
Using Homemade Mayo: Practical Ideas
Homemade mayo can be used for much more than sandwiches. Here are ways to enjoy it:
- Dip for fries and vegetables
- Base for salad dressings
- Spread for burgers and wraps
- Sauce for fish or chicken
- Ingredient for deviled eggs
- Binding agent in potato salad
Flavor variations make it even more versatile.
Nutrition Facts For Homemade Mayo
Homemade mayo is rich, but you control the ingredients. Here are typical nutrition facts for 1 tablespoon:
- Calories: 95–110
- Fat: 10–12 grams
- Protein: 0.2 grams
- Carbs: 0.1 grams
- Sodium: 90–120 mg
Most calories come from oil. You can reduce fat by using less oil or substituting part with Greek yogurt, but it changes texture.
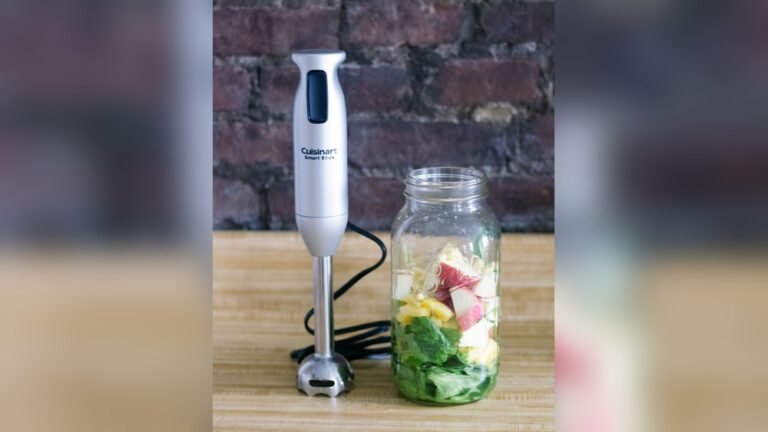
Credit: forksandfoliage.com
Mayo Without Immersion Blender: Is It Worth It?
Many people wonder if hand-whisking mayo is worth the effort. The answer depends on your priorities.
- If you value freshness and control, hand-made mayo is unbeatable.
- If you want convenience and long shelf life, store-bought is easier.
- If you enjoy learning kitchen skills, making mayo by hand teaches you about emulsification—a foundation for sauces, dressings, and more.
Hand-made mayo also lets you experiment. Try new oils, add herbs or spices, or adjust salt and acidity. You become the chef.
Troubleshooting: Real Examples
Let’s look at a few real scenarios:
Example 1: You add oil too fast and mayo breaks.
Fix: Start a new bowl with an egg yolk. Slowly whisk in the broken mixture.
Example 2: Your mayo tastes too acidic.
Fix: Add more oil to balance. Taste and adjust.
Example 3: Mayo is too thin.
Fix: Keep whisking, add more oil, and check egg freshness.
Most problems can be fixed with patience and understanding emulsification.
Mayo For Special Diets
Homemade mayo can be adapted for special diets:
- Vegan mayo: Use aquafaba (chickpea water) instead of eggs. Whisk aquafaba with oil and acid for similar texture.
- Low-fat mayo: Replace part of oil with Greek yogurt. Texture will be lighter.
- Allergy-friendly mayo: Use pasteurized eggs or substitute as needed.
If you have dietary restrictions, homemade mayo gives you freedom.
How To Make Mayo Last Longer
Homemade mayo lasts 3–5 days, but you can extend shelf life:
- Use pasteurized eggs.
- Keep mayo very cold.
- Add more acid (lemon juice or vinegar).
- Always use clean utensils.
Never freeze mayo; it separates and becomes unusable.
Mayo As A Base For Other Sauces
Mayonnaise is the foundation for many classic sauces:
- Remoulade: Add capers, herbs, and pickles.
- Tartar sauce: Mix in chopped pickles, onions, and herbs.
- Ranch dressing: Combine mayo with buttermilk, herbs, and garlic.
- Aioli: Add garlic and olive oil.
Learning to make mayo by hand unlocks a world of homemade sauces.
Why Some Homemade Mayo Turns Yellow
Mayo color depends on egg yolk. Farm eggs with deep orange yolks make yellow mayo. Store eggs make pale mayo. Oil type also affects color—olive oil makes mayo darker.
This is normal and not a sign of spoilage.
Advanced Tips: Getting Perfect Texture
Once you have made mayo a few times, try these advanced tips:
- Use two egg yolks for thicker mayo.
- Add oil slowly, but whisk quickly for a lighter texture.
- For glossy mayo, add a teaspoon of water at the end.
- Use a chilled bowl for thicker mayo.
Experiment and record your results. Each kitchen is different.
Mayo In Global Cuisine
Mayonnaise is used worldwide, but every culture adds its own twist.
- Japan: Kewpie mayo uses rice vinegar, is sweeter and creamier.
- France: Aioli is garlic mayo, often made by hand.
- Russia: Mayo is used in salads and as a dip.
Making your own lets you try global flavors.
Is Homemade Mayo Cheaper?
Homemade mayo is often cheaper per batch, especially if you buy eggs and oil in bulk. Store-bought mayo costs more for packaging and marketing.
For example, 1 cup homemade mayo costs about $0. 60–$1. 00, while store mayo can cost $2–$4 for the same amount.
Mayo Without Immersion Blender: Quick Recap
If you want to make homemade mayo without immersion blender, remember:
- Use room temperature ingredients.
- Whisk egg yolk, mustard, and acid until smooth.
- Add oil slowly, whisking constantly.
- Taste and adjust seasoning.
- Refrigerate and use within 3–5 days.
It’s simple, but requires patience and attention.
:max_bytes(150000):strip_icc()/sea-primary-immersion-blenders-sep-24-rkilgore-0658-89167e1e4bd44afb93d9c847674b09e4.jpeg)
Credit: www.seriouseats.com
Frequently Asked Questions
Can I Use Whole Eggs Instead Of Yolks?
Yes, you can use a whole egg. This makes the mayo lighter and easier to emulsify. The whites add water, so the texture is thinner. Using only yolk results in richer, thicker mayo.
What Oil Is Best For Homemade Mayo?
Neutral oils like canola, sunflower, or grapeseed are ideal. Olive oil is strong and can turn bitter. Avocado oil works for a buttery flavor. Avoid unrefined oils for basic mayo.
How Do I Fix Broken Mayonnaise?
If your mayo separates, start with a new egg yolk in a clean bowl. Slowly whisk in the broken mayo, drop by drop. This usually repairs the emulsion.
Is Homemade Mayo Safe To Eat?
Homemade mayo is safe if you use fresh or pasteurized eggs, refrigerate promptly, and use within 3–5 days. Pasteurized eggs reduce risk of Salmonella. Always use clean utensils.
Can I Make Mayo With A Fork?
It’s possible, but harder. A fork doesn’t whisk as much air as a whisk. For small batches, a fork can work. For creamy, thick mayo, a whisk is better.
Making mayo by hand is a skill worth learning. With practice, you’ll get creamy, rich mayonnaise every time—no immersion blender needed. For more food science and recipe tips, you can check out Serious Eats.
Enjoy experimenting and tasting the difference. Homemade mayo is a small kitchen victory that brings big flavor to your meals.