How to Replace an Oster Blender Drive Pin in 15 Minutes
You can replace an Oster blender drive pin in about 15 to 30 minutes. Unplug the blender, pull off the jar and blade assembly, pry out the old pin from the blade base, press the new pin in until it sits flush, then test on low speed. The pin costs a few dollars, and the whole job needs only basic hand tools — a pin punch or nail set and a light hammer.
Three things change that answer. The blender model decides whether the pin sits in the blade base or the motor coupling. How the old pin failed decides whether you also need a new blade assembly. And whether the base still spins tells you if the problem is the pin at all.
Who should fix an Oster blender drive pin
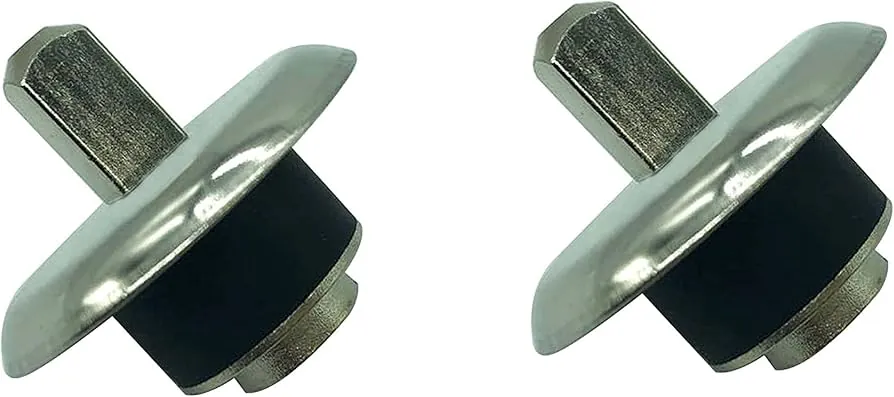
Three kinds of people search this. The first owns an older Oster with a square, four-sided drive pin that has worn round, so the blade spins free and the jar just hums. They have basic hand tools and want to spend a few dollars, not buy a new blender.
The second has a newer Oster where the pin is molded into the blade base and can’t be pressed out at all. They need to know that the whole blade assembly is the replacement part, not a loose pin. This page helps them less, because there’s nothing to press.
The third has a blender that won’t turn the blades and assumes the pin is the problem. Often it’s not. A stripped coupling, a dead motor, or a jar that isn’t seated causes the same symptom.
This page serves the first reader best: someone with a serviceable pin, a model number they can read, and a willingness to spend 20 minutes. If your pin is molded in, or you hear no motor sound at all, read your model’s parts diagram before you buy anything.
What decides whether this fix works
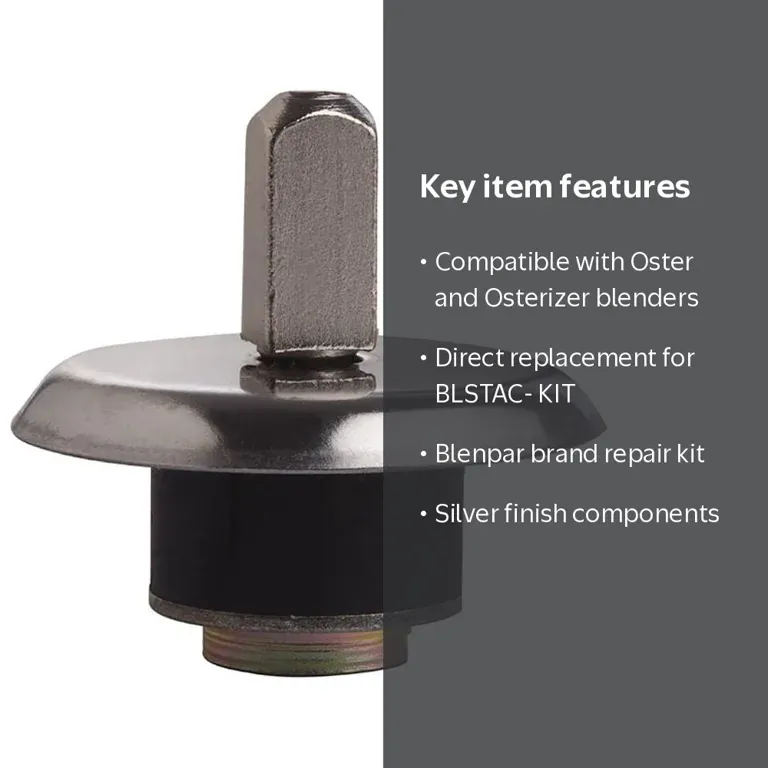
The pin type decides everything. Look at the top of the blade base. A square metal pin that sits proud and can be pushed with a punch is replaceable. A pin cast into the plastic hub is not — you replace the whole blade assembly instead. Check your model’s parts list on Oster’s site to confirm which one you have.
Blade base wear is the second factor. If the hole the pin sits in has gone oval, a new pin will wobble and strip again in weeks. Hold the base up to light and look at the hole shape. A round hole takes a new pin fine; an oval one means a new blade base too.
The third is thread direction and seating. Some Oster blade bases unscrew from the jar collar, and some press on. Forcing the wrong one cracks the collar, which costs more than the pin. Twist gently by hand first — if it doesn’t move with light pressure, stop and check the diagram.
The fourth is the motor coupling below the jar. If the coupling’s rubber or plastic teeth are worn smooth, a new pin won’t help because the drive never reaches the blade. Look down into the base with a flashlight and check for rounded teeth.
People get the pin type wrong most often. It’s the one check worth doing before you order anything.
Step-by-step drive pin replacement
- Unplug the blender from the wall. Don’t skip this — the blades are sharp and the motor can spin if the cord is live. Confirm the plug is out and the cord is clear.
- Remove the jar from the base by lifting it straight up. Set it on a flat surface. The jar should come off with no resistance; if it sticks, check for a locking tab.
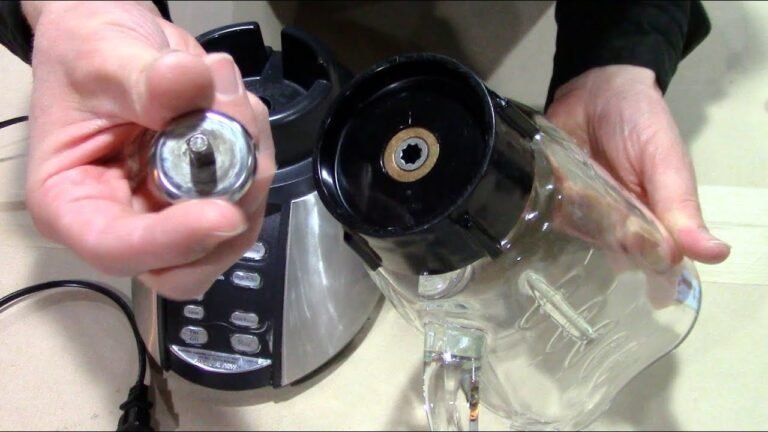
- Unscrew the blade base from the jar collar counterclockwise. Most Oster jars release this way. If it won’t turn by hand, wrap the collar in a cloth and try again — don’t use pliers on plastic.
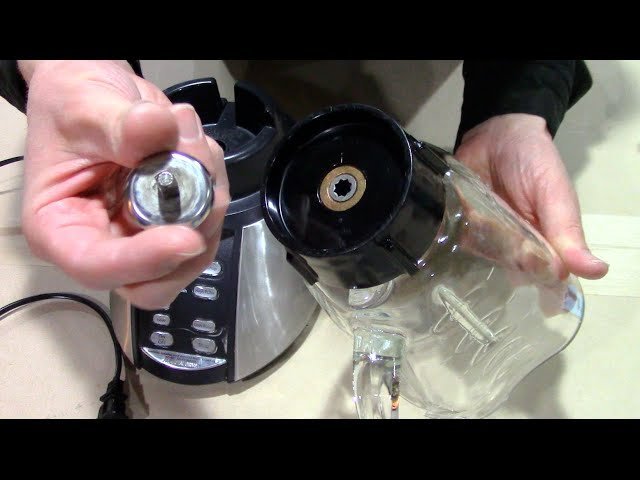
- Lift the blade assembly out of the collar. The pin sits in the center of the base, under the blades. Note which end faces up before you remove it.
- Support the blade base on a wood block or folded towel with the pin over a gap. This stops the plastic from cracking when you press.
- Tap the old pin out with a pin punch or a nail set and a light hammer. Two or three firm taps should move it. If it won’t budge, stop and check your model’s parts diagram — a pin that’s molded into the hub can’t be pressed out, and you’ll need the full blade assembly.
- Clean the pin hole with a cotton swab and a little dish soap. Dry it fully. Old food or debris in the hole stops the new pin seating straight, and grease can let it work loose.
- Press the new pin in by hand first, then tap it flush with the hammer. It should sit level with the base surface, not proud and not sunk. A pin that sits high will hit the coupling.
- Reassemble the blade base into the collar and screw it back onto the jar. Hand-tight only — snug, never forced.
- Fill the jar with 1 cup of water, fit the lid, and run the blender on low for 5 seconds. The blades should spin smoothly with no rattle. If they don’t turn, stop and recheck the pin seating.
The judgement call is pin height. A pin that sits proud rubs the coupling and wears both parts; one that’s sunk doesn’t engage at all. Press it until it’s flush with the surrounding plastic, then check with your fingernail across the surface.
If your blender’s base makes no sound at all when switched on, or you smell burning, that’s beyond a pin job. Take it to a small appliance repair shop rather than opening the base — the motor and wiring inside aren’t a DIY repair.
Drive pin jobs at a glance
| Situation | What to do | What it takes | What to watch for |
|---|---|---|---|
| Square pin, worn round | Replace the pin only | 15-20 min, few dollars | Hole shape — oval means new base |
| Pin molded into hub | Replace the blade assembly | 10 min, part cost higher | Match your model number exactly |
| Pin hole gone oval | New pin plus new blade base | 20-30 min, two parts | Wobble after fitting |
| Coupling teeth worn smooth | Replace the motor coupling | 20-30 min, part cost | Check teeth with a flashlight |
| Jar collar cracked | Replace the collar | 10 min, part cost | Don’t force a stiff collar |
| Blender hums, blades still | Recheck pin seating first | 5 min, no cost | Pin sitting too low |
| No sound from base | Stop — motor or switch fault | Repair shop visit | Burning smell means stop |
What a good repair looks like
Preparation and parts checks
Experienced hands read the model number off the base plate before ordering anything. That number tells you whether your pin is a separate part or part of the blade assembly, and it’s printed on a sticker under the base. They also check the pin hole for oval wear at the same time, so one order covers both parts.
Beginners order a pin, fit it, and find the hole is worn — then pay shipping twice. The cost of that mistake is a second wait and a second delivery charge, not a ruined blender.
Fitting and testing
The pin goes in flush, tested with a fingernail across the surface. Then a water test on low speed for 5 seconds, not a full smoothie, because thick mixtures hide a loose pin until it strips. Listen for rattle and watch the blades from above with the lid on.
What experienced people leave alone is the motor base. Once the pin and coupling check out, they don’t open the housing. The capacitor inside holds a charge even when unplugged, and that’s technician work, not kitchen work.
Common problems and quick fixes
Here’s what usually goes wrong, matched to the cause and the first thing to try.
| What you notice | What it usually means | What to do first | How to stop it happening again |
|---|---|---|---|
| Blades spin free, jar hums | Pin worn round or missing | Replace the pin | Check pin wear periodically |
| New pin strips in weeks | Pin hole gone oval | Fit a new blade base | Inspect hole before ordering |
| Blades won’t turn at all | Pin seated too low | Reseat pin flush | Tap to flush, not below |
| Rattling while blending | Pin sitting too high | Reseat or replace pin | Check height with a fingernail |
| Motor runs, no blade motion | Coupling teeth worn smooth | Replace the coupling | Don’t overload thick mixtures |
| Burning smell from base | Motor or wiring fault | Unplug and stop | Book a repair shop |
| Jar leaks at the collar | Cracked collar or bad gasket | Replace collar or gasket | Hand-tight only, never force |
Parts, safety and where to check
Oster publishes parts diagrams and model-specific part lists on its own website, and that’s the page to check before buying. Search your model number there and confirm whether the drive pin is sold separately or comes with the blade assembly. Buying the wrong part is the most common wasted spend here.
The safety rules are simple and they don’t bend. Unplug before any work near the blades. Never open the motor base, and never touch anything inside it — the capacitor can hold a lethal charge even with the cord out. That’s technician work, full stop.
If your blender is under warranty, opening or modifying it can void the coverage. Check your warranty terms first, and if it’s covered, let Oster or an authorized service center handle it.
What this repair costs you
A replacement drive pin is one of the cheapest blender parts you can buy — usually a few dollars from Oster or a parts seller. A full blade assembly costs more, often in the range of a quarter to half the price of a basic new Oster blender, so check today’s prices before deciding. Prices change, so look them up rather than trusting a number from a blog.
Time is the other cost: 15 to 30 minutes for a pin swap, longer if you’re also replacing the blade base or coupling. Add delivery time if you order online, which is often the longer wait.
What moves the cost up is discovering a second worn part — an oval pin hole, a smooth coupling, a cracked collar. What moves it down is checking all of those before you order, so one delivery covers everything. If the motor itself is dead, the repair usually costs more than a new blender, and that’s the point to stop.
After the new pin is in
Run the blender on low for the first few uses and listen. A smooth whir with no rattle means the pin seated right. A rattle or a sudden free-spin means the pin has moved or the hole is worn — stop and recheck before it strips again.
Check the pin periodically by turning the blade by hand with the blender unplugged. If it turns with resistance and no wobble, it’s fine. If it spins freely or feels loose, the pin is wearing and it’s time to look again.
Keep the jar collar hand-tight, not cranked down. Over-tightening cracks the collar, and a cracked collar is a new part. Wash the blade base by hand rather than in the dishwasher if your model’s instructions say so — heat and detergent can soften the plastic around the pin.
When a new pin isn’t the answer
If your blender’s motor doesn’t run at all, a drive pin won’t fix it. That’s a motor, switch, or cord fault, and it belongs with a repair technician — not a kitchen table job, because the base holds a capacitor that can shock you even unplugged.
If your Oster is a newer model with a molded-in pin, there’s nothing to press out. Buy the full blade assembly matched to your model number instead, or if the blender is under warranty, let Oster’s service handle it.
If the blender is more than a decade old and the coupling, collar, and base are all worn, the parts add up past the price of a basic replacement. In that case, a new blender is the better spend.
Frequently asked questions
How long does it take to replace an Oster blender drive pin?
About 15 to 30 minutes for a standard pin swap, assuming the pin presses out and the hole is still round. Add delivery time if you order the part online. If you’re also replacing the blade base or the motor coupling, allow closer to 45 minutes.
Can I replace just the drive pin, or do I need the whole blade assembly?
It depends on your model. Older Oster blenders use a square pin you can press out and replace alone. Newer models mold the pin into the blade base, so the whole assembly is the part. Check your model number on Oster’s parts page to confirm which you have.
Why does my Oster blender spin but not blend?
A worn or missing drive pin is the most common cause — the motor turns but the pin can’t grip the blade. A worn motor coupling causes the same symptom. Check the pin first, then look at the coupling teeth with a flashlight before ordering parts.
Is it safe to replace the drive pin myself?
Yes, if you unplug the blender first and only work on the jar and blade base. Never open the motor base — the capacitor inside can hold a lethal charge even unplugged. Blade edges are sharp, so handle the assembly by the base, not the blades.
What happens if I fit the pin too high or too low?
A pin that sits too high rubs the motor coupling and wears both parts. A pin that sits too low won’t engage, so the blades won’t turn. Press the pin until it’s flush with the surrounding plastic, then check with a fingernail across the surface.
How do I know if my pin hole is too worn for a new pin?
Look at the hole shape. A round hole holds a new pin fine. An oval or enlarged hole lets the pin wobble, and it’ll strip again in weeks. Hold the blade base up to light and compare the hole to the pin — if there’s visible side-to-side play, replace the blade base too.
Does it matter which way the pin goes in?
For a square pin, no — both ends fit the same. For a pin with a rounded end or a shoulder, fit it the way the old one came out. Note the orientation before you remove the old pin so you don’t have to guess.
Can I use a nail or a screw instead of a real drive pin?
No. A nail or screw is the wrong hardness and shape, and it’ll chew the plastic hole or the coupling. Use the pin Oster sells for your model, or the full blade assembly if the pin is molded in. A homemade pin costs more in ruined parts than the real one costs to buy.
Start with the model number
Before you order anything, read the model number off the base plate and check Oster’s parts page for your pin type. That one check tells you whether you need a pin or a whole blade assembly.
The number is usually stamped into the underside, not the side, and it’s the only thing that separates an inexpensive pin from a blade set that costs many times more. Write it down before you go looking, because parts pages list several models that look identical from the outside.
If the parts page shows your model with a replaceable pin, order the pin. If it shows a sealed blade assembly, replace the assembly, because driving a pin into a sealed unit cracks the housing and leaves you buying both.
Expect the blades to spin smoothly on a 5-second water test once the new pin sits flush. If the base makes no sound, smells like burning, or the motor won’t run, stop there and take it to a repair technician.