How To Replace an Oster Blender Coupling in 15 Minutes
Replacing an Oster blender coupling takes about 10 to 15 minutes and one part: the rubber or plastic coupling that sits under the blade base. Unplug the blender, turn the jar upside down, grip the old coupling with pliers, unscrew it counter-clockwise, and screw the new one on clockwise until it’s snug — no tools past that.
Three things change the job: your Oster model (some couplings press on, most screw on), whether the old coupling is stuck or stripped, and whether the blade assembly itself is worn too.
A coupling that spins freely but won’t drive the blades is stripped, not stuck. If the coupling turns freely when you grip it, the splines are gone and the part comes off easily. If the coupling won’t budge, the threads may have seized from food residue drying in them or from cross-threading.
Apply a few drops of penetrating oil to the threads and wait 10 minutes before you reach for pliers. Forcing a seized coupling can crack the plastic blade base, and a cracked base means replacing the whole assembly.
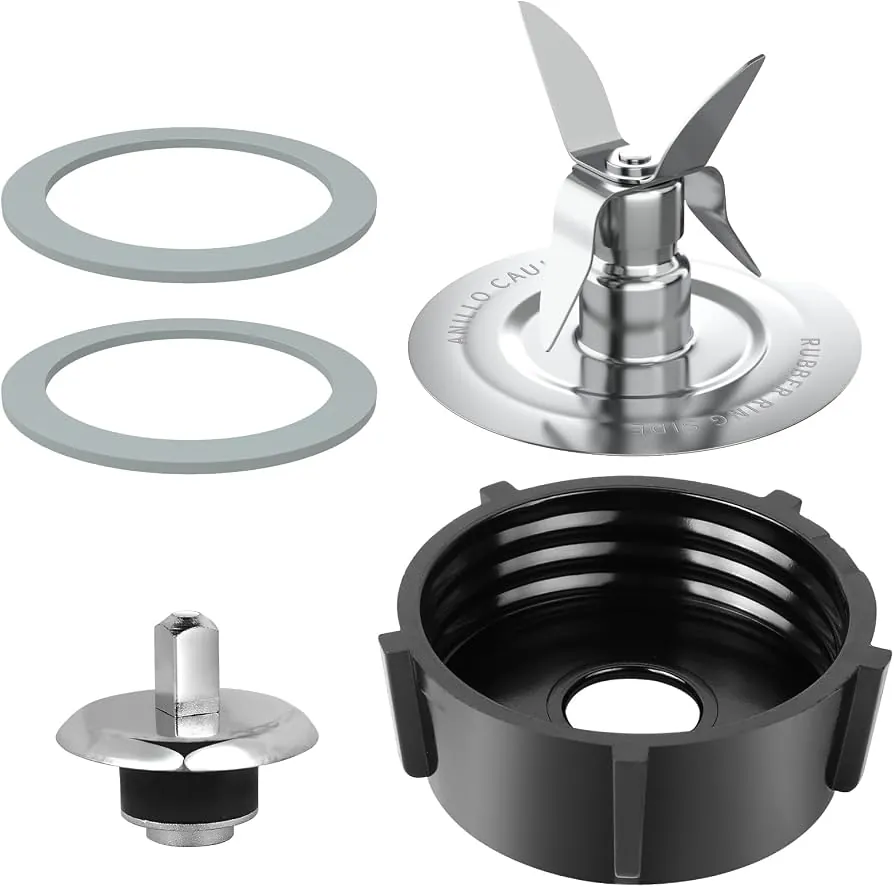
Press-on couplings look identical to threaded ones from above. Look at the shaft underneath: threads mean unscrew, a smooth post means pull straight off. Buying the wrong style is the most common mistake, so match the old part to the photo before ordering.
Who this job is really for
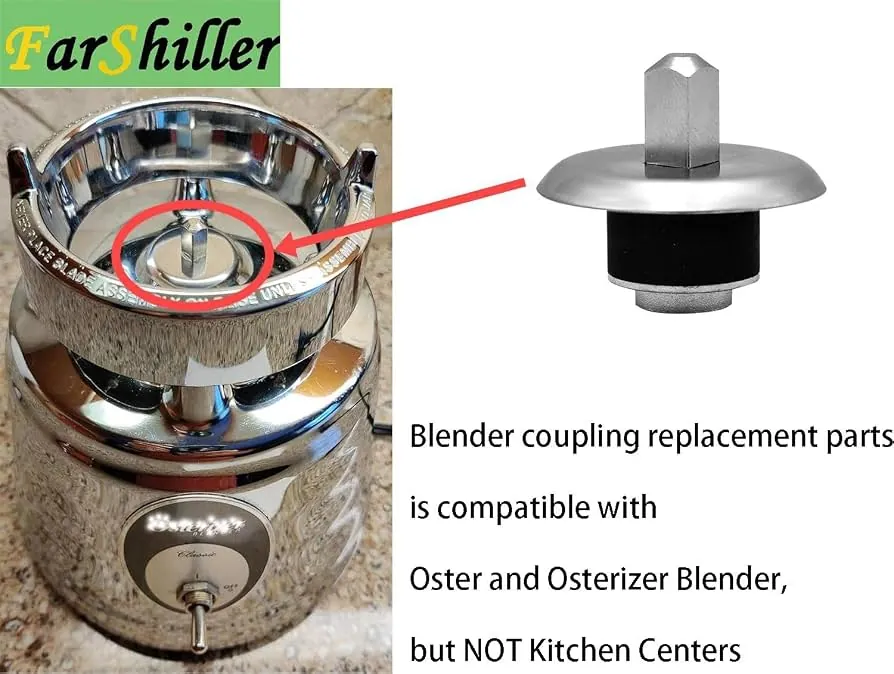
Three kinds of people search this. The first owns a classic Osterizer with a metal drive stud and a rubber coupling that’s gone smooth and round. They’ve had the blender for years, they know the jar, and they need one clear instruction: which coupling fits and how it comes off.
The second has a newer Oster with a plastic coupling that cracked or stripped its splines. They may not know yet whether the part screws off or presses off, and they need a way to tell before they buy anything.
The third is troubleshooting the wrong part. Their blender smells hot, or the motor spins but nothing turns, and they’ve decided the coupling is the culprit. Some of them are right. Others have a worn blade assembly, a cracked jar base, or a motor problem that no coupling will fix.
This page serves the first two best. It assumes your motor runs, your jar isn’t cracked, and the problem is the connection between them. If your blender won’t power on at all, or the motor hums and won’t spin, that’s an electrical or motor fault — stop here and take it to a service technician.
What decides how this goes
The part number is the first thing that decides the outcome, and it’s the one people get wrong most. Oster has made dozens of jar and blade designs. A coupling that fits a 5-cup glass jar often won’t fit a 6-cup plastic one. Check the model number stamped on the bottom of the motor base, then match the coupling to that number on Oster’s own parts page or the retailer’s fitment list.
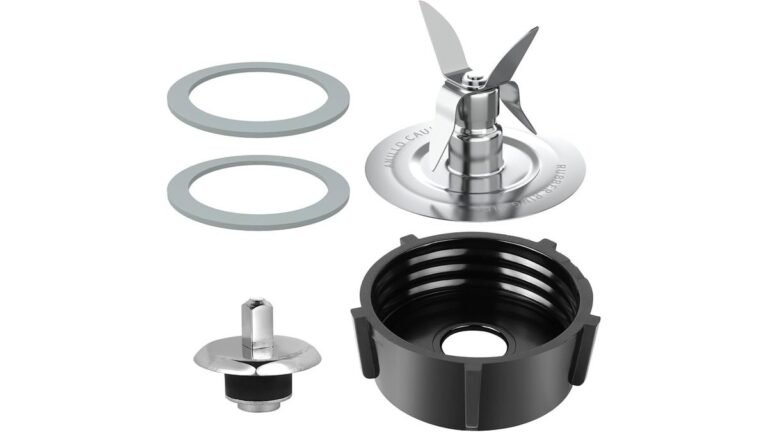
Whether the coupling screws off or presses off is second. Most Oster couplings have a threaded metal insert and unscrew counter-clockwise. Some newer models use a press-fit coupling that pulls straight off the shaft. Look at the underside: a hex or square hole in metal means threaded; a smooth round bore usually means press-fit.
Third is the condition of the drive stud — the metal shaft sticking up from the motor base. If it’s rounded, burred, or worn thin, a new coupling will strip within weeks. Run your finger over it. It should feel square-edged, not smooth.
Fourth is the blade assembly. If the blade spins freely by hand with a gritty feel, the bearing inside the blade base is worn and the blade assembly should be replaced. Replace the blade assembly at the same time.
Fifth is how tight you go. Snug by hand is right. Over-tightening cracks the new coupling where it meets the threads — a mistake that costs you the part and another 10 minutes.
Step-by-step replacement
Unplug the blender. Pull the cord from the wall outlet, not just the switch. Wait 30 seconds. Confirm the blade has stopped completely before you touch anything.
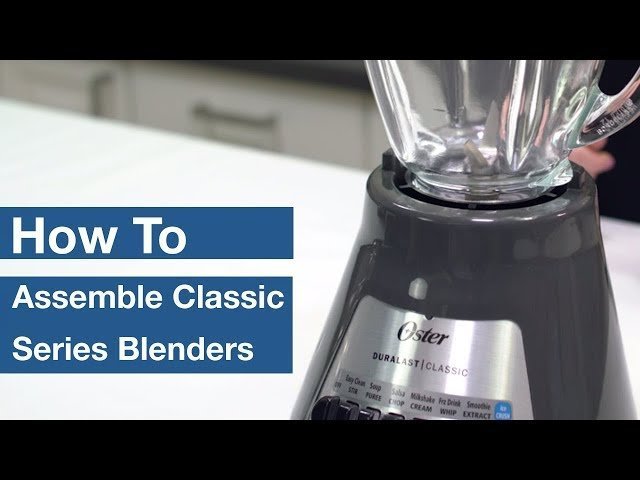
Remove the jar from the base. Lift it straight up. Set it on a flat surface with a towel under it so the glass doesn’t chip.
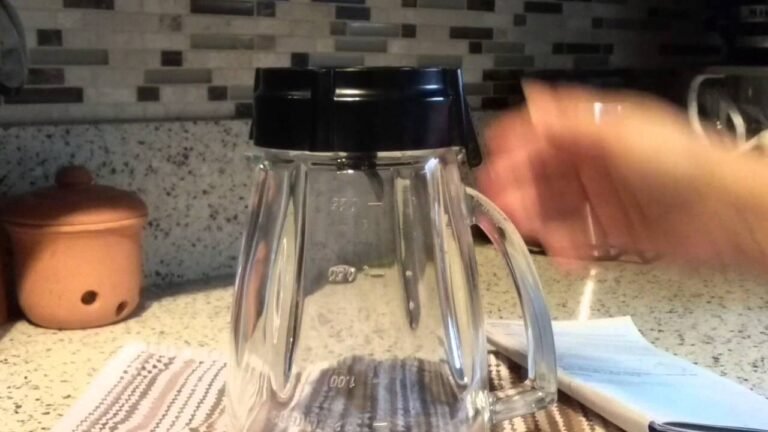
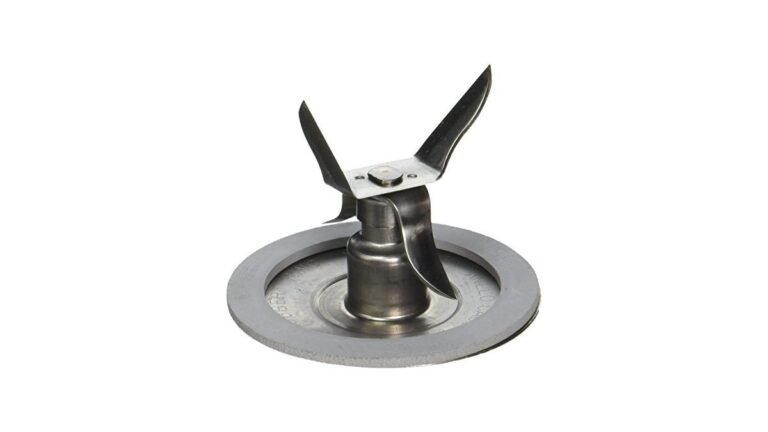
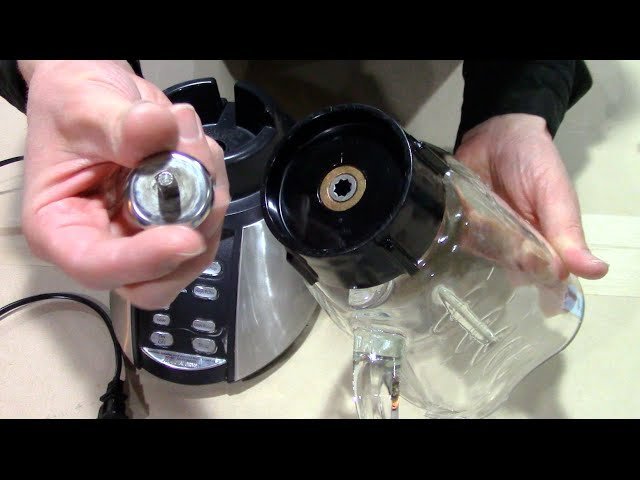
Turn the jar upside down. The blade base and coupling now face you. The coupling is the rubber or plastic piece in the center, below the blade.
Check the coupling type. Look into the center hole. Metal hex or square insert means threaded. Smooth round bore means press-fit. This decides your next step.
For a threaded coupling, grip it with slip-joint pliers. Pad the jaws with a cloth so you don’t scar the rubber. Turn counter-clockwise. It should break free within a quarter turn. If it won’t move, apply a few drops of penetrating oil and wait 10 minutes.
For a press-fit coupling, pull straight down. Grip the coupling firmly and pull it off the shaft. If it’s stubborn, grip it firmly and work it off by hand, rocking it slightly side to side. Don’t pry against the jar glass or the plastic base.
Clean the shaft and threads. Wipe the drive stud with a dry cloth. Remove any rubber dust or old thread-locking residue. The shaft should look clean and dry before the new part goes on.
Thread or press the new coupling on. Turn clockwise by hand until it seats. For press-fit, push straight down until it clicks or bottoms out flush. It should sit level, with no gap on one side.
Tighten by hand only. Turn until snug — hand-tight only, with no extra turn. Don’t use pliers to tighten. Pliers are for removal only.
Reassemble and test. Seat the jar on the base, fill it with 2 cups of water, and run it on low for 5 seconds. The blade should spin smoothly with no wobble or grinding. If it wobbles, the coupling isn’t seated evenly — take it off and reseat it.
The judgement call is the drive stud. A new coupling on a worn stud feels fine for a week, then strips again. If the stud looks rounded or feels smooth, that’s the real problem, and it’s a technician job — the stud sits on the motor shaft, and getting at it means opening the base.
The variations at a glance
| Your situation | What to do | What it takes | What to watch for |
|---|---|---|---|
| Threaded coupling, not stuck | Unscrew by hand or with padded pliers | 10 minutes, one part | Don’t over-tighten the new one |
| Threaded coupling, seized | Penetrating oil, wait 10 minutes, retry | 20-25 minutes | Don’t force it — you’ll crack the jar base |
| Press-fit coupling | Pull straight off, push new one on | 10 minutes, one part | Must sit flush, no tilt |
| Coupling strips every few weeks | Check the drive stud for wear | 5-minute inspection | Worn stud means technician work |
| Blade feels gritty when spun | Replace blade assembly too | 15 minutes, two parts | Worn blade bearing eats couplings |
| Jar base cracked near coupling | Replace the jar, not the coupling | Cost of a new jar | A cracked base leaks and wobbles |
| Motor hums but nothing spins | Stop — this isn’t a coupling fault | Technician diagnosis | Don’t keep running it |
What separates a good result from a poor one
They check the drive stud before buying the part
The drive stud is the metal shaft on the motor base that the coupling grips. Experienced people run a finger over it before ordering anything. Square edges and a matte finish mean it’s fine. Rounded corners, a shiny worn patch, or a shaft that’s visibly thinner on one side mean the stud is done. A new coupling on a worn stud lasts weeks, not years. That check takes 30 seconds and saves a second part order.
They match the part to the model number, not the jar size
Two Oster jars that hold the same 5 cups can take different couplings. The jar size tells you nothing reliable. The model number on the bottom of the motor base does. Read it, then check it against the fitment list on Oster’s parts page or the retailer’s listing before you buy. People who guess by looks end up with a coupling that threads on halfway and wobbles.
What goes wrong, and what to do
| What you notice | What it usually means | What to do first | How to stop it happening again |
|---|---|---|---|
| Blade spins but jar doesn’t turn | Coupling stripped or rounded | Replace the coupling | Check drive stud for wear |
| Burning rubber smell | Coupling slipping under load | Stop, unplug, inspect | Don’t run thick mixes on high |
| Coupling cracks within days | Over-tightened on install | Replace, hand-tighten only | Snug, never pliers-tight |
| New coupling wobbles | Not seated evenly on shaft | Remove and reseat | Push straight, check for tilt |
| Blender shakes hard | Blade assembly or jar base worn | Inspect blade bearing | Replace blade assembly with coupling |
| Coupling won’t unscrew | Threads seized or cross-threaded | Penetrating oil, wait, retry | Clean threads before installing |
| Motor hums, no movement | Motor or switch fault | Stop using it | Technician diagnosis |
The rules that apply
Oster’s own parts documentation is the authority here — not forums or video comments. The model number on your motor base is what Oster’s parts page uses to match a coupling, and that page is where the correct part number for your unit lives. If the listing doesn’t confirm your model number, don’t buy it.
Your blender’s warranty decides whether you should touch it at all. Many Oster blenders carry a limited warranty that covers defects but not user-replaced wear parts, and opening the motor base usually voids it. Check the warranty card or Oster’s warranty page for your model before you go past the coupling.
Anything inside the motor base — the shaft, the bearings, the switch, the wiring — is technician work. The motor base holds mains voltage, and a capacitor inside can hold a dangerous charge even when the blender is unplugged. Don’t open it. Take it to an authorized Oster service center or a small-appliance repair shop.
What it costs you
The coupling itself is the cheap part. Prices move with the model and the seller, so check Oster’s parts page or a retailer listing for today’s number rather than trusting a figure from an old forum post. A blade assembly, if you need one too, costs more than the coupling — often several times more.
The real cost is time and repeat orders. A wrong part means waiting for a second delivery, and a coupling that strips again in three weeks means you bought the right part but missed the worn drive stud. That’s the expensive version of this job.
What moves the cost down: checking the drive stud first, matching the part to the model number, and buying the coupling and blade assembly together if the blade feels gritty. One order, one shipping charge, one repair.
What moves it up: seized threads that need a soak, a cracked jar base that turns a coupling swap into a jar replacement, or a motor fault that no part will fix. If you’re not sure which one you have, the drive stud and blade check tell you in under 2 minutes.
Keeping it right afterwards
A correctly installed coupling needs almost nothing. Wipe the area under the jar after each use so grit doesn’t work into the threads. Don’t run thick mixtures — nut butters, frozen fruit blocks, dry grains — on high speed for long stretches. That’s what overheats and strips couplings.
The sign it needs attention again is a change in sound. A healthy blender runs steady. A slipping coupling usually makes a grinding or rattling noise under load, and the blade slows when the mixture thickens. Stop and check before it strips completely — a coupling caught early sometimes just needs reseating.
If it does strip again, you don’t start over. Unplug, unscrew the coupling, check the drive stud, and replace just the coupling. The jar, blade, and base stay as they are. But if the second coupling strips within a few weeks, stop replacing parts and get the drive stud looked at — that’s the pattern that says the problem is upstream.
When this isn’t the right fix
If your blender won’t power on, hums without spinning, or trips the breaker, this isn’t a coupling job. Those point to the switch, the motor, or the wiring, and the fix lives inside the base — technician territory. Take it to an authorized Oster service center.
If the jar base is cracked around the coupling, a new coupling won’t seal or sit straight. Replace the jar instead. Running a cracked jar risks glass in your food.
If the blender is under warranty and the fault isn’t a wear part, use the warranty. Opening the base yourself usually voids it, and a covered repair costs you nothing.
One test tells the two apart before you buy anything. Unplug the blender and turn the jar upside down. If the coupling spins freely by hand and the rubber looks chewed or smooth, that’s wear and a new coupling will fix it. If the coupling is intact but the blades won’t turn, the problem is above the coupling, in the jar or the shaft.
A coupling that fails twice in a few months is telling you something else. Repeated failure usually means the jar is out of alignment or the blade assembly is worn, and another coupling will fail the same way. Replace the jar and blade assembly together.
Frequently asked questions
How long does it take to replace an Oster blender coupling?
About 10 to 15 minutes if the old coupling unscrews cleanly. Add 10 to 15 minutes if the threads are seized and need penetrating oil. Press-fit couplings come off faster — usually under 10 minutes total.
Can I replace the coupling without any tools?
Yes, if the coupling isn’t stuck. Most threaded couplings break free by hand, and press-fit ones pull straight off. Keep slip-joint pliers nearby for a seized one, but pad the jaws with cloth so you don’t scar the rubber.
How do I know which coupling fits my Oster blender?
Match it to the model number stamped on the bottom of the motor base, not the jar size. Check that number against Oster’s parts page or the retailer’s fitment list. If the listing doesn’t confirm your model number, don’t buy that part.
Why does my new coupling strip so fast?
A worn drive stud is the usual cause. Run a finger over the metal shaft on the motor base — rounded edges or a shiny worn patch mean the stud is done, and any new coupling will strip within weeks. That’s a technician repair.
Is it safe to use the blender after replacing the coupling?
Yes, once you’ve confirmed the blade spins smoothly with no wobble. Test with 2 cups of water on low for 5 seconds before blending food. If it wobbles or grinds, unplug it and reseat the coupling.
What happens if I over-tighten the coupling?
It cracks where the threads meet the rubber, usually within a few days of use. Hand-tight is enough — about a quarter turn past finger-tight. Never use pliers to tighten, only to remove a stuck one.
Does it matter if I use a generic coupling instead of an Oster part?
It can. Generic couplings vary in rubber hardness and thread depth, and a loose fit strips faster. A genuine Oster part matched to your model number is the safer bet, especially if you’ve already replaced one coupling.
Can I replace the coupling while the jar still has food in it?
No. Empty the jar and wash it first. Food left in the jar adds weight and slip during the test run, and you can’t see whether the coupling seated evenly with the jar full.
Conclusion
Start by unplugging the blender and checking the drive stud before you order anything. Expect a smooth 5-second test spin with 2 cups of water and no wobble — that’s your sign it’s seated right. If the blade still wobbles after reseating, or the new coupling strips within a few weeks, stop and take the base to a service technician.