Can’t Open Nutribullet After Blending? How to Loosen It
A Nutribullet that won’t come apart after blending is almost always locked by suction, swollen threads, or a safety interlock that hasn’t fully released — not by a broken machine. The fix is usually a few minutes of patient pressure and heat, not a new blender. Work through the causes below in order, from the gentlest method to the ones that need a little more force, and you’ll get that cup off without cracking the plastic or voiding your warranty.
Key Takeaways
- Suction is the #1 cause. A vacuum forms when hot or thick contents cool and contract inside a sealed cup, literally gluing the blade base to the cup.
- Never twist the cup. Twist the blade base while holding the cup steady — the cup is the part that cracks.
- Warm water beats force. Running the base threads under warm (not boiling) water for 60–90 seconds expands the plastic and breaks the seal.
- Stop if you hear cracking. Plastic failure sounds like a sharp snap; back off immediately and try heat again.
- Don’t freeze or microwave anything. Both damage the plastic and can shatter a pressurized cup.
- When in doubt, call Nutribullet. Their warranty covers manufacturing defects, and forcing a stuck cup usually doesn’t.
Why Your Nutribullet Won’t Open After Blending
Understanding the mechanism saves you from making it worse. There are really only four reasons a Nutribullet cup refuses to separate from its blade base, and each one calls for a different approach.
Vacuum suction is the most common culprit by far. When you blend warm ingredients — soup, coffee smoothies, steamed vegetables — the air inside the cup heats up and expands. As the contents cool after blending, that air contracts and creates negative pressure. The cup and blade base are now held together like two suction cups. The tighter the seal, the harder it’s to break.
Swollen or warped threads come second. Plastic expands when hot and doesn’t always return to its original shape. If you’ve been blending hot liquids regularly, the threads on the cup or the blade base may have deformed just enough to bind. Dishwasher heat on a heated dry cycle can do the same thing.
Sticky residue is the sneaky one. Thick blends — nut butters, protein shakes with peanut butter, frozen banana and date smoothies — leave a film in the threads that acts like adhesive once it dries. You twist, nothing moves, and you assume it’s cross-threaded when it’s actually glued.
Cross-threading happens when the cup was screwed on at a slight angle. The threads jam against each other rather than sliding. This one feels different: the cup usually wobbles slightly rather than feeling rock-solid.
| Symptom | Most Likely Cause | First Fix |
|---|---|---|
| Cup feels glued, no wobble | Vacuum suction | Warm water on threads |
| Cup wobbles but won’t turn | Cross-threading | Firm downward pressure, then twist |
| Only sticks with thick recipes | Sticky residue | Soak in warm soapy water |
| Sticks every single time | Warped threads | Inspect and contact support |
| Blade base spins but cup won’t | Interlock not released | Unplug, wait 30 seconds |
The Safest Method: Warm Water and Patience
This is the method to try first, every time. It works on vacuum suction and mild thread binding, and it carries almost zero risk of damaging your cup.
- Unplug the motor base. This is non-negotiable. You’re about to handle the blade assembly directly.
- Fill a bowl with warm tap water. Aim for comfortably hot to the touch — around 110–120°F. Never boiling. Boiling water can warp the plastic and weaken the blade seal.
- Hold the cup upright and submerge only the threaded joint. You want the water line just above where the cup meets the blade base. Don’t dunk the whole thing.
- Wait 60 to 90 seconds. The warm water expands the plastic threads slightly and softens any dried residue.
- Dry your hands and the cup exterior completely. Wet hands slip, and slipping is how cups get dropped.
- Grip the blade base firmly with one hand and the cup with the other. Twist the blade base counterclockwise while holding the cup still. If nothing moves, twist the cup clockwise instead — sometimes reversing direction breaks the bind.
- Apply steady pressure, not a jerk. A sudden yank is what cracks plastic. Slow, increasing force is what works.
Pro Tip: If the cup is still stuck after one warm-water cycle, repeat it two or three times. Each cycle expands the plastic a little more, and the cumulative effect is often enough when a single attempt isn’t.
Tapping and Vibration Tricks That Work
When heat alone doesn’t do it, mechanical vibration is the next tool. The goal is to break the vacuum seal or jolt the threads loose without stressing the plastic.
- Tap the blade base rim with the handle of a wooden spoon. Work your way around the circumference with light taps. The vibration travels through the threads and often pops the seal.
- Press down while twisting. Push the cup down onto the blade base (toward the counter) as you twist. This compresses the threads slightly and can release a jammed connection.
- Use a rubber jar opener. Those flat rubber grippers sold for pickle jars give you far more torque with far less hand strain. They also let you apply force evenly instead of in one spot.
- Try the “two-person” method. One person holds the cup steady with both hands while the other twists the blade base. Two sets of hands apply cleaner force than one person fighting both directions.
- Gently rock, don’t rotate. Small back-and-forth rocking motions — maybe 10 degrees each way — can work a stuck thread loose when a full twist won’t budge it.
Warning: Never use pliers, a pipe wrench, or a vise on the cup or blade base. Metal tools concentrate force on a single point and will crack the plastic or shred the threads. If you’ve reached the point where you’re considering tools, stop and call support instead.
What NOT to Do When It’s Stuck
Some “fixes” circulating online will destroy your Nutribullet. Skip all of these.
- Don’t put it in the freezer. Cold makes plastic contract and brittle. A frozen cup is far more likely to shatter when you twist it.
- Don’t microwave the cup. Even briefly. The plastic isn’t microwave-safe in this context, and a sealed container under pressure can burst.
- Don’t run it under boiling water. Thermal shock can crack the cup and degrade the blade seal.
- Don’t bang it on the counter. Impact fractures start as hairline cracks you can’t see, then fail completely a week later.
- Don’t run the motor to “loosen” it. Running the blender while the cup is stuck can strip the motor coupler — a repair that usually costs more than a replacement cup.
- Don’t use a knife or screwdriver to pry. You’ll gouge the plastic and create a leak path.
- Don’t force it if you hear cracking. That sound means plastic is failing. Stop, apply heat, and try again later.
How to Prevent It Next Time
Prevention is genuinely easier than the fix, and it takes about ten seconds per use.
Never blend hot liquids in a sealed cup. If you’re making soup, let it cool to room temperature first, or blend in batches with the cup only two-thirds full. Nutribullet’s own user guides warn against blending hot ingredients in the standard cups for exactly this reason.
Rinse immediately after every use. The single biggest cause of stuck cups is dried residue in the threads. A 15-second rinse under warm water before the residue sets prevents most problems entirely.
Don’t overtighten. You need the cup snug enough to seal, not cranked down like a jar lid. Hand-tight is enough. If you have to strain to tighten it, you’ve gone too far.
Inspect the gasket regularly. The rubber gasket inside the blade base degrades over time. A worn or missing gasket changes how the cup seats and can cause both leaks and sticking. Replacements are cheap and available directly from Nutribullet.
Hand-wash the cups and blade base. If your model’s parts are dishwasher-safe, use the top rack only and skip the heated dry cycle. Heat is what warps threads.
Pro Tip: Keep a dedicated rubber jar opener in the drawer next to your blender. If a cup does stick, you’ll have the right tool within arm’s reach instead of improvising with something that damages the plastic.
| Prevention Habit | What It Prevents | Effort |
|---|---|---|
| Rinse threads immediately | Sticky residue lock | 15 seconds |
| Cool hot foods first | Vacuum suction | Passive wait |
| Hand-tighten only | Cross-threading and warping | Zero |
| Hand-wash, top rack only | Thread deformation | Minor |
| Replace gasket yearly | Leaks and poor seating | Low cost |
| Keep a jar opener nearby | Panic force damage | One-time purchase |
When the Blade Base Is the Problem
Sometimes the cup isn’t the issue — the blade base is. Here’s how to tell the difference.
If the blade base spins freely when you press it against the motor, the internal coupling is stripped. That’s a blade base replacement, not a stuck-cup problem. New blade bases are sold individually by Nutribullet and by most retailers that carry the brand.
If the blade wobbles or rattles inside the base, the bearing is failing. Continuing to use it risks metal fragments in your smoothie. Replace it.
If the base smells burnt or shows discoloration near the blades, the seal has failed and contents have leaked into the housing. Replace it — don’t try to clean and reuse it.
If the base won’t seat on the motor at all, check the motor’s coupler (the small plastic or rubber nub on top of the motor base). If that’s worn down or rounded off, the motor base needs service or replacement.
Warning: A blade base with a compromised seal can leak liquid into the motor housing during blending. If you’ve noticed liquid pooling under the cup after blending, stop using that base immediately.
Nutribullet Models and Their Quirks
Different Nutribullet models have slightly different cup and blade designs, and the sticking behavior varies.
| Model | Cup Style | Common Sticking Cause |
|---|---|---|
| NutriBullet 600/900 | Standard 24 oz cup | Vacuum from warm blends; overtightening |
| NutriBullet Pro 900/1000 | Tall 32 oz cup | Residue in deep threads; harder to rinse |
| NutriBullet Rx | Short wide cup | Cross-threading from the wider mouth |
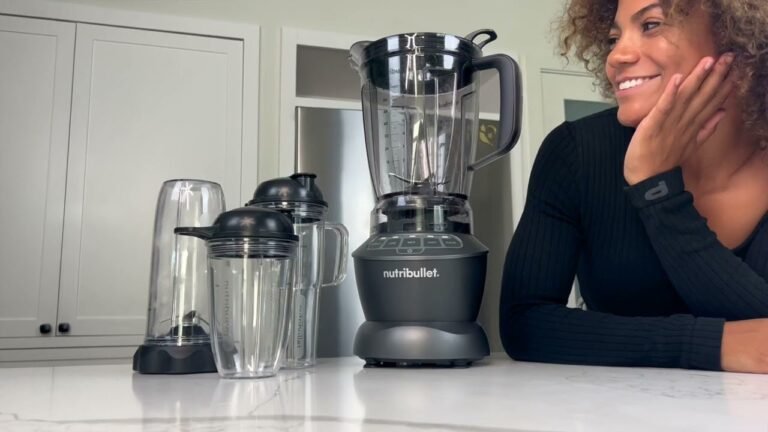
| NutriBullet Blender Combo | Pitcher + cups | Pitcher lid suction; cup threads same as 900 |
| NutriBullet Go | Small personal cup | Overtightening; smaller grip area |
The NutriBullet Rx is worth calling out specifically because its wider cup mouth makes it easier to seat the blade base at a slight angle. If you own an Rx and your cups stick constantly, check your threading technique before assuming the plastic is warped.
Cleaning a Stuck Cup Once It’s Free
Once you’ve got the cup apart, clean both halves thoroughly before the next use. Residue left in the threads guarantees a repeat performance.
- Soak both parts in warm water with a drop of dish soap for 10 minutes.
- Use a soft bottle brush on the cup threads. Never a scouring pad — it scratches the plastic and creates places for residue to hide.
- Scrub the blade base threads with a small brush, working around the gasket carefully.
- Rinse under running warm water and check that no film remains.
- Air-dry upside down on a dish rack. Don’t towel-dry the blade area — it’s a cut risk.
- Reassemble only when fully dry. Moisture between the threads encourages residue buildup.
If the gasket looks stretched, cracked, or discolored, replace it now. Nutribullet sells gasket and blade base replacement kits, and third-party versions exist for most models.
Frequently Asked Questions
Why is my Nutribullet cup stuck so tight I can’t move it?
The most likely cause is vacuum suction created when warm contents cooled inside the sealed cup. The contracting air pulls the blade base and cup together with surprising force. Run the threaded joint under warm tap water for 60–90 seconds, dry your hands, then twist the blade base — not the cup — counterclockwise.
Can I put a stuck Nutribullet cup in the freezer to loosen it?
No. Cold makes plastic contract and become brittle, which increases the chance the cup will crack or shatter when you twist it. Freezing also doesn’t break a vacuum seal effectively. Warm water is the correct temperature approach — it expands the plastic and softens residue.
How do I open a Nutribullet cup without breaking it?
Use a rubber jar opener for grip, hold the cup steady on the counter, and twist only the blade base. Apply slow, increasing pressure rather than a sudden jerk. If it won’t budge, apply warm water and try again. Never use pliers, a vise, or metal tools — they concentrate force and crack the plastic.
Is it safe to blend hot soup in a Nutribullet?
Nutribullet advises against blending hot ingredients in the standard sealed cups because pressure builds inside and can cause the lid to blow off or the cup to crack. Let hot food cool to room temperature first, and never fill past the maximum line. If you blend warm food regularly, expect more stuck cups.
Will Nutribullet replace a cup that’s stuck or cracked?
Nutribullet’s warranty covers manufacturing defects, and a cup that cracked from a defect rather than from force may qualify. Contact their customer support with your model number and purchase date. Damage from prying, freezing, or boiling water is generally not covered, so be honest about what happened.
How often should I replace the blade base?
Most Nutribullet blade bases last six months to two years with regular use, depending on how often you blend and how well you clean them. Replace yours if the blade wobbles, the base leaks, the gasket is degraded, or you notice a burnt smell. A worn blade base is also a common hidden cause of cups that stick repeatedly.
Conclusion
Once you’ve freed the cup, rinse the threads immediately, hand-tighten only from now on, and keep a rubber jar opener within reach — that single habit prevents nearly every stuck-cup situation you’ll run into. If it sticks again despite doing everything right, replace the gasket or blade base rather than fighting the same battle every morning.