How To Make Celery Juice In A Vitamix Blender: Simple Steps
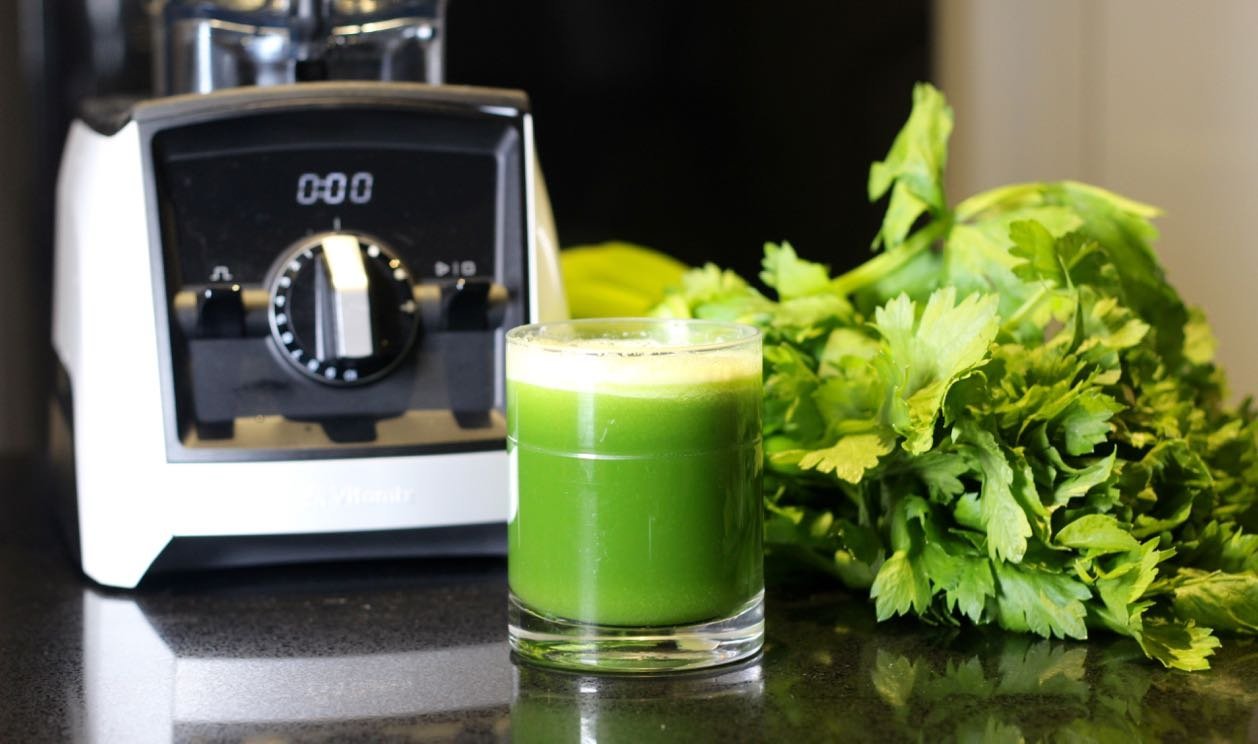
You can make celery juice in a vitamix blender by processing two large stalks of washed celery with a quarter cup of water on the highest speed for 45 seconds. This method produces a smooth consistency that’s easy to strain through a fine-mesh nut milk bag.
Your final outcome changes based on the freshness of the celery, the volume of water added, and the specific model of your blender. These factors determine whether your juice is watery, thick, or contains too many fibrous chunks.
Who should make celery juice this way

This guide is written for home cooks who already own a high-performance blender and want to incorporate fresh vegetable juices into their daily routine without buying a dedicated juicing machine. You likely have a refrigerator full of produce and a desire for a quick, nutrient-dense drink. You’re familiar with basic kitchen safety, but you might be new to the specific textures that come from blending raw vegetables versus using a centrifugal or masticating juicer.
This page serves readers who want a straightforward, efficient process using equipment they already own. If you’re looking for a professional-grade cold-press extraction that removes every trace of insoluble fiber, this method won’t provide that specific result. We assume you have a standard 64-ounce container or a smaller personal cup attachment and that you’re comfortable with basic food hygiene.
We don’t cover the maintenance of your blender motor or the specific repair of electronic parts. If you’re trying to achieve a pulp-free juice that lasts for several days, you should consider purchasing a commercial-grade masticating juicer instead, as the blending method is intended for immediate consumption.
Factors that influence your juice
The freshness of your celery is the most important factor in your yield. Celery that has been sitting in the crisper drawer for more than a week will be limp and contain less water, resulting in a drier, fibrous paste rather than a drinkable juice. Always choose firm, upright stalks for the highest water content.
The amount of water you add acts as a carrier for the blades. If you add no water, the blades will create a vacuum and stall, leaving you with a dry, stuck mass at the bottom of the pitcher.
The speed setting matters more than the duration of blending. High-performance blenders like those from the Vitamix line require high speed to break down the tough cellulose walls of the celery stalks. If you run the machine on low, you’ll only bruise the celery rather than liquefying it.
Most people make the mistake of overloading the container. If you fill the blender halfway with celery, the blades can’t create a vortex, and the mixture will remain chunky. The ideal batch size for a standard container is two to three large stalks, which allows the blades to pull the pieces down effectively.
Finally, the straining method determines the texture of your final glass. A standard kitchen colander is too wide to catch the fine fibers, so you must use a dedicated nut milk bag or several layers of cheesecloth. This step is essential to remove the grit that makes the juice unpleasant to drink.
Steps to make celery juice in a Vitamix blender
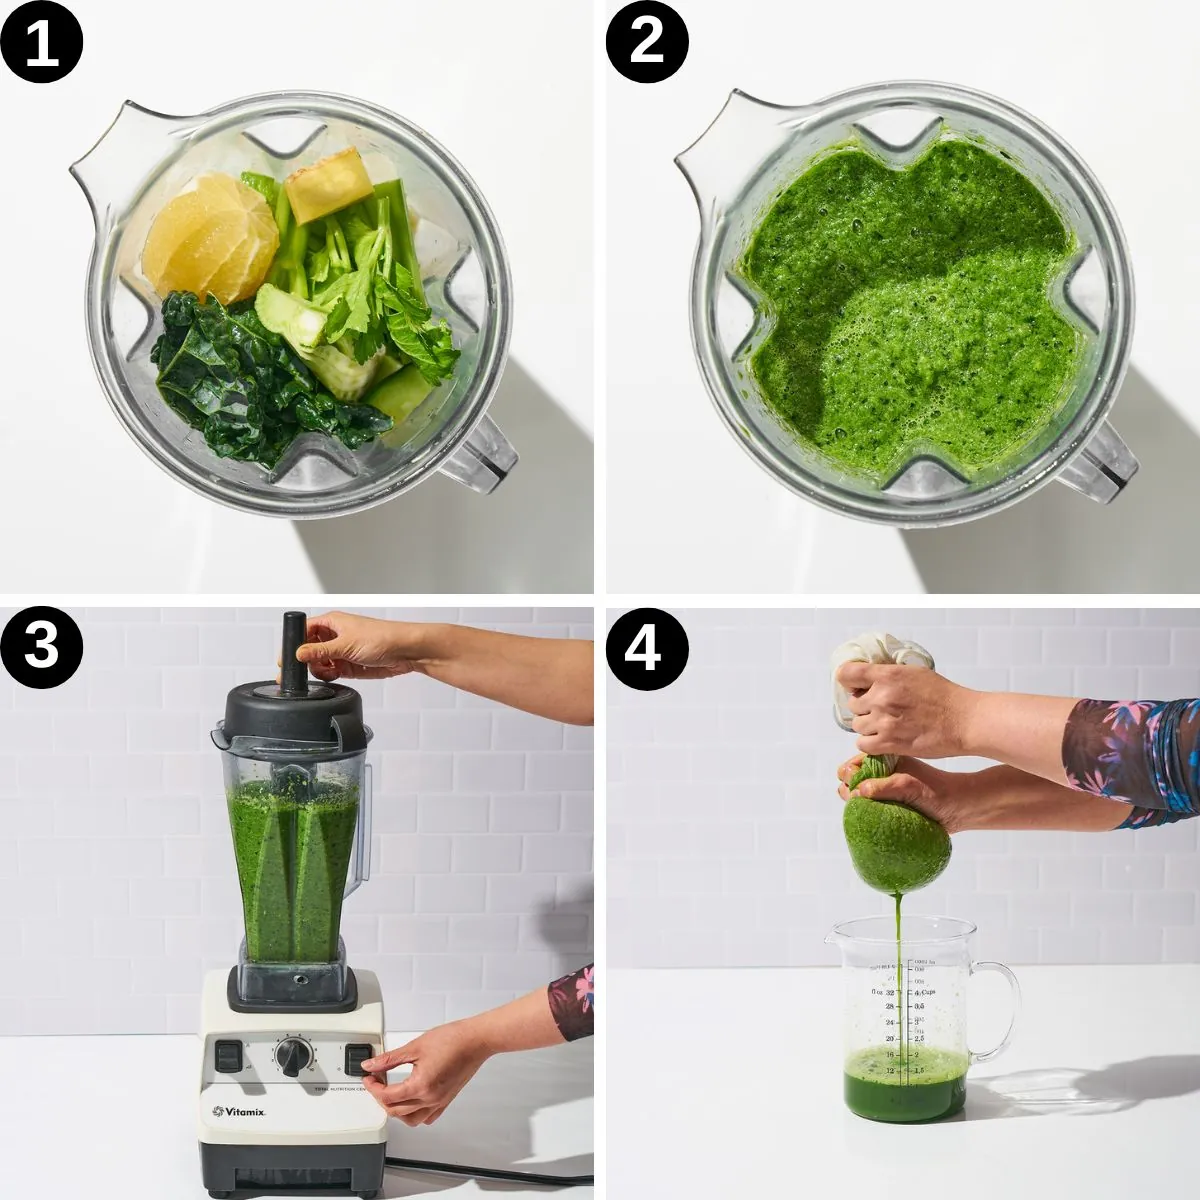
- Wash two large stalks of celery under cool running water to remove dirt from the base and leaves.
- Chop the stalks into 2-inch pieces to help the blender blades grab the material quickly.
- Place the celery pieces and one-quarter cup of filtered water into your blender container.
- Secure the lid tightly and start the machine on its lowest speed setting.
- Immediately increase the speed to the highest setting and run for exactly 45 seconds.
- Observe the mixture through the clear lid; it should look like a uniform, bright green puree.
- Place a nut milk bag over a large glass or bowl and pour the contents of the blender into it.
- Squeeze the bag firmly with clean hands to extract all the liquid, leaving the dry pulp inside.
The judgement call that separates a good result from a poor one is the squeeze. You must twist the top of the nut milk bag and apply steady, firm pressure to ensure you aren’t leaving half the nutrients trapped in the remaining pulp. If the pulp feels damp, you haven’t squeezed hard enough.
You should always treat raw produce with care. According to the U.S. Food and Drug Administration, you must rinse fresh fruits and vegetables under running water before use to reduce the presence of bacteria. Don’t use soap or detergent, as these can be absorbed by the produce.
Quick reference for common situations
| The situation | What to do | What it takes | What to watch for |
|---|---|---|---|
| Too thick | Add 1 tablespoon water | 1 minute | Over-dilution |
| Too chunky | Blend 15 seconds more | 30 seconds | Motor heat |
| Bitter taste | Add half an apple | 2 minutes | Sugar content |
| Small batch | Use personal cup | 1 minute | Blade engagement |
| Large batch | Process in two stages | 3 minutes | Container capacity |
If your mixture remains too thick after adding water, check the temperature of your ingredients. Frozen fruit requires twice the liquid volume of fresh produce to reach a pourable consistency. If you force the blades through frozen blocks, you risk burning out the motor.
When correcting a bitter taste, rely on the apple’s pectin to balance the texture. If you use a banana instead, the smoothie will thicken significantly, often requiring an extra splash of almond milk to maintain flow. Avoid adding honey or agave, as these sweeteners mask bitterness without neutralizing the underlying acidity.
For small batches, ensure the ingredients cover the blades by at least one inch. If the blades spin freely without catching the food, add a handful of spinach or ice to create necessary friction.
When processing large batches, never fill the container past the maximum line marked on the side. Exceeding this limit prevents the vortex from forming, which results in uneven blending. If the motor begins to emit a burning smell, stop immediately and let it cool for ten minutes before attempting a smaller, second pass.
Achieving the perfect texture
Preparation and technique
Experienced users always remove the base of the celery bunch before chopping, as this area is often woody and difficult to process. They also pull away the largest, stringiest outer ribs if the celery is particularly mature. By preparing the stalks uniformly, you ensure that the blades encounter consistent resistance, which prevents the motor from surging or struggling during the start of the cycle.
Managing the extraction
The best results come from working in small batches rather than trying to process an entire head of celery at once. If the mixture stops moving in the blender, stop the machine immediately and use your tamper to push the celery toward the blades. Never reach into the container while it’s powered on. Professionals keep their straining bags dedicated to this task and wash them thoroughly after each use to prevent residue buildup.
Troubleshooting common issues
| What you notice | What it usually means | What to do first | How to stop it |
|---|---|---|---|
| Blades spinning air | Not enough liquid | Add water | Chop smaller |
| Burnt smell | Motor is straining | Stop blending | Reduce volume |
| Gritty texture | Poor straining | Strain again | Use finer bag |
| Foam on top | Blended too long | Skim with spoon | Reduce time |
| Discolored juice | Oxidation occurred | Drink immediately | Add lemon juice |
If your blades spin freely without pulling ingredients down, you have created an air pocket. Add liquid in 1/4 cup increments until the vortex resumes. If the motor emits a burnt odor, you have exceeded the machine’s torque capacity. Stop immediately and remove half the contents to prevent permanent coil damage.
Gritty textures often result from using a coarse mesh bag that allows pulp to bypass the filter.
Foam indicates excessive aeration from blending at high speeds for more than 45 seconds. To prevent this, pulse your ingredients rather than running a continuous cycle.
Discoloration happens when enzymes react with oxygen, turning bright greens into dull browns. If your juice sits for more than 10 minutes, the nutrient profile begins to degrade. Add one tablespoon of lemon juice to act as an antioxidant shield.
Regulatory and safety rules
The most important safety standard involves the operation of high-speed motor equipment. You must ensure the blender base is on a level, dry surface to prevent vibration from moving the unit during operation. If you notice a frayed power cord or a loose base, stop using the unit immediately. These appliances are governed by strict electrical standards, and any internal repair must be handled by a certified technician because a capacitor can hold a lethal charge even when unplugged.
Never attempt to bypass the safety interlock switch by inserting objects into the base housing. Doing so creates an immediate risk of motor burnout and potential electrical arcing. If the motor smells like ozone or burning plastic, you have already exceeded the thermal limit of the internal windings. At that point, the unit is a fire hazard and must be decommissioned.
When preparing raw juice, remember that it’s a perishable product. The Centers for Disease Control and Prevention notes that raw juice can harbor harmful bacteria if the produce isn’t handled correctly. Always wash your hands for 20 seconds with soap and warm water before handling your food or your blender equipment.
If you’re processing leafy greens or sprouts, use a diluted vinegar rinse to reduce microbial load. If you’re working with root vegetables like carrots or beets, scrub them under running water with a stiff-bristled brush to remove soil-borne pathogens. If the juice won’t be consumed within four hours, store it in an airtight glass container at or below 40 degrees Fahrenheit.
Understanding the real cost
The cost of this process is primarily the price of fresh organic celery, which varies significantly by season and location. A single bunch of celery typically yields about 12 to 16 ounces of juice depending on the stalk size. You also invest about 5 minutes of your time, including the cleanup of the blender and the nut milk bag.
If you choose to buy organic produce to avoid pesticide residue, expect to pay roughly double the price of conventional stalks. Budget for three bunches per week if you plan to juice daily, as each bunch provides only one serving.
The effort required is low, but the time spent cleaning the nut milk bag is the hidden cost that many people overlook. If you don’t clean the bag immediately, the fibers will dry and become nearly impossible to clear, requiring you to buy a replacement.
Rinse the bag under high-pressure warm water for thirty seconds right after pouring your glass. If you wait until after you finish drinking, the pulp hardens into the mesh. This forces you to scrub for five minutes or soak the bag in vinegar, which degrades the fabric over time. If the bag remains stained or shows visible signs of spoilage, discard it immediately. Using a compromised filter introduces bacteria into your fresh juice, negating the health benefits you’re seeking.
Maintaining your equipment
To keep your blender in top condition, rinse the container immediately after use with warm water and a drop of dish soap. Run the blender on high for 30 seconds to clean the blades and the underside of the lid without needing to scrub them manually. This prevents acidic vegetable juices from drying and pitting the plastic container over time.
If you notice a cloudy film forming on the pitcher walls, fill it with a mixture of half white vinegar and half water. Let this sit for ten minutes before rinsing. This simple soak removes mineral buildup that dulls the blades and creates friction.
Inspect your nut milk bag every few uses for signs of fraying or small tears. If you see a hole, replace the bag immediately to prevent pulp from entering your drink. A bag that feels slimy to the touch even after washing is harboring bacteria; discard it rather than attempting a deep bleach soak.
Store your clean, dry bag in a cool place to prevent mold growth. If the juice starts to smell fermented or looks cloudy after sitting in the fridge for more than 24 hours, discard it.
When to use a different method
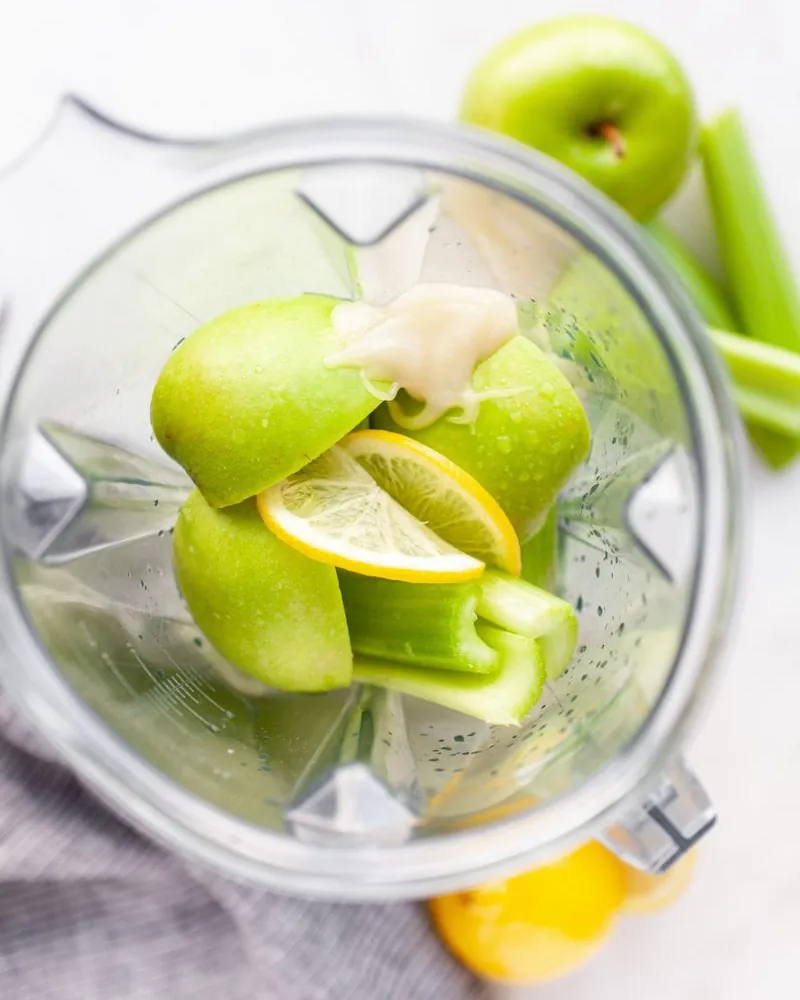
If you need to produce juice for a large family or for an entire week of storage, this blender method is the wrong choice. The high-speed blades introduce a significant amount of oxygen into the liquid, which causes the juice to oxidize and lose its bright color within hours. For larger quantities, a masticating juicer is the correct tool because it uses a slow-pressing action that preserves the liquid for longer periods.
You should also avoid this method if you’re strictly trying to avoid all insoluble fiber. While the nut milk bag removes most of the solids, the blending process isn’t as efficient at separating the cellular structure as a dedicated press. If you have specific dietary requirements that demand zero-fiber intake, consult with a registered dietitian about the best way to prepare your vegetables.
Frequently asked questions
Can I make celery juice ahead of time?
You should consume your celery juice immediately for the best flavor and nutrient quality. If you must store it, keep it in an airtight glass jar in the refrigerator for no more than 24 hours, as it will lose its freshness and separate quickly.
Is it safe to drink celery juice every day?
It’s generally safe for most healthy adults to drink celery juice daily as part of a balanced diet. If you have specific health conditions, particularly those related to kidney function or high blood pressure, consult your doctor before making it a regular habit due to the high sodium content in celery.
How long does it take to clean the blender?
It takes about 60 seconds to clean the blender by using the soap-and-water method. Simply fill the container halfway with warm water, add a drop of dish soap, and run the machine on high for 30 seconds to remove all residue from the blades.
What happens if I don’t use a nut milk bag?
You’ll end up with a thick, fibrous smoothie rather than a juice if you don’t use a bag. The texture will be difficult to swallow because the blender doesn’t fully break down the tough, stringy fibers found in the celery stalks.
Why is my celery juice turning brown?
Your juice turns brown because of oxidation, which happens when the high-speed blades introduce air into the mixture. You can slow this process by adding a squeeze of fresh lemon juice, which acts as an antioxidant to keep the color bright.
Does it matter if I use the leaves?
It doesn’t strictly matter, but the leaves have a much stronger, more bitter flavor than the stalks. Many people prefer to remove the leaves before blending to ensure the juice remains sweet and refreshing for daily consumption.
Conclusion
Start by washing your celery thoroughly and chopping it into small pieces to protect your blender motor. You should expect a vibrant green color and a thin, refreshing consistency once you have strained the liquid through your bag. If the blender begins to smoke or makes a loud grinding noise, stop immediately and contact the manufacturer’s customer support for a professional inspection.