How To Make Hummus In A Ninja Blender: Quick and Easy Recipe
Making fresh, creamy hummus at home is a simple pleasure—and using a Ninja blender makes it even easier. If you’ve only tasted store-bought hummus, you’re in for a surprise: homemade hummus bursts with flavor, costs less, and lets you control every ingredient. With the right method, your Ninja blender can whip up hummus that’s just as smooth as versions from fancy restaurants.
This guide gives you everything you need to succeed: clear steps, ingredient tips, smart tricks, and solutions to common problems. Even if you’ve never made hummus before, you’ll feel confident after reading. Plus, you’ll learn how to adapt the recipe for your taste, store hummus safely, and serve it in creative ways. Let’s unlock the full potential of your Ninja blender and enjoy the best hummus you’ve ever had—right from your own kitchen.
Why Make Hummus In A Ninja Blender?
Many people use food processors to make hummus, but a Ninja blender has unique advantages:
- Powerful blending: Ninja blenders have strong motors that quickly puree chickpeas into a smooth paste.
- Easy cleanup: Removable blades and dishwasher-safe parts make cleaning simple.
- Versatility: Use your Ninja for many recipes, not just hummus—smoothies, soups, nut butters, and more.
A Ninja’s tall pitcher helps create a vortex, pulling ingredients down toward the blades. This gives you an extra-creamy texture, even if you use canned chickpeas. For those with small kitchens, using one appliance for many jobs saves space and money.
Some believe blenders can’t handle thick mixtures like hummus, but the Ninja’s design handles thick batters well. You may need to scrape the sides a few times, but the results are worth it.
Key Ingredients For Perfect Hummus
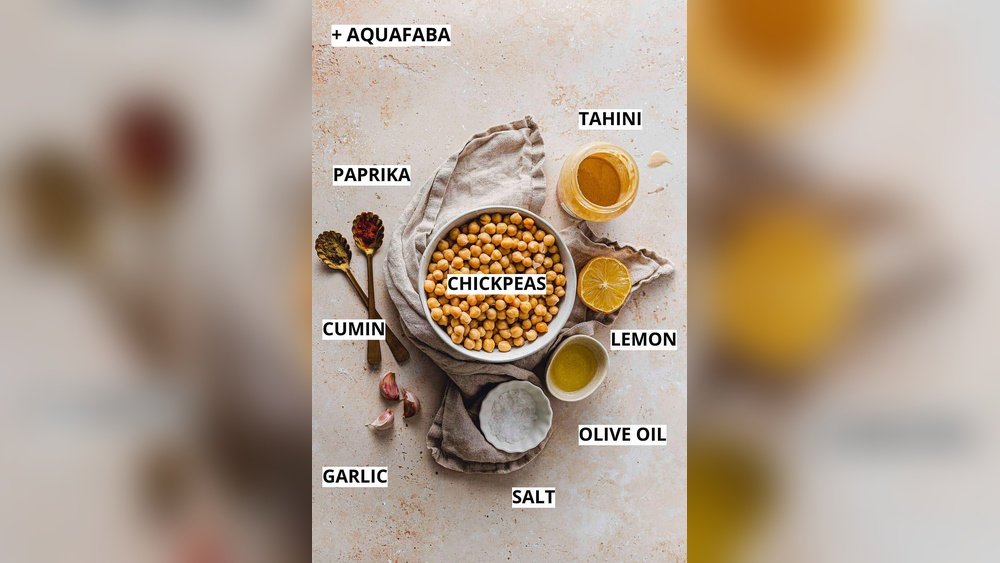
Hummus is simple: most recipes use just a handful of ingredients. But each one matters. Here’s what you’ll need for classic hummus:
- Chickpeas (garbanzo beans): Cooked or canned, well-drained.
- Tahini: Ground sesame seed paste, gives hummus its signature flavor.
- Fresh lemon juice: Adds brightness and balances flavors.
- Garlic: For aroma and depth.
- Olive oil: Adds richness and smoothness.
- Salt: Enhances all the other tastes.
- Cold water: Helps achieve a creamy, fluffy texture.
Below is a simple table showing the role of each main ingredient:
| Ingredient | Purpose in Hummus | Tips |
|---|---|---|
| Chickpeas | Base, structure | Use canned for speed, cook from dry for best flavor |
| Tahini | Flavor, creaminess | Use fresh, high-quality tahini for best taste |
| Lemon juice | Acidity, brightness | Always use freshly squeezed juice |
| Garlic | Aroma, depth | Start with less, add more to taste |
| Olive oil | Richness, mouthfeel | Extra-virgin is best for flavor |
| Salt | Flavor enhancer | Add a little at a time, taste as you go |
| Cold water | Texture, smoothness | Add gradually until desired consistency |
Ingredient Quantities For Classic Hummus
For about 2 cups (enough for 6 people as a dip):
- 1 can (15 oz) chickpeas, drained and rinsed (or 1.5 cups cooked chickpeas)
- 1/3 cup tahini
- 3 tablespoons fresh lemon juice (about 1 large lemon)
- 1–2 cloves garlic, peeled
- 1/4 cup extra-virgin olive oil (plus more for drizzling)
- 1/2 teaspoon salt (adjust to taste)
- 2–4 tablespoons ice-cold water
Optional extras: pinch of cumin, paprika for garnish, chopped parsley, roasted red peppers, or sun-dried tomatoes.
A Note On Tahini
Not all tahini is created equal. Some brands taste bitter or dry. Look for smooth, pourable tahini with a mild, nutty flavor. If you don’t like the taste of tahini straight from the jar, you won’t like it in your hummus. Give it a taste test before using.
Preparing Chickpeas: Canned Vs. Dried
Both canned and dried chickpeas work in hummus. Each has pros and cons.
| Type | Pros | Cons |
|---|---|---|
| Canned | – Quick and convenient – No soaking or cooking – Consistent results | – Slightly less flavor – Sometimes too firm – Higher sodium (rinse well) |
| Dried | – Best flavor and texture – Control over doneness – Cheaper in bulk | – Requires soaking and cooking – Takes more time and planning |
Pro tip: For extra-smooth hummus, peel the chickpeas after cooking. It’s a little work, but removing the thin skins gives your hummus a silkier texture. To do this quickly, soak the cooked chickpeas in hot water with a bit of baking soda for a few minutes, then rub them gently between your hands—the skins will float off.
Step-by-step: How To Make Hummus In A Ninja Blender
Making hummus is a sequence of easy steps. Your Ninja blender does most of the work.
1. Prepare The Chickpeas
- If using canned chickpeas, drain and rinse them very well under cold water. This removes extra salt and gives a cleaner taste.
- For dried chickpeas, soak overnight, then simmer until very soft (about 1–1.5 hours). They should mash easily between your fingers.
2. Blend Garlic, Lemon, And Tahini First
Add the following to your Ninja blender:
- 1/3 cup tahini
- 3 tablespoons lemon juice
- 1–2 cloves garlic
Blend on medium for 30 seconds. Pause, scrape down the sides, and blend again until the mixture is creamy and slightly pale. This step helps the tahini whip up, giving your hummus a fluffier texture.
3. Add Chickpeas And Salt
Add the drained chickpeas and 1/2 teaspoon salt to the blender. Blend on medium-high until the mixture looks thick and grainy—about 1 minute. Scrape down the sides as needed.
4. Drizzle In Olive Oil
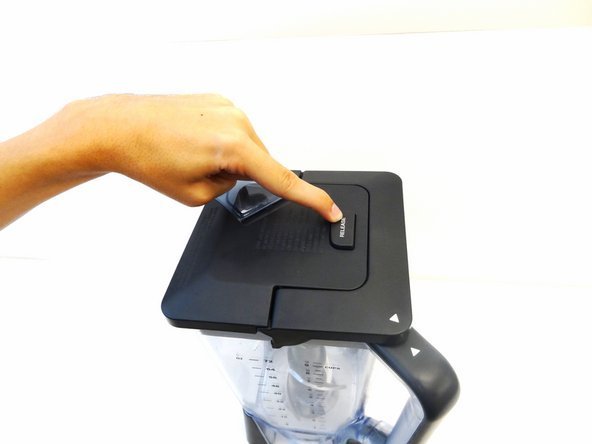
With the blender running on low, slowly drizzle in 1/4 cup olive oil through the opening in the lid. This helps the oil emulsify and makes the hummus extra creamy.
5. Add Cold Water Gradually
With the blender still running, add ice-cold water 1 tablespoon at a time. Blend for 30 seconds between additions. Hummus should become lighter in color and super smooth. Stop adding water when you reach your desired consistency (usually 2–4 tablespoons).
Non-obvious insight: Using cold water (not room temperature) helps “fluff” the hummus, making it less dense and more spreadable.
6. Taste And Adjust
Open the blender and taste your hummus. Add more salt, lemon, or garlic if needed, and blend again. For extra-smooth hummus, let the blender run for a full minute.
7. Serve And Garnish
Spoon the hummus into a shallow bowl. Use the back of a spoon to make a swirl or well in the center. Drizzle with more olive oil, sprinkle with paprika or cumin, and add toppings like chopped parsley or toasted pine nuts.

Credit: foodandword.com
Troubleshooting: Common Hummus Problems And Fixes
Even with a Ninja blender, issues can happen. Here’s how to solve them:
Hummus Too Thick
- Add more ice-cold water or a little extra olive oil. Blend until smooth.
Hummus Too Thin
- Add more chickpeas or tahini to thicken.
- Blend in a spoonful of plain Greek yogurt for body.
Hummus Not Smooth Enough
- Blend longer—at least 1–2 minutes.
- Make sure chickpeas are very soft.
- Peel chickpeas for silkier texture.
Bland Or Flat Flavor
- Add more lemon juice or salt, a pinch of cumin, or extra garlic.
- Taste after blending, not before. Flavors change as hummus sits.
Bitter Taste
- Check your tahini—some brands are more bitter.
- Add a splash of extra lemon juice or a tiny bit of honey to balance.
Creative Hummus Variations
Once you master basic hummus, try adding new flavors. Here are some ideas:
- Roasted Red Pepper Hummus: Blend in 1/2 cup roasted red peppers.
- Spicy Hummus: Add 1/2 teaspoon cayenne or a chopped jalapeño.
- Herb Hummus: Blend in a handful of fresh parsley, cilantro, or basil.
- Sun-Dried Tomato Hummus: Add 1/4 cup oil-packed sun-dried tomatoes.
- Avocado Hummus: Blend in 1 ripe avocado for a creamy, green twist.
- Beet Hummus: Add 1/2 cup cooked beetroot for vibrant color and sweetness.
- Greek-Style Hummus: Top with crumbled feta, olives, and chopped cucumber.
For each, blend the extra ingredients with the chickpeas. Adjust lemon, garlic, and salt to balance new flavors.
Pro tip: Don’t add too many watery vegetables (like cucumbers) or your hummus can turn runny.
Serving And Pairing Ideas
Hummus is more than a dip for pita chips. Try these ways to enjoy it:
- As a sandwich spread: Use instead of mayo for a healthier choice.
- With fresh veggies: Carrot sticks, cucumber, bell pepper, celery.
- On toast: Top with sliced tomato, avocado, or a sprinkle of seeds.
- In grain bowls: Add a dollop to rice or quinoa bowls for extra protein.
- Alongside grilled meats: Pairs well with chicken, lamb, or beef.
- As a salad dressing base: Thin with water and lemon for creamy dressing.
Hummus is high in plant protein and fiber, making it a filling snack or side. A two-tablespoon serving has about 60–70 calories, 2 grams protein, and 2 grams fiber.
Storing And Freezing Hummus
Homemade hummus keeps well, but not forever. Here’s how to store it safely:
- Fridge: Store in an airtight container for up to 5 days. Always use a clean spoon to avoid contamination.
- Freezer: Spoon into small containers (leave space at the top for expansion). Freeze for up to 3 months. Thaw overnight in the fridge, then stir well before serving.
Non-obvious insight: Hummus may thicken after chilling. Stir in a bit of cold water or lemon juice to restore creaminess.

Credit: www.reddit.com
Ninja Blender Vs. Food Processor For Hummus
If you own both a Ninja blender and a food processor, you might wonder which is better for hummus. Here’s a side-by-side look:
| Feature | Ninja Blender | Food Processor |
|---|---|---|
| Texture | Ultra-smooth, creamy | Chunkier, rustic |
| Batch Size | Best for medium-large batches | Works well for small or large batches |
| Speed | Very fast | Fast, but may need longer blending |
| Cleanup | Easy (fewer parts) | Easy, but more parts to wash |
| Effort | May need to scrape sides often | Ingredients mix evenly |
For most home cooks, a Ninja blender gives a creamier, smoother hummus, especially if you want café-quality results. Food processors work well for chunkier spreads or when making very small amounts.
Nutrition: Is Hummus Good For You?
Hummus is considered a healthy food by nutritionists. Here’s what you get in a 2-tablespoon serving (about 30g):
- Calories: 60–70
- Protein: 2g
- Fat: 4g (mostly heart-healthy unsaturated fats)
- Carbs: 4g
- Fiber: 2g
- Sodium: 80–120mg (varies by recipe)
Hummus is naturally gluten-free, dairy-free, and vegan. It’s a smart snack for anyone watching their cholesterol or looking to add more plant protein.
Interesting fact: Chickpeas are rich in folate, iron, and magnesium, and tahini adds calcium, copper, and B vitamins. Making hummus at home lets you control the salt and oil, so it’s often healthier than store-bought.
If you want more nutrition data, the USDA FoodData Central has detailed breakdowns for hummus and its ingredients.

Credit: magazine.joovy.com
Cleaning And Caring For Your Ninja Blender
A sticky hummus mess is no fun to clean. Here’s how to keep your Ninja blender in top shape:
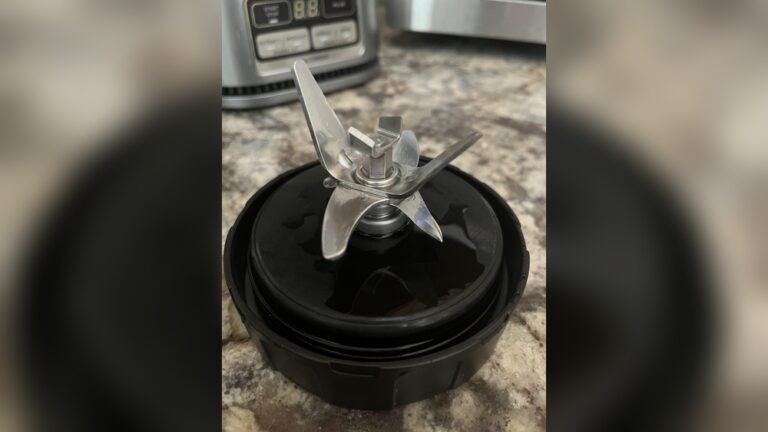
- Rinse the blender jar, lid, and blades immediately after use.
- Fill the jar halfway with warm water and a drop of dish soap, blend on low for 30 seconds, then rinse.
- For stuck-on bits, use a soft brush to scrub around the blades.
- All removable parts are dishwasher-safe (top rack recommended).
Dry all parts completely before reassembling to prevent odors or mold. If you notice lingering smells, blend a mix of baking soda and water, then rinse well.
Extra Tips For Next-level Hummus
- Let hummus rest: Flavors deepen after an hour in the fridge.
- Use good olive oil: The taste really shines through.
- Add toppings just before serving: Keeps texture and color fresh.
- Don’t overload the blender: For very thick hummus, blend in two batches.
- Try white beans for a twist: Cannellini beans make a mild, creamy dip.
Frequently Asked Questions
How Do I Make Hummus Extra Smooth In My Ninja Blender?
Use very soft chickpeas (overcooked a little is fine), add cold water slowly, and blend for at least a full minute. For the smoothest texture, peel the chickpeas before blending. Scrape down the sides often and don’t rush the blending process.
Can I Make Hummus Without Tahini?
Yes, though the flavor will be different. You can use a little extra olive oil, Greek yogurt, or even sunflower seed butter as a substitute. The texture will still be creamy, but classic hummus flavor comes from tahini.
How Long Does Homemade Hummus Last In The Fridge?
Stored in an airtight container, homemade hummus stays fresh for up to 5 days. Always use a clean spoon to serve, and discard if you notice an off smell or taste.
Why Is My Hummus Bitter?
The most common cause is bitter tahini. Some tahini brands are more bitter than others. You can balance bitterness with extra lemon juice or a tiny bit of honey. Always taste your tahini before using, and switch brands if you consistently get bitter hummus.
Can I Freeze Hummus?
Yes, hummus freezes well. Spoon into small containers, leaving space at the top. Freeze for up to 3 months. Thaw overnight in the fridge and stir well before serving. You may need to add a little water or lemon juice to refresh the texture.
Making hummus in a Ninja blender is quick, satisfying, and opens the door to endless flavor combinations. With a few simple techniques, you’ll never go back to store-bought again. Enjoy your homemade hummus with friends, family, or as a healthy snack just for yourself.