How To Keep Immersion Blender From Splattering: Expert Tips
Blending soups, sauces, or smoothies at home feels satisfying—until you’re faced with splatters everywhere. If you’ve ever used an immersion blender, you know the struggle: the tool is powerful, but the mess can be overwhelming. You might wonder if it’s possible to blend without covering your kitchen in tomato soup. The good news? You can keep your immersion blender from splattering with a few smart techniques, clever tools, and a bit of know-how. This guide dives deep into simple, practical steps that will help you blend like a pro—without the chaos.
Understanding Why Immersion Blenders Splatter
Before you learn how to prevent splattering, it’s important to understand why it happens. An immersion blender works by spinning blades at high speed to mix or puree food. When the blades hit liquid, they create a vortex. If the blender isn’t fully submerged or the container is too shallow, the blades push liquid outward—resulting in splatters.
Key causes of splattering:
- Shallow containers: Not enough room to contain the splash.
- High speeds: Fast spinning can throw food outside the container.
- Unsubmerged blades: Air gaps cause the blender to “spit.”
- Chunky ingredients: Large pieces bounce off the blades, creating a mess.
There’s also a less obvious cause: the shape of the blender’s blade guard. Some blade guards have holes or vents designed to move liquid back toward the blades, but if these are blocked or poorly designed, they can direct liquid upward instead. Beginners rarely check this, but cleaning and inspecting these vents can help reduce splatter.
Knowing these causes helps you control them. With the right approach, you can blend smoothly—even with tricky mixtures. If you’ve ever noticed splatter happening even in deep containers, check if the blender head is tilted or if air is trapped under the blades.
Repositioning the blender head can fix this instantly.
Choosing The Right Container
One of the most important factors in preventing splatter is your container. The container’s shape, size, and depth all play a role. Picking the right container is the first step to cleaner blending.
Ideal Container Features
- Tall and narrow: A tall container gives more vertical space, reducing upward splatter. Narrow containers keep food close to the blades, improving blending.
- Non-slip base: Prevents tipping or moving during blending. This is especially important if you’re blending thicker mixtures that require more force.
- Sturdy material: Glass or thick plastic works best. Thin plastic can crack, especially when blending hot mixtures, and metal can sometimes interfere with the immersion blender’s operation.
The height of the container should be at least two inches taller than the length of the blender head. If you’re blending small amounts, a tall glass or measuring cup works well. If you’re blending larger batches, a deep saucepan or pitcher is safer.
Common Mistakes When Picking Containers
Many beginners use shallow bowls or wide pots. These allow food to splash out easily. Instead, choose a container that’s taller than the immersion blender’s head and narrow enough to guide ingredients toward the blades.
Another mistake is using containers with rounded bottoms. Rounded bottoms can cause the blender to tilt, increasing splatter. Flat-bottomed containers keep the blender upright and stable.
Comparing Container Types
Here’s a quick look at how common containers perform with immersion blenders:
| Container Type | Splatter Risk | Best Use |
|---|---|---|
| Tall Measuring Cup | Low | Soups, Smoothies |
| Wide Mixing Bowl | High | Large Batches |
| Deep Saucepan | Medium | Hot Liquids |
| Plastic Pitcher | Low | Cold Drinks |
If you’re blending in a pot, make sure the liquid is deep enough to cover the blender’s head completely. For very thick soups, try blending in smaller batches to keep the mixture deep and reduce splatter.
Proper Immersion Blender Technique
Even the best container can’t prevent splatter if your technique is off. How you hold, move, and operate your immersion blender makes a big difference. Using proper technique is as important as picking the right container.
Step-by-step Guide To Safe Blending
- Submerge the blender head fully: Place the blades under the surface before turning the blender on. This avoids initial splashes.
- Start at low speed: Begin blending at the lowest setting. Gradually increase speed as ingredients break down.
- Hold the blender vertically: Don’t tilt the blender, as this can cause liquid to spray sideways.
- Move slowly: Gently move the blender up and down, keeping the head below the surface.
- Pulse instead of continuous blending: Short bursts give you more control and reduce sudden splatter.
- Stop before lifting: Turn off the blender before removing it from the mixture. Lifting while spinning sprays food everywhere.
If you’re blending a thick mixture, add a little liquid and blend in sections. For example, if you’re making hummus, blend half the chickpeas with oil, then add the rest. This keeps the mixture deep and helps the blender head stay submerged.
Common Mistakes To Avoid
- Turning on before submerging: Always start with the blender under the surface.
- Lifting while spinning: Wait for blades to stop before moving.
- Blending at high speed from the start: Gradual speed increases prevent sudden splashes.
Another mistake: moving the blender too quickly. Fast movements can create a wave effect, sending liquid over the sides. Slow, steady blending is always safer.
By mastering these steps, you’ll see fewer splatters and smoother blends. Practice makes perfect—after a few tries, you’ll find your own rhythm.
Ingredient Preparation Tips
The way you prepare your ingredients affects splatter. Chunky, hard pieces can bounce off the blades, causing mess. Ingredient prep is often overlooked but makes blending easier and safer.
How To Prep Ingredients
- Cut pieces small: Smaller pieces blend more easily and reduce splatter risk. For tough vegetables, aim for cubes no larger than one inch.
- Avoid overfilling: Don’t fill containers to the brim. Leave space for the blender and movement. Overfilled containers spill easily, even with careful blending.
- Add liquid first: If you’re blending solids, pour liquid in first. This helps submerge the blades and starts blending smoothly.
- Soften ingredients: For soups, cook vegetables until soft. Hard ingredients resist blending and cause splatter.
For smoothies, defrost frozen fruit a bit before blending. Rock-hard frozen fruit can jam the blades and cause sudden splashes.
Real-world Example
If you’re blending potato soup, cook potatoes until they’re fork-tender. Cut them into chunks before adding to the pot. Add enough broth to cover the blender head fully.
Another practical tip: if you’re blending salsa, dice tomatoes and onions finely. This prevents chunks from bouncing off the blades and spraying juice.
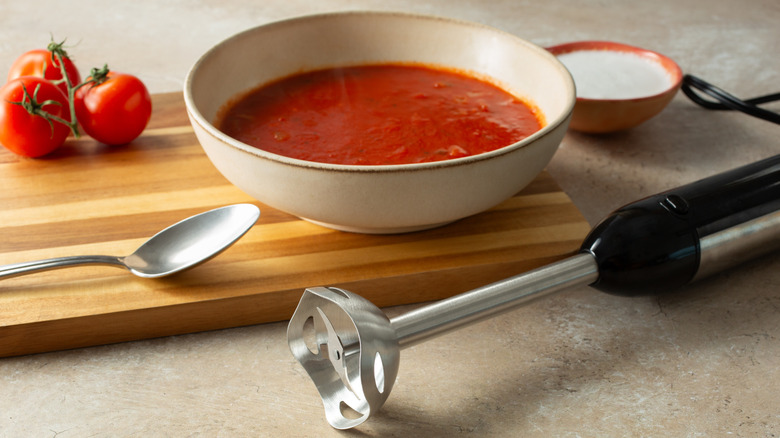
Credit: www.tastingtable.com
Using Splatter Guards And Accessories
Some immersion blenders come with accessories designed to prevent splatter. Others can be added for extra protection. Using a guard is a smart move for messy mixtures.
Types Of Splatter Guards
- Silicone lids with holes: These fit over containers and allow the blender to pass through, blocking splashes.
- Custom blender guards: Some brands offer attachable guards for their models.
- DIY guards: Use a plate with a hole or parchment paper as a quick solution.
There are also mesh guards that cover the container and catch splatter without interfering with blending. These are useful for thin liquids that tend to spray upward.
Accessory Comparison
Let’s compare splatter guards and their effectiveness:
| Accessory | Effectiveness | Ease of Use |
|---|---|---|
| Silicone Lid | High | Easy |
| Custom Guard | Medium | Moderate |
| DIY Plate | Low | Simple |
Silicone lids are especially helpful for thinner liquids like soup or milkshakes. They’re available online and fit most containers. Look for lids with a flexible opening that seals around the blender shaft, blocking splatter but letting you move the blender freely.
Adjusting Immersion Blender Speed
Speed settings matter. Many immersion blenders have multiple speeds, but not everyone uses them correctly. Learning to control speed is a skill that pays off.
Why Speed Matters
High speed is tempting because it blends quickly. But it also causes turbulence, which leads to splatter. Low speed gives you more control and is gentler on ingredients.
If you’re blending fibrous vegetables or tough meats, start slow to avoid sending chunks flying. High speed is best used for final smoothing, not for breaking down tough ingredients.
How To Use Speed Settings
- Start low: Begin with the lowest setting. Only increase speed after the mixture is mostly blended.
- Use short bursts: Pulse instead of holding the button constantly.
- Switch speeds for texture: If you want a smoother result, finish with a brief high-speed burst after the mixture is mostly blended.
For smoothies, blend at low speed for the first 10–20 seconds, then switch to medium or high. This lets ice and fruit break down without splatter.
Statistical Insight
According to kitchen appliance studies, blending at low speed reduces splatter by up to 60% compared to starting at high speed. It also leads to more consistent textures. This is especially true for thin liquids, where high speed can create a fountain effect.
:max_bytes(150000):strip_icc()/sea-primary-immersion-blenders-sep-24-rkilgore-0658-89167e1e4bd44afb93d9c847674b09e4.jpeg)
Credit: www.seriouseats.com
Cleaning Up After Splatter
Even with perfect technique, accidents happen. Knowing how to clean quickly and efficiently saves time and keeps your kitchen safe. Quick cleanup is part of good kitchen habits.
Quick Cleaning Steps
- Turn off and unplug the blender: Always start with safety.
- Wipe the blender body: Use a damp cloth for the handle and controls.
- Detach the blending head: Most immersion blenders have removable heads. Rinse under water or wash with soap.
- Clean the container: Soak if needed, then wash as usual.
- Check the area around: Clean walls, counters, and floors quickly before splatters dry.
When cleaning, pay attention to crevices in the blender head. Food can collect here and cause odors or mold if left unchecked.
Cleaning Tips For Difficult Messes
- Use a soft brush: For dried splatter, a brush helps scrub without damaging surfaces.
- Avoid harsh chemicals: Stick to mild dish soap and water.
- Clean immediately: Fresh splatter wipes off easily; dried messes are harder to remove.
For food splatter on walls, wet a sponge and gently scrub. For stubborn spots, let a damp cloth sit for a minute to soften the mess.
Advanced Tricks For Splatter-free Blending
As you gain experience, you can use advanced tricks to blend even tricky mixtures without a mess. These methods help when basic steps aren’t enough.
Blending Hot Liquids Safely
Hot liquids splatter more because steam expands rapidly. Always let hot mixtures cool slightly before blending. If you must blend hot, use a deep pot and cover with a splatter guard.
A non-obvious trick: tilt the pot slightly and blend with the head angled away from you. This directs any splatter back into the pot and keeps you safe.
Layered Blending
For mixtures with solids and liquids, blend in layers:
- Start with liquid only.
- Add solids gradually, blending between additions.
- Finish with any remaining liquid.
This approach keeps the blender head submerged and prevents sudden splashes. For thick soups, add broth in stages as you blend.
Using Immersion Blenders For Thick Mixtures
Thick mixtures like hummus or mashed potatoes are less likely to splatter, but can clog blades. Move the blender slowly, and scrape down sides as needed. Don’t force the blender through thick masses—let it work gradually.
For sticky mixtures, add a splash of liquid to loosen before blending. This prevents strain on the motor and reduces clogging.
Non-obvious Insight
Many people forget to let ingredients settle before blending. Waiting 30 seconds after pouring liquid or adding solids allows air bubbles to escape, making blending smoother and reducing splatter.
Another advanced tip: tap the container gently on the counter to release trapped air before blending.
Comparing Immersion Blender Models For Splatter Control
Not all immersion blenders are created equal. Some models are designed to minimize splatter with special features.
| Model | Blade Guard Design | Splatter Reduction |
|---|---|---|
| KitchenAid KHB1231 | Curved guard | Good |
| Braun MQ505 | Bell-shaped guard | Excellent |
| Cuisinart CSB-75 | Flat guard | Fair |
| Breville BSB510XL | Wide guard | Very good |
Choosing a model with a bell-shaped blade guard can reduce splatter by guiding liquid back into the container instead of outward. Look for models with small vent holes around the guard—these help recirculate liquid.
Mistakes Beginners Make With Immersion Blenders
Knowing what not to do is just as important as knowing the right steps. Many beginners make common errors that create more mess.
Top Mistakes
- Using shallow containers: Always pick tall, narrow options.
- Turning blender on before submerging: Start with the blades under the surface.
- Blending at high speed immediately: Begin slowly and increase speed if needed.
- Lifting blender while spinning: Wait until the blades stop.
- Ignoring splatter guards: Use available accessories for messy mixtures.
- Not prepping ingredients: Cut, soften, and add liquids first.
Another frequent mistake: blending too much at once. If your container is overfilled, even the best technique won’t prevent splatter.
Avoiding these mistakes will save you cleaning time and frustration. Remember, small changes in your process can make a big difference.
Practical Tips For Real-life Blending
Let’s look at real-life scenarios where splatter is likely and how to avoid it. Experience teaches that a few tweaks can prevent most messes.
Blending Soup Directly In The Pot
Soups are often blended in the cooking pot. To prevent splatter:
- Let soup cool slightly before blending.
- Ensure liquid covers blender head.
- Use a splatter guard or lid with a hole.
- Move blender slowly, starting at low speed.
For chunky soups, blend in batches. Remove half, blend the rest, then return all to the pot and stir.
Making Smoothies In A Pitcher
Smoothies can splatter due to ice and thick fruit. Prep by:
- Cutting fruit small.
- Adding liquid first.
- Using a tall pitcher.
- Blending in layers.
If you use protein powder, add it last and pulse at low speed to avoid powder clouds.
Pureeing Baby Food
Baby food is often thick but can splatter if not prepared correctly. Use a tall, narrow container and blend small batches. Clean immediately for food safety.
A useful tip: cover the container with plastic wrap, poke a hole, and blend through the hole for extra protection.
Safety Considerations When Blending
Safety is important, especially when blending hot or heavy mixtures.
Protect Yourself
- Wear an apron: Prevent stains on clothing.
- Use oven mitts for hot mixtures: Protect hands from steam.
- Keep hands clear of blades: Never touch blades while blender is plugged in.
- Unplug before cleaning: Always disconnect to prevent accidental activation.
Protect Your Kitchen
- Cover nearby surfaces: Lay a towel or plastic sheet around blending area.
- Keep pets and children away: Blending can be noisy and distracting.
Don’t forget to check your blender’s cord. Loose cords can snag and tip containers, causing spills.
Maintenance For Immersion Blenders
Proper maintenance keeps your blender working well and reduces splatter risk.
Maintenance Tips
- Clean after each use: Prevent buildup that can affect blending.
- Check for wear: Inspect blade guard and blades regularly.
- Replace worn parts: Many brands offer replacement heads or guards.
- Store properly: Keep in a dry place to prevent corrosion.
If your blender head has removable vents or slots, clean them thoroughly. Food buildup here leads to splatter and uneven blending.
Non-obvious Insight
Some immersion blenders have small vents or slots in the blade guard. If these clog, splatter increases. Clean these areas with a brush or toothpick.
Another tip: lubricate moving parts with food-safe oil if recommended by the manufacturer. This prevents sticking and ensures smooth operation.
Why Immersion Blenders Are Still Worth It
Even with splatter risks, immersion blenders are powerful tools. They save time, reduce dishes, and make smooth blends possible. With the right steps, you can enjoy their benefits without the mess.
Key benefits:
- Convenience: Blend directly in the pot or pitcher.
- Versatility: Soups, sauces, smoothies, and more.
- Easy cleanup: Fewer parts than traditional blenders.
If you want more details on the science behind blending, check out this resource: Wikipedia: Blender (Appliance).
Credit: www.webstaurantstore.com
Frequently Asked Questions
Why Does My Immersion Blender Splatter More With Hot Soup?
Hot soup creates steam that expands quickly. When you blend, the pressure pushes liquid upward, leading to splatter. Let hot soup cool slightly, use a deep pot, and blend at low speed to reduce risk. Stir gently before blending to release trapped steam.
Can I Use An Immersion Blender In A Shallow Pan?
It’s not recommended. Shallow pans don’t offer enough depth to contain splashes. Choose a tall, narrow container whenever possible. If you must use a shallow pan, blend in small batches and keep the blender head submerged. Use a splatter guard for added safety.
Are Splatter Guards Worth Buying For Immersion Blenders?
Yes, especially if you blend thin liquids or large batches. Splatter guards are affordable and block most upward splashes. Silicone lids with a hole are highly effective and work with most containers. For messy recipes, they can save time and cleaning effort.
Is It Safe To Blend Hot Liquids With An Immersion Blender?
Yes, but with caution. Let liquids cool slightly to reduce steam, use a deep pot, and always start at low speed. Wear oven mitts to protect your hands and use a splatter guard for extra safety. Avoid blending boiling liquids; always allow them to settle first.
How Do I Clean Dried Splatter From Walls Or Counters?
Act quickly. If splatter dries, use a soft brush and mild dish soap. Avoid harsh chemicals that can damage surfaces. For tough spots, soak with a damp cloth before scrubbing. For painted walls, test cleaning products in a small area first.
With these tips and techniques, you’ll find that immersion blender splatter can be controlled—even eliminated. Blending becomes enjoyable, clean, and efficient. Next time you reach for your immersion blender, remember these strategies. Your kitchen will thank you.