How To Set Up Vitamix Blender: Step-by-Step Guide
Unboxing a new vitamix blender is exciting, but setting it up correctly prevents leaks and motor damage. To get started, you must remove all protective tape from the base, ensure the blade assembly is tight, and fill the container with water before testing. This simple sequence protects your investment and ensures smooth blending from day one.
The exact steps depend on your specific model’s locking mechanism and whether you have a low or high-profile container. You’ll also need to know how to clean the unit safely without damaging the electrical contacts. We cover these details below so you can blend immediately.
Who should use this vitamix blender

This page helps first-time Vitamix owners who just unboxed their machine and want to use it safely. It assumes you have the standard 64-ounce container and a base that plugs into a US outlet. If you bought a personal cup adapter or a dry grains container, some steps change slightly, but the core setup remains the same.
Home cooks looking for quick breakfasts benefit most here. They need to know how to lock the lid securely and where to find the speed dial. The guide avoids technical jargon and focuses on physical actions you can take right now.
Professional chefs might skip this if they already know the maintenance schedule. However, anyone moving to a new kitchen or storing the blender long-term will find value in the cleaning and storage sections. The assumption is that you want reliable performance without reading a 50-page manual first.
If you own a vintage model or a commercial-grade unit, this guide may not cover your specific voltage requirements. Check your base label for wattage. For most home users, this step-by-step approach gets you blending within ten minutes.
What decides the outcome
Three factors determine whether your Vitamix works well or fails early. The first is proper seating of the blade assembly. If the blades aren’t screwed on tightly, liquid leaks under the base during blending. This damages the motor switch and voids the warranty. Always hand-tighten until it stops, then give it a quarter-turn more. Never use pliers, which can strip the threads.
The second factor is the lid seal. A loose lid lets hot soup escape or cold ice crash out. The red vent plug must be seated fully. If it pops out, pressure builds inside. This creates a mess and risks burns. Press it down firmly before every blend, especially for hot liquids.
The third factor is power supply stability. Vitamix motors draw significant current at startup. Plugging it into an overloaded strip can trip breakers. Use a dedicated wall outlet. Avoid extension cords unless they’re heavy-duty 12-gauge wires. Thin cords heat up and reduce power delivery, making blending slower and noisier.
People often ignore the base cleaning. Food particles trapped under the unit attract pests and cause odors. Wipe the bottom with a damp cloth monthly. This simple habit keeps the cooling vents clear and extends the motor life. Ignoring it leads to overheating warnings after just a few uses.
Step by step
- Remove all packaging materials. Peel off the blue tape from the control panel and the plastic wrap around the base. Check for any loose screws or tools left inside the box.
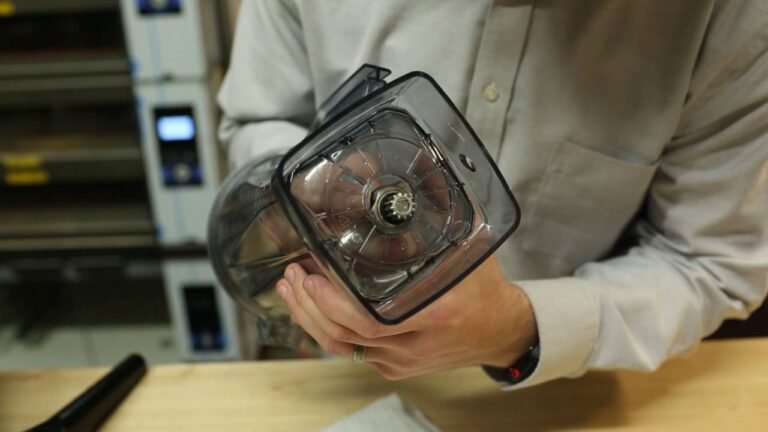
- Inspect the blade assembly. Ensure the metal blades are secure on the bottom of the container. Hand-tighten clockwise until firm. Don’t overtighten with tools, as this can crack the plastic housing.
- Attach the container to the base. Align the arrow on the container with the dot on the base. Twist counter-clockwise until it locks into place. You should hear a click or feel resistance stop.
- Secure the lid. Place the lid on top and twist clockwise. Ensure the red vent plug is pushed in completely. For hot blends, leave the plug out carefully; for cold, keep it in to prevent splashing.
- Clean the container. Fill it halfway with warm water and a drop of dish soap. Blend on low speed for 10 seconds. Rinse thoroughly. This removes dust from manufacturing and tests the seal.
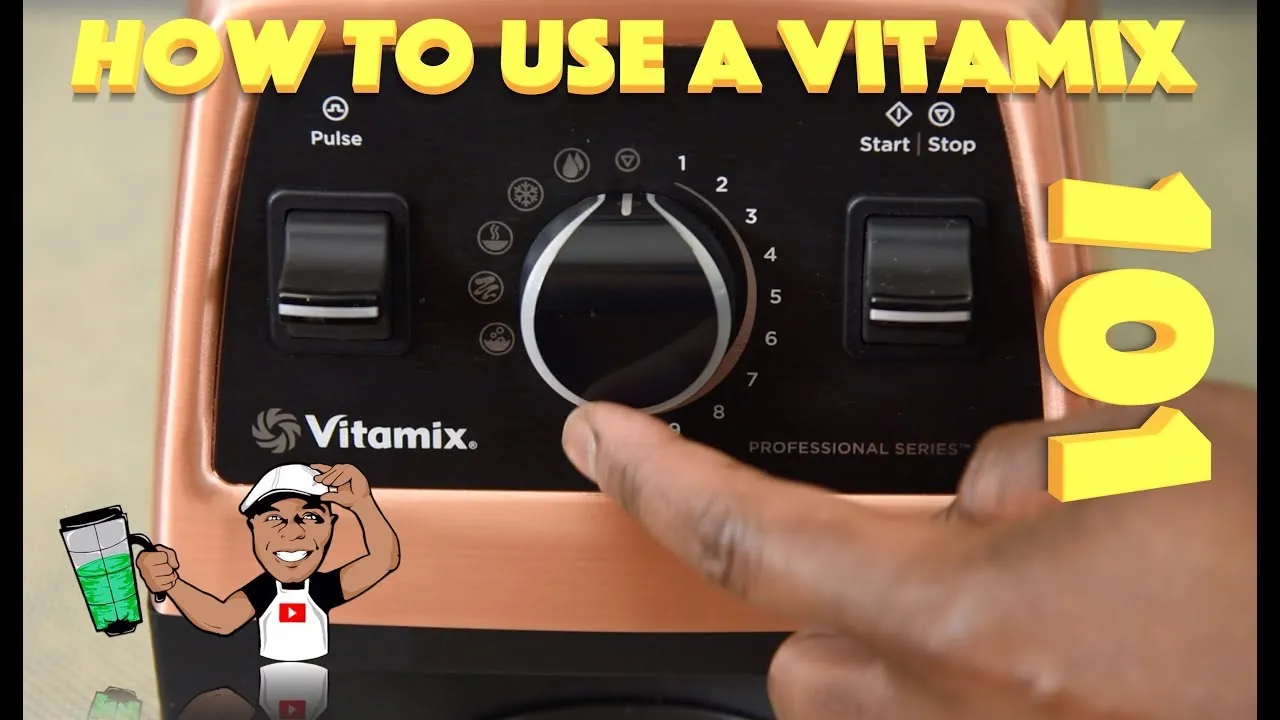
- Test the motor. Plug the unit into a wall outlet. Start on Speed 1 and slowly increase to High. Listen for smooth operation. No grinding noises should occur. If it hums loudly, turn it off immediately.
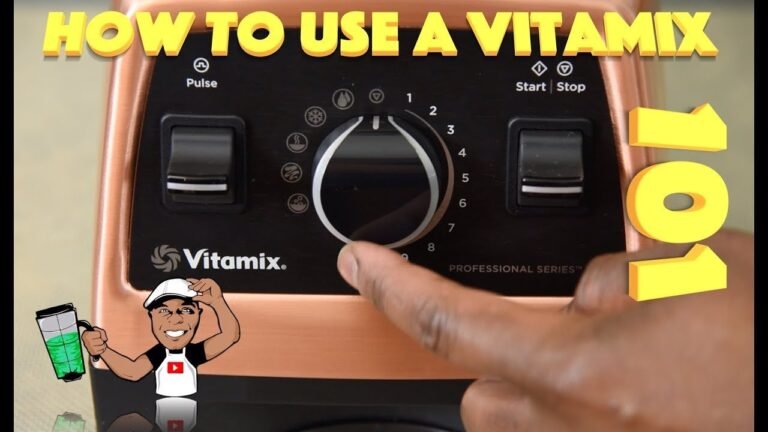
- Adjust settings for your recipe. Use the variable speed dial for texture control. Start low and ramp up. Use the pulse feature for chunky salsas or nuts. Avoid running the motor continuously for more than five minutes.
The key judgment call is knowing when to stop blending. Over-blending heats ingredients unnecessarily and breaks down fibers too much. Stop when you see the vortex form and ingredients move freely. If chunks remain, pause, stir with a tamper, and resume.
The variations at a glance
| Situation | What to do | Time/Cost | Watch for |
|---|---|---|---|
| Standard 64oz container | Lock base, tighten lid | 5 mins | Leaking under base |
| Personal cup adapter | Screw cup onto blade hub | 2 mins | Loose cup fit |
| Dry grains container | Use lower speeds only | 3 mins | Overheating motor |
| Hot soup blending | Leave vent plug out | 10 mins | Steam pressure burst |
| Frozen dessert blending | Add liquid first | 4 mins | Stalled motor |
| Commercial 64oz | Check voltage rating | 1 min | Trip breaker |
| Low-profile container | Ensure lid fits snugly | 2 mins | Spillage on dial |
Each row represents a distinct scenario. The personal cup requires a different attachment method. The dry grains container has smaller blades and needs gentler handling. Hot soups release steam, so the vent must be managed carefully. Frozen desserts need liquid to help the blades catch. Commercial units may require 220V power. Low-profile containers fit under cabinets but have tighter lids. Always match the container to your task. Mismatching causes poor results and potential damage.
What separates a good result from a poor one
Proper sealing technique
Experienced users check the seal before every blend. They press the lid down firmly and verify the vent plug position. Beginners often rush this step, leading to spills. A good seal means no liquid escapes during high-speed mixing. Check the rubber gasket on the lid regularly. Replace it if cracked. A worn gasket compromises safety and cleanliness.
Tamper usage
Pros use the tamper tool effectively. They insert it through the lid opening while blending. This pushes ingredients toward the blades without stopping the motor. Beginners try to scrape sides manually, which is dangerous. Never insert utensils other than the tamper. The tamper is designed to fit safely. Using forks or spoons can break the lid or injure your hand. Master the motion: push down and rotate gently.
Cleaning habits
Good results come from immediate cleaning. Pros rinse the container right after use. Soap and water follow quickly. Dried residue hardens and becomes difficult to remove. Beginners let mixtures sit overnight. This stains the plastic and traps odors. A simple self-cleaning cycle works for most tasks. Fill with warm water and soap. Blend briefly. Rinse. This preserves the container’s clarity and hygiene.
What goes wrong, and what to do
| What you notice | What it usually means | What to do first | How to stop it happening again |
|---|---|---|---|
| Liquid leaking | Loose blade assembly | Tighten blades by hand | Check seal before each use |
| Loud humming | Jammed ingredients | Turn off, remove blockage | Cut food smaller beforehand |
| Burning smell | Overworked motor | Unplug, let cool down | Limit run time to 5 mins |
| Lid popping off | Vent plug missing | Re-seat plug firmly | Verify plug position always |
| Vibration noise | Base uneven surface | Level surface, check feet | Keep base flat and stable |
| Weak blending | Old gasket seal | Replace lid gasket | Inspect gasket monthly |
Leaks usually mean the blades aren’t tight enough. Humming indicates a jam. Turn off the machine immediately. Letting it run can burn the motor. Burning smells signal overheating. Cool it down completely before retrying. Popping lids mean the vent wasn’t secured. Vibration suggests an unstable surface. Weak blending often points to a worn seal. Address these signs promptly to avoid costly repairs.
The rules that apply
Vitamix blenders must comply with UL safety standards in the US. These standards ensure electrical insulation and thermal protection. Always respect this limit. Let the motor rest between heavy loads.
Food contact materials must be BPA-free. Vitamix containers meet FDA guidelines for food safety. However, abrasive cleaners can scratch the plastic. These scratches harbor bacteria. Use only soft sponges and mild detergents. Never use steel wool or harsh chemicals.
Warranty coverage lasts ten years for the base and five years for the container. This applies to defects in materials and workmanship. It doesn’t cover misuse or normal wear. Keep your receipt. Register your product online for faster service. Unauthorized repairs void the warranty. Only use genuine replacement parts.
Check local recycling laws for disposal. Electronic waste regulations vary by state. Don’t throw the base in regular trash. Take it to an e-waste facility. The container can often be recycled with plastics. Follow municipal guidelines to dispose of responsibly.
The five-minute rule is strict because heat builds up inside the motor housing. If you blend hot soup, stop after three minutes. Let the machine cool for two minutes before continuing. This prevents internal damage that the warranty won’t fix. Many users ignore this and burn out their motors within months.
BPA-free doesn’t mean indestructible. Plastic containers crack if dropped on concrete. Glass containers shatter under high impact. Handle both with care during cleaning. A cracked container can leak hot liquid onto your counter. Inspect the bottom for stress marks regularly. Replace any container showing deep scratches or cloudiness.
Warranty claims require proof of purchase. Digital receipts are accepted but must show the date. Mail-in copies are slower than online registration. Keep the original box if possible. It helps with shipping returns safely.
What it costs you
The outlet requirement isn’t the only physical constraint. You must also account for counter space. A Vitamix base demands a footprint roughly the size of a standard coffee maker. If your kitchen is cramped, this appliance displaces other essentials. Measure your surface area before buying. Many users underestimate the height clearance needed above the blade assembly.
Extension cords are rarely safe solutions. They introduce resistance that can overheat the motor. If you must use one, choose a 12-gauge wire rated for outdoor use. Indoor cords often lack the durability to handle the blender’s startup surge. This mistake voids warranties and creates fire hazards. The cost for a proper cord is inexpensive relative to the alternative.
Cleaning supplies are indeed cheap, but method matters. Using abrasive sponges scratches the container. These micro-scratches harbor bacteria and degrade clarity. Use soft nylon brushes instead. They cost under $5 but protect the vessel. Replacement gaskets are true rarity. Most owners never touch them. Don’t stockpile spares. Buy only when leakage appears.
Electricity costs are negligible per blend. However, high-speed processing draws significant current. Running the machine at maximum speed for three minutes consumes more power than idle heating. Calculate based on usage frequency. Heavy daily use adds up. Still, it remains pennies monthly.
Time investment is low, yet consistency is key. Ten minutes for setup is accurate if parts are organized. Cleaning takes two minutes only if you rinse immediately after use. Dried residue doubles that time. Annual maintenance checks take five minutes. Inspect seals and blades. Documenting issues helps warranty claims. Delayed action increases frustration. Act quickly to preserve value.
Keeping it right afterwards
Maintain your Vitamix by rinsing the container after every use. Warm water and a drop of soap suffice. Blend briefly to clean stubborn residues. Air dry upside down on a rack. This prevents water spots and odors. Store the base in a dry place. Dust accumulates in vents over time. Wipe the exterior monthly with a damp cloth.
Check the blade assembly annually for looseness. Hand-tighten if needed. Inspect the lid gasket for cracks. Replace if damaged. This ensures safety and performance. Keep the tamper clean and stored separately. Don’t leave it in the container. This prevents accidental damage during storage.
Avoid extreme temperatures. Don’t expose the base to direct sunlight or heat sources. This degrades plastic components. Store in a cool, shaded cabinet. This preserves material integrity. Handle the cord carefully. Coil loosely around the base. Never wrap tightly around sharp edges. This prevents wire fraying.
Record any unusual sounds or vibrations. Note the date and frequency. This helps identify trends. Contact support if issues persist. Keep receipts and registration details handy. This simplifies warranty claims. Regular care ensures decades of reliable service. Neglect leads to premature failure. Stay proactive for best results.
When this is the wrong approach
This guide is useless for broken units. Don’t attempt DIY repairs on internal components. Opening the housing voids warranties and risks severe injury. Seek professional service instead. The cost of a repair call is far less than hospital bills.
It’s also unsuitable for non-Vitamix brands. Different manufacturers use unique locking mechanisms and blade assemblies. Following these steps may strip gears or crack housings. Check your specific brand’s manual before touching anything. Generic advice rarely works across brands with different tolerances. Stick to official documentation for your model. Using wrong torque settings can ruin motor mounts instantly.
Finally, don’t use this for commercial high-volume use. Home models lack the cooling systems for continuous restaurant service. They overheat under heavy loads within minutes. Choose a commercial-grade unit instead. These handle constant operation better without thermal shutdowns. Investing in the right tool saves money long-term. Match equipment to workload demands to avoid premature failure. A home blender used commercially will die quickly.
Frequently asked questions
Can I blend hot liquids safely?
Yes, but remove the vent plug carefully. Steam pressure builds quickly. Hold the lid firmly with a towel. Start on low speed. Gradually increase to high. Never fill above half capacity. This prevents explosions and burns. Always supervise hot blends closely.
How long does the warranty last?
The base carries a ten-year warranty. The container has a five-year warranty. This covers defects in materials and workmanship. It excludes normal wear or misuse. Keep your proof of purchase. Register online for faster claims. Coverage starts from the original purchase date.
Why is my blender leaking?
Leaking usually means the blade assembly isn’t tight. Hand-tighten the blades securely. Check for cracks in the container. Inspect the lid gasket for damage. Replace worn parts immediately. Ensure the base sits flat. Uneven surfaces cause misalignment. Fix leaks promptly to protect the motor.
Is it safe to use the tamper?
Yes, if used correctly. Insert only through the lid opening. Push ingredients toward blades gently. Never force it against resistance. Don’t use other utensils. Forks or spoons break lids. The tamper is designed for safety. Master the motion for best results.
How often should I clean it?
Clean after every use. Rinse with warm water and soap. Blend briefly to remove residues. Air dry upside down. Deep clean monthly with vinegar. This prevents odors and stains. Avoid abrasive cleaners. Scratches harbor bacteria. Gentle care preserves clarity and hygiene.
What happens if I overload it?
Overloading stalls the motor. It may trip the circuit breaker. Reduce ingredient quantity. Cut food smaller. Add liquid to help circulation. Run in short bursts. Allow cooling between loads. Respect the five-minute limit. Overuse damages the motor permanently.
Does it matter which outlet I use?
Yes, use a dedicated wall outlet. Avoid shared strips or extensions. Vitamix draws high current at startup. Overloaded circuits trip breakers. Use heavy-duty cords if necessary. Thin cords heat up and reduce power. Stable power ensures smooth operation. Protect your home’s electrical system.
What to do next
Start with a simple water test. Fill the container halfway and secure the lid tightly. Plug in the unit and run it on low speed for ten seconds. Watch for a steady vortex pulling liquid toward the center. Listen closely. A smooth hum is normal. A grinding noise means something is wrong.
If you hear loud humming, stop immediately. Unplug the machine. Check that the blade assembly is seated correctly. Ensure no debris blocks the rotation. Reassemble carefully before trying again.
Leaks are rare but serious. If water escapes from the base, don’t use the blender. Contact support right away. Don’t attempt to fix internal seals yourself. Safety comes first.